In this quick guide, we will show you the simple steps to installing Steam on a Mac.

While the Mac is not known for gaming, that hasn’t stopped Apple from trying to improve it. For example, macOS now has Apple Arcade, which offers a wealth of games for a single subscription. The downside is that many of these are mobile games that can run on the Apple Silicon Macs.
Of course, Apple Arcade is not the only source of games on Mac. Even on a Mac, Steam is still the main go-to place for gaming. It boasts one of the more extensive libraries of games that have actual support for the Mac.
Some of the games that you can play on your Mac through the Steam client are Baldur’s Gate 3, No Mans Sky, Lies of P, and many more.
Installing the Steam Client on a Mac and gaining access to your game library is a super straightforward process. While it may not be available to install through the App Store, it can be installed by just going to the Steam website.
How to Install Steam on a Mac
Over these following steps, we will be walking you through the process of installing Steam onto your Mac.
Don’t worry. This process is incredibly simple and involves a few simple steps. Basically, all we need to do is download Steam from the official website and install it.
Downloading the Steam Client
1. Start by opening the web browser on your Mac. In our case, we are using Safari as it is the default web browser.
If you don’t have your web browser in your dock, the fastest way to open a web browser is to press COMMAND + SPACEBAR, type in “Safari” or the name of your web browser, and press the ENTER key.
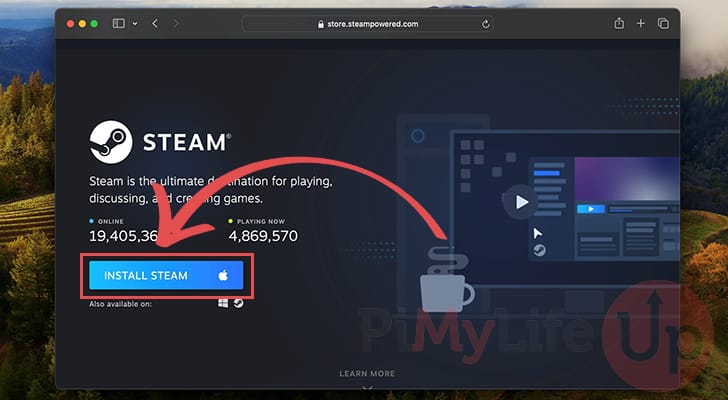
2. With your web browser open, you will want to go to the Steam website at “store.steampowered.com” (1.).
Once you are on the page, click the “Install Steam” button (2.) in the top-right of the page.

3. On this next page, you will want to click the big “INSTALL STEAM” button.
Clicking this button will start the process of downloading the Steam client.
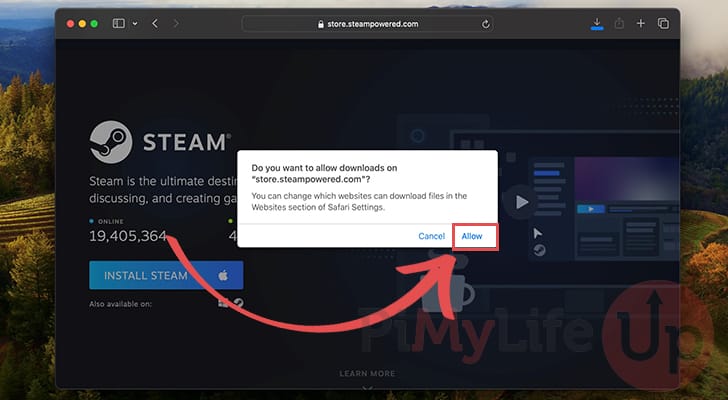
4. If this is the first time you have downloaded a file off of the Steam website, you will see the following permission box appear on your screen.
To download the Steam installer to your Mac, click the “Allow” button.
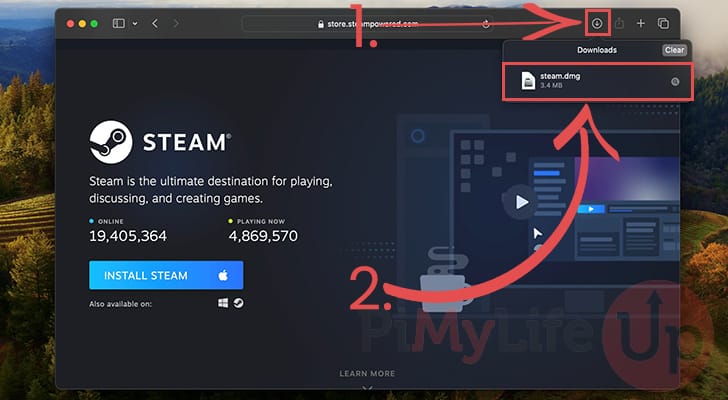
5. The Steam installer is only a tiny file, so it should download very quickly. Once downloaded, click the download icon in the top-right corner (1.).
In the downloads box that pops up, double-click the file called “steam.dmg” (2.) to begin installing Steam.
Installing Steam to your Mac
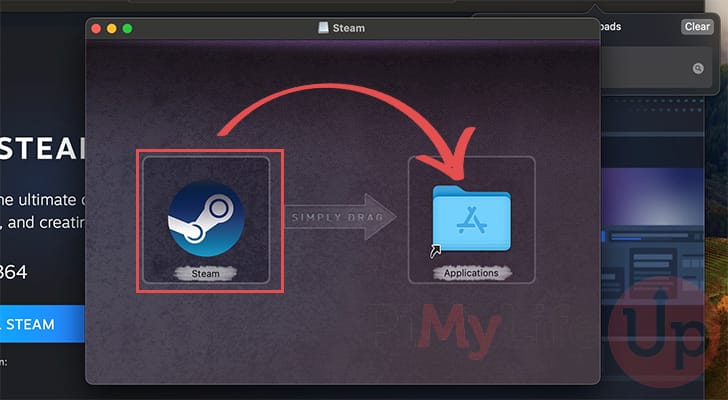
6. To install the Steam client, click and drag the Steam icon from the left side of this screen on to the “Applications” folder.
This will copy Steam into the “Applications” folder on your Mac.
Launching Steam for the First Time on macOS
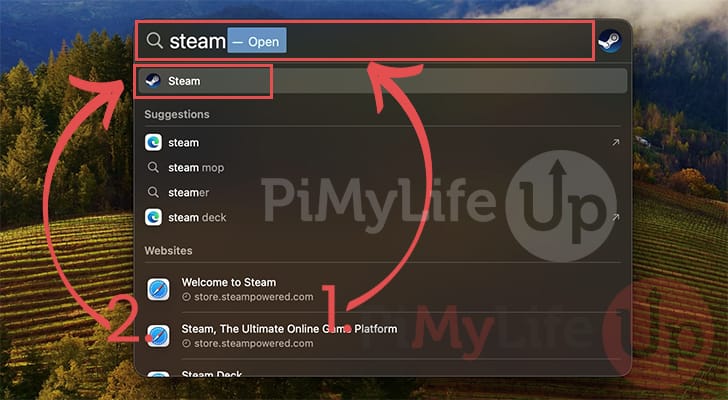
7. At this point, we can now open Steam on our Mac for the first time. One of the easiest ways of launching this client is to open up Spotlight by pressing COMMAND + SPACEBAR on your Mac.
With Spotlight open, use the search box (1.) and type in “Steam“.
After typing this in, you should see Steam as the first entry. You can either press ENTER or click “Steam” (2.).
8. Before your Mac will let you open Steam, you will get a warning that this is an app you downloaded from the internet.
To proceed, please click the “Open” button.

9. When Steam starts up, it will automatically update itself.
As this is the first time you are running it, it needs to download the entire client, which may take a couple of minutes.

10. Once Steam has finished updating itself, you can safely log in to your account.
If you have Steam on your mobile, using the QR code makes logging in a very simple process as you don’t have to type in your username and password.

11. At this point, you finally have Steam running on your Mac.
You can now use this client to install all of your macOS-compatible games, such as Baldur’s Gate 3 and Hades.

Filter Games by Supported Operating System
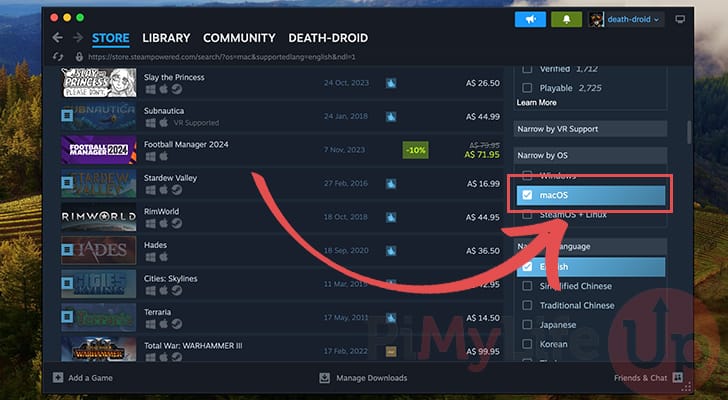
12. One last thing, when buying games on your Mac through Steam, ensure it is compatible with macOS.
While there are a decent number of games that support macOS, there are also plenty that do not.
When browsing available games, you can use the sidebar options to filter for only games that support “macOS“.
Conclusion
Hopefully, at this stage, you will now have Steam installed and running on your Mac.
You can use this game client to install any macOS-compatible games you own. Of course, you can always use it to buy new games. Just remember to filter games by what operating system they are compatible with.
While Steam will show the Apple icon if the game is compatible with macOS, it typically won’t stop you from buying a game that is Windows only.
Please feel free to comment below if you have any questions about running Steam on a Mac.
If you found this tutorial to be helpful, check out our many other macOS guides.


store.stempowered.com is a scam address! Use store.steampowered.com instead.
Hi Anonymous,
Thank you so much for pointing out that typo. I have now quickly corrected it.
Kind regards,
Emmet