In this guide, we will be showing you how to disable the firewall on Ubuntu.
A firewall is crucial to securing a modern system from outside access. It sits there to block or allow any incoming or outgoing connection.
Without a firewall, nothing stops an outside attacker from potentially abusing an open program with a nasty vulnerability. With that said, you should proceed with caution. Only disable your firewall if you know why you are doing it.
Ubuntu uses a configuration tool called UFW (Uncomplicated FireWall) that makes disabling, enabling, and configuring the underlying firewall a very straightforward process.
Ubuntu’s underlying firewall system is the Linux Netfilter subsystem, which retrieves its rules from iptables.
Over the next section, we will show you how to use UFW to enable or disable the firewall on Ubuntu. We will also show you an alternative graphical interface you can use if you don’t feel comfortable using the terminal to control your firewall.
Please note to interact with the firewall. You will need to have a user with superuser privileges or be using the root user.
How to Disable the Ubuntu Firewall in the Terminal
This section will show you how to disable the Ubuntu firewall entirely from the terminal.
If you are not a fan of using the terminal, don’t worry; this is a straightforward task, thanks to UFW.
Before proceeding, open up the terminal on Ubuntu. If you use the desktop variant, you can press CTRL + ALT + T to open the terminal quickly.
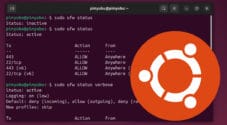
1. With the terminal open, let us verify that the firewall is actually enabled on our Ubuntu device.
We can do this by using the UFW tools “status” option. This option will tell us the status of the firewall and, if it is running, any active firewall rules.
sudo ufw statusCopyAfter running this on our system, we can see that the firewall is enabled on our Ubuntu device.
Status: active2. Now that we know our firewall is active, we can disable it.
To disable the firewall on Ubuntu, all you need to do is use the following command.
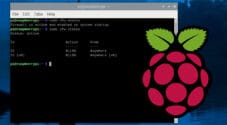
sudo ufw disableCopyAfter running this command, you should see a message that the firewall has been disabled.
Firewall stopped and disabled on system startup3. You can verify that you have disabled the firewall on Ubuntu by utilizing the status option again.
One thing to point out is that if you have any firewall rules, UFW will not show them while the firewall is disabled.
sudo ufw statusCopyWith the firewall disabled, you should see the following message displayed in the terminal.
Status: inactive4. When you want to enable the firewall on Ubuntu again, you can use the following command.
sudo ufw enableCopyDisable the Ubuntu Firewall from the Desktop Interface
We will need to install an additional piece of software to disable the Ubuntu firewall from the desktop interface.
This additional software is called gufw and is a user-friendly interface for those who don’t like using the terminal.
In this section, we will show you how to install gufw to your Ubuntu device and how to use it to disable the firewall
1. You will need to use the terminal for the first two steps. Don’t worry, as these are super straightforward steps, and you won’t need to use the terminal again after this.
Remember, you can open the terminal easily by pressing CTRL + ALT + T.
2. Before we can install gufw we will need to update the package list.
You can update the package list by using the following command.
sudo apt updateCopy3. With the package list updated, our next step is to install the gufw utility. This is the utility we will use to disable Ubuntu’s firewall.
To install this software, you only need to run the following command.
sudo apt install gufwCopy4. With gufw installed, let us now open this application.
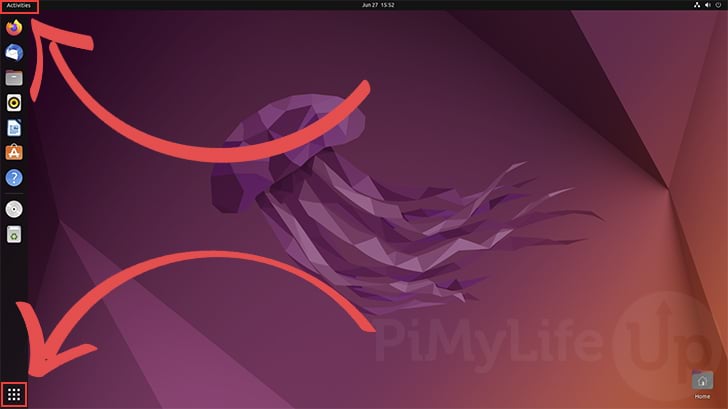
To get to this application, open the activities screen by clicking either the top-left or bottom-left of your screen.
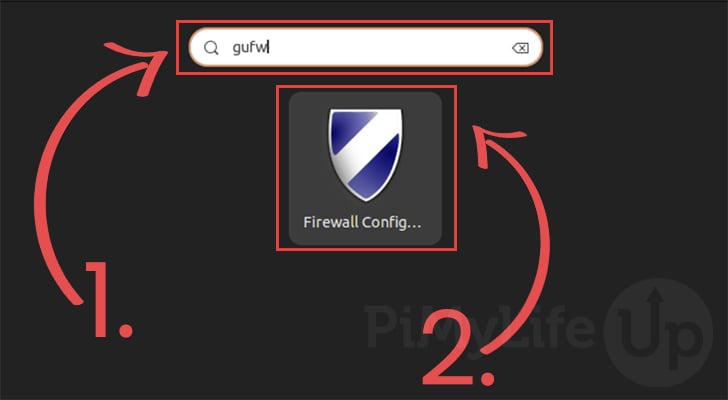
5. With the activities screen open, use the search bar at the top to look for “gufw” (1.).
You should see an application pop-up identified by a shield icon (2.). Once found, click it to open it.
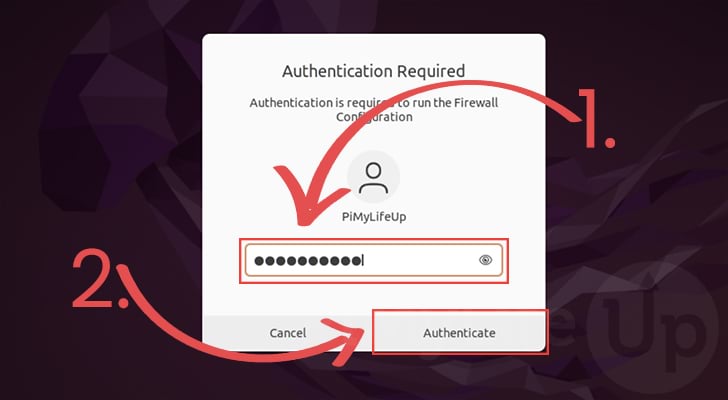
6. You will be prompted to authenticate yourself before you can continue.
Type in the password for your user (1.), then click the “Authenticate” button (2.) to continue.
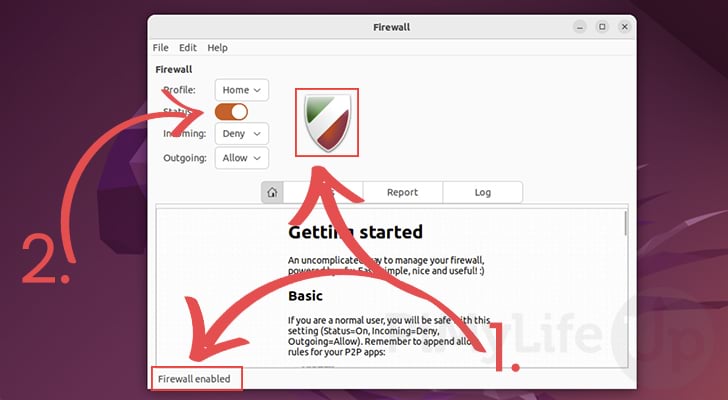
7. Below, you can see the GUFW application open on our device.
There are three ways that you can tell that the firewall is enabled. First, the shield is colored, and the text at the bottom left of the application says “Firewall enabled” (1.).
There is also a toggle on this screen next to the label “Status” (1.). If the toggle is colored, then this also indicates the firewall is enabled.
To disable the firewall on Ubuntu, you only need to click the toggle (2.).
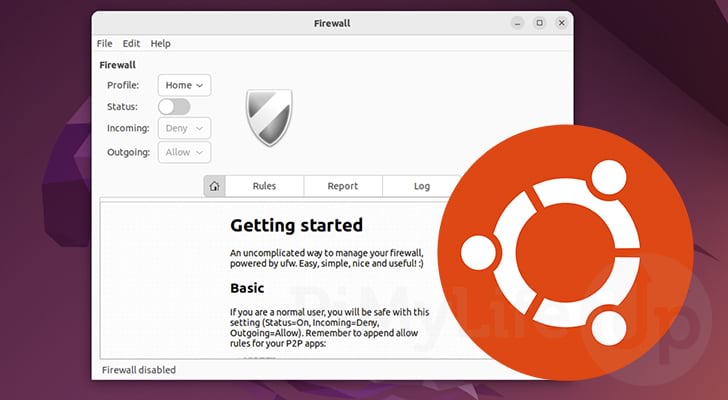
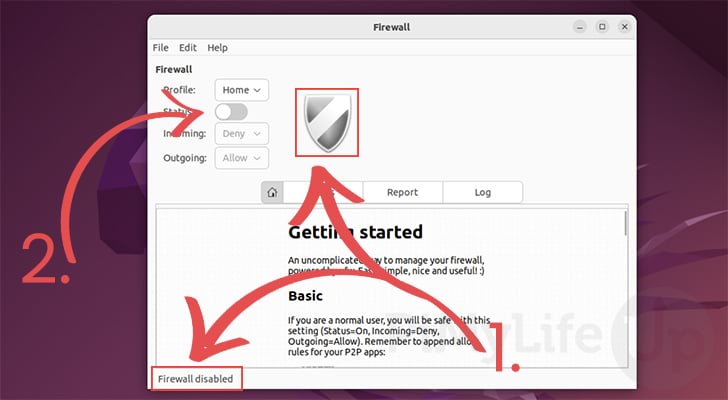
8. After disabling the firewall on Ubuntu, the application will look like the following.
The text at the bottom-left will show “Firewall disabled“, and the shield will now be grayed out (1.).
Finally, the toggle will also be grayed out (2.). You can click the toggle to re-enable the firewall.
Conclusion
In this tutorial, we have shown you how you can disable the firewall on Ubuntu.
It is easy to disable the firewall through the terminal or by installing an application called “gufw”.
Remember that when you disable Ubuntu’s firewall, you are opening up your device to potential attacks. Therefore, a firewall is crucial to securing any system connected to a network.
Please comment below if you have questions about disabling the firewall on Ubuntu.
To learn more about using Ubuntu check out our other guides. We also have general Linux tutorials if you want to learn how to use the terminal better.