This tutorial will show you how to set up and run Redis on your machine using Docker Compose.
Redis is a free and open-source in-memory data store known for its incredibly low latency read and writes. Thanks to its speed, it has become one of the most used NoSQL databases in the world, often being utilized as a cache.
One of the advantages of using Redis over something like Memcached is that you can also store data on the disk. This allows reads and writes to remain persistent even if the software restarts. It also will enable Redis to only keep the most used items in memory.
By using Docker, you can get Redis up and running with just a few short commands. Not only does Docker make running the server easy, but it also makes it super easy to update and ensure it keeps running.
Over the following sections, we will show you how to install Docker on your machine and then write a Compose file to manage and run Redis.
The steps below are focused on Linux-based systems, but the same Compose file should also work on other systems.


Installing and Running Redis using Docker Compose
The following steps will show you how to get Redis up and running using Docker Compose. Using a Docker container makes the whole process of getting this server software up and running as simple as running a couple of commands.
Below we have embedded a video that will walk you through the whole process of installing and running Redis using Docker. We also try and explain how things work as well as show you the server in action. If you prefer, we have included our written guide below.
Setting up Docker on your Device
1. Before we can run Redis using Docker, you must have the Docker runtime installed on your machine. If you already have Docker installed, skip to step 2.
If you don’t have this runtime installed, we highly recommend that you follow our guide on installing Docker on Linux.
https://pimylifeup.com/linux-docker-install/Creating a Folder to Store your Redis Docker Container
2. With Docker installed, you will want to create a directory to store your Redis Docker container’s compose file and its data files.
We will create directory at “/opt/stacks/redis” using the mkdir command. The “-p” option allows us to create the full path regardless of whether a folder is missing.
sudo mkdir -p /opt/stacks/redisCopy3. The rest of the tutorial will expect us to be within this directory we created.
You can move to this directory using the following command within the terminal.
cd /opt/stacks/redisCopyWriting a Docker Compose File to Run Redis
4. We are now at the point where we can write a Docker compose file to run Redis on your system.
A compose file is a set of instructions that Docker will use to run your container. It is simpler to manage than using individual commands.
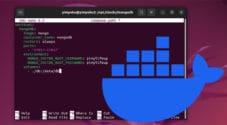
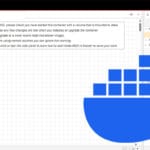
sudo nano compose.yamlCopy5. Within this file, you will want to enter the following lines.
<VERSION>: You will want to replace this placeholder with the version of Redis that you want to run. For example, if you want to use Redis 7, you can either use the major version “7” or a specific release like “7.4“.
Alternatively, if you want to always use the latest release of Redis, just use “latest“.<PASSWORD>: This placeholder should be replaced the password you want to use to interact with your Redis Docker container. Setting a password is crucial as it stops anyone from accessing your database.<SECONDS>: The last placeholder we have sets the number of seconds that should pass before it saves a snapshot of the database. Essentially what this does is allow data to be persistent between restarts.
Since Redis works in memory, without this, your data will be lost whenever the server restarts.
A decent option for this is “60” seconds, however, you can leave it longer if the data you are keeping within Redis isn’t that critical.
services:
redis:
image: redis:<VERSION>
restart: always
ports:
- '6379:6379'
command: redis-server --save <SECONDS> 1 --loglevel warning --requirepass <PASSWORD>
volumes:
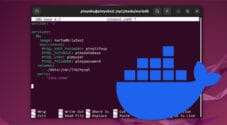
- ./data:/dataCopyAn example of what a filled-out version of this file would look like is shown below.
services:
  redis:
    image: redis:7.4
    restart: always
    ports:
      - '6379:6379'
    command: redis-server --save 60 1 --loglevel warning --requirepass pimylifeup
    volumes:
      - ./data:/dataCopy
6. After filling out the Compose file, you can save and quit by pressing CTRL + X, Y, and then ENTER.
Starting up Redis using Docker
7. With the Compose file written, all you need to do to start up Redis using Docker is to use the following command.
This command will launch Redis using all of the information provided within the Compose file. When it starts the container, it must download the Redis image, which might take a couple of minutes to complete.
You will only need to run this once to start up your server. Docker will automatically start Redis every time your system restarts.
docker compose upCopyAt this point, you can start using the Redis server. If you want to verify that everything is working, you can follow the next section, but it is absolutely not required.
If you are having trouble connecting, ensure that you specify the same password you wrote within the Compose file earlier.
Testing your new Redis Container
8. With the container up and running, we can test that the Redis server is working correctly.
The easiest way to do this is to install the “redis-tools” package. The following step will differ slightly for those running a system that doesn’t use the “apt” package manager.
sudo apt install redis-toolsCopy9. With the above package installed, we can launch the Redis command line interface using the following command. This tool will allow us to connect to and test the server.
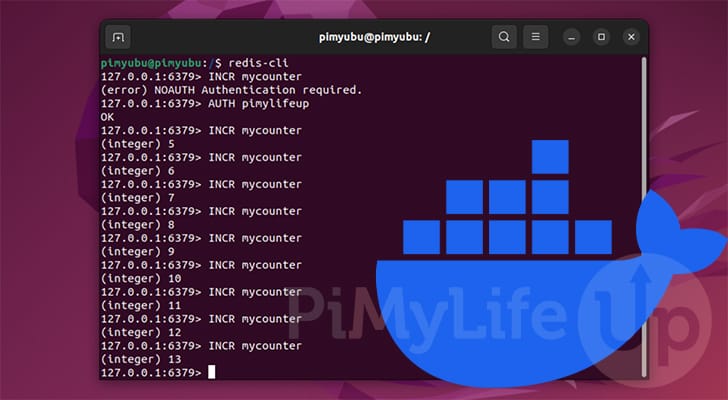
redis-cliCopy10. Now that we are in the Redis CLI it should attempt to connect automatically to the “local” Redis server running within the Docker container.
Before you can perform any tasks, you will need to authenticate yourself.
Authenticating with the Redis server is as simple as typing in the following command. Ensure you replace “<PASSWORD>” with the password you set earlier in this guide.
AUTH <PASSWORD>CopyIf successfully authenticated, you will see the message “OK” appear in the terminal.
OK11. Once authenticated, the easiest way to verify that the server is storing and retrieving information is to use the “INCR” command on a new variable.
In our example, we are increasing the entry “examplecounter” by 1.
INCR examplecounterAfter running this command, you should see that the value has been increased by 1 from the previous run.
(integer) 1
Updating your Redis Container using Docker Compose
As mentioned at the start of this guide, one of the benefits of using Docker Compose to run software like Redis is that it makes updating a straightforward process.
These quick few steps will show you how easy the update process is.
1. First, you must ensure you are in the same directory in which you wrote the Docker Compose file.
You need to be in the correct directory so that Docker knows what containers it needs to pull an image for.
cd /opt/stacks/redisCopy2. After changing to the correct directory, you will want to tell Docker that it should pull the latest version of the Redis container.
All we need to do to get Docker to do this is to use the following command. It will scan the Compose file, find all images, and pull a new version if it’s available.
docker compose pullCopy3. Even though we downloaded a new image, it doesn’t mean it will automatically move Redis to the latest version of the Docker container.
We will want to run the following command to get Docker to restart the container using the new version of the Redis image.
docker compose upCopyConclusion
Hopefully, at this stage, you will now have a good understanding of how to use Redis by using a Docker container.
Running Redis in a Docker container is a great way to get the software up and running quickly. Additionally, if you use it with other containers, you can include it within the same Compose file to make connecting even easier.
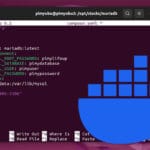
Please feel free to leave a comment below if you have had any issues with getting Redis up and running using Docker.
If you found this guide to be helpful, we highly recommend checking out our many other tutorials.