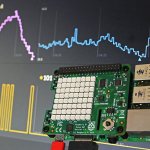
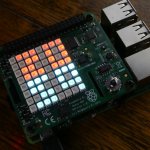
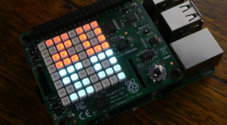
The Raspberry Pi Sense Hat was released back in 2015 and is an incredibly cool device that allows you to add a bunch of sensors easily to the Pi. It also adds an 8×8 LED matrix display and a joystick that you’re able to use in your programs.

In this guide, I go through the basics of what the Sense Hat, is and anything else you should be aware of. If you rather implement these sensors separately than be sure to check out the sensor guides page.
If you’re an owner of an old Raspberry Pi, then there is a bit of bad news. The sense hat is only compatible with the Pi 3, 2, B+ and A+. The original Raspberry Pi B and A models are not compatible.
What is the Raspberry Pi Sense Hat?
The Raspberry Pi Sense Hat is an add-on board that makes use of all the GPIO pins on your Pi. By sacrificing these pins, you gain access to a range of sensors that will allow you to read the temperature, pressure, humidity, and orientation of the Pi (using the accelerometer, 3D gyroscope, and magnetometer).
As I also mentioned earlier, you get access to an 8×8 LED matrix that you’re able to display messages or even make use of simple games such as Tetris.
For anyone who wants a good list of all the parts that are included on the device, then you can find everything below.
- Gyroscope: Angular rate sensor (dps): ~245/500/2000
- Magnetometer: A Magnetic sensor (gauss): ~4/8/12/16
- Accelerometer: Linear acceleration sensor (g): ~2/4/8/16
- Temperature sensor: Accurate to ~2°C in the 0-65°C range
- Relative humidity sensor: Accurate to ~4.5% in the 20-80%rH range, accurate to ~0.5°C in 15-40°C range
- Barometer: 260 – 1260 hPa absolute range (Accuracy varies depending on the temperature and pressure, it is usually ~0.1 hPa)
- 8×8 LED matrix display
- Standoffs, can be plastic or metal.
- Onboard 5 button Joystick
Programming for the board is incredibly handy as there is a Python Library readily available to use. You will need to learn Python, but once you get the hang of it, you will be surprised how easy it is to learn. You can find all the documentation you need at the dedicated Sense Hat Python library website.
There is a huge amount you’re able to do with all these sensors. I will be covering an increasing number of Raspberry Pi projects that make use of the add-on board.
What can you do with it
There is so much that you’re able to do with the Sense Hat due to its large number of sensors. The 8×8 RGB LED matrix is extremely handy for when you want to output something so people can view it. The joystick is also super handy for when you want to have input without a keyboard and mouse, and you could even use the gyroscope, accelerometer for input as well.
Just to quickly list off a few project ideas that you can do with the Sense Hat.
- Weather Station – Using the temperature, sensor, humidity sensor and the barometer you can monitor and track these to graph and changes in the weather.
- Email Notification – Use the LED matrix to notify you for when you have email.
- Games – Use the joystick and the LED matrix to make a fun range of simple games like snake, Tetris and more.
As I mentioned above these are just a few simple examples of what you can do. If you have any ideas that you would love to share, then please don’t hesitate to leave a comment below.
Where to buy
You can buy the Sense Hat at pretty much any retail outlet that also sells the Raspberry Pi. This range of retail outlets includes a lot of the usual big retailers such as element14, RS electronics and much more. If you prefer you can also find it for sale over at Amazon.
I hope this guide has provided you with a brief overview of what the Raspberry Pi Sense Hat is and how you can get started with using one. If you have anything to add to this guide, then be sure to leave a comment below.


