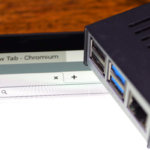
The Raspberry Pi Chromium operating system is a great alternative to Raspbian offering a simple, fast & secure experience for anyone who finds themselves on the web a lot.

Now this version of the operating system is a work in progress, so there are still quite a few issues at the time of this tutorial.
It appears work on this has halted, so be sure to check out their subreddit or the official website for any updates on development. If in-progress work doesn’t bother you and would love to get Chromium on your Pi, then let’s get to it.
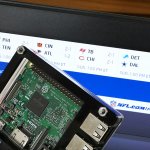
I should also mention that for me there was a noticeable improvement in using the Raspberry Pi 3 over the 2 with this image. I came across fewer issues, and it just seemed to work better overall.
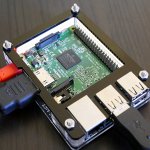

Equipment
All the equipment that you will need for this tutorial is listed below. If you’re starting out, then a starter kit will have everything you need to get started.
Recommended
- Raspberry Pi Amazon 2 onwards
- 16Gb+ Micro SD Card Amazon
- Ethernet Cable Amazon or Wi-Fi Amazon
- Power Supply Amazon
Optional
Video
If you want to hear me talk through the process of installing Chromium OS and any extra little bits that you might want to know, then please check out the video below.
If you like it, then please don’t forget to subscribe or follow us on social media so you can stay up to date on all our latest work.
Installing the Raspberry Pi Chromium OS
As with most of the operating system installation guides, I have done this one is pretty easy. You will be wiping the SD card so make sure you don’t have anything you want to keep on there.
Download & Preparing the SD Card
1. Firstly, we need to get the latest version of the Chromium OS. Their main project website has been down for quite some time and looks like it won’t be coming back. You can still find all the released versions over at their SourceForge mirror (You will most likely want the files in the Raspberry Pi 3 folder.).
Alternatively, you can install Flint OS which is built on Chromium OS and still in active development.
2. On this page scroll down to downloads and then find the latest version for your Pi. For example, CHROMIUMRPI3 is for the Raspberry Pi 3.
3. Once downloaded you will need to unzip the file. If you don’t have any zipping tool installed, I suggest something like 7zip if you’re using Windows (Mac should unzip by double-clicking on it).
4. Next, you will also need a formatting tool. The one I always use and I highly recommend you use, is called SD formatter and can be downloaded here.
5. Once downloaded, install it.
6. Once installed insert the SD card into your PC and check the drive letter allocated for it. (For example: g:/)
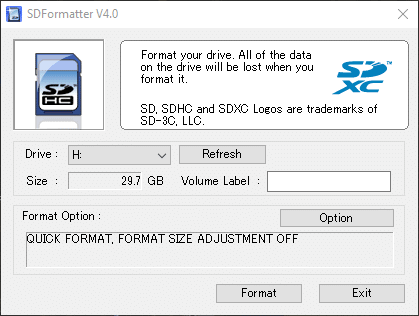
7. Now open up the SD formatter and select your drive letter in the required field. Once confirmed that it is all correct press format.
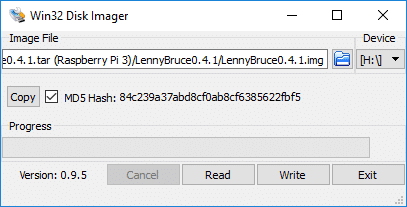
8. Now that’s done we need to install the image on the SD card. To do this download and install the Win32diskimager.
9. Now open up the Win32diskimager and select the image we extracted earlier. It is also super important to make sure the drive letter is correct as you don’t want to wipe a random drive.
10. Once you have confirmed everything is correct, click on write.
11. Once it is done, merely eject and remove the SD card from the computer.
Now we’re ready to insert the SD card into the Raspberry Pi and boot it up.
First Boot Up
Booting up is a pretty straightforward process, but I will just quickly go through it. If you have ever owned a Chromebook before, then the process is pretty much the same.
When you first boot up, you will be presented with a screen asking for your language, keyboard type and the network you will be using. When I wrote this tutorial, the WiFi wasn’t fully supported, so it’s suggested that you use Ethernet. I did try WiFi but found some weird issues with it.
Next, you will be asked to sign into your google account. If you don’t wish to do this, you can continue as a guest, however, nothing will be personalized to you, and you will also need to login to your Google account manually.
If your login it will sync your preferences and then you can start using the Chromium operating system as usual. I have found that sometimes on setup it gets stuck in an endless loop a simple reboot will fix this.
Troubleshooting
Now as I mentioned Raspberry Pi Chromium operating system is a work in progress and will contain issues that might be a little annoying if you want a flawless experience. It’s important to know these are likely to be patched and fixed by the people working on this port. If you’re going to see this project grow, make sure you throw your support behind them and let them know of any issues that you come across.
As I mentioned earlier, the Raspberry Pi 3 indeed performed a lot better than the two so if you want a better experience you will need to pick up the latest version of the Pi. You will also find that Netflix isn’t working in the current version but the devs are aware of this and looking into it.
SD Card Formatting Help
You will notice once you write the image to the SD card it will disappear from your file explorer. This lack of icon in the file explorer is really annoying if you need to wipe it or reinstall a different operating system. I go through the steps to getting it back in working condition below.
Either search & open diskpart or open up run and enter diskpart.
Inside the terminal window enter the following:
list volumeIt should show something like this, and your volume will have no label and have a size of roughly 121mb and the type will be removable. Be super careful in these next few steps as you will be wiping the drive. Enter following to select the volume you wish to wipe. (Change x to the number of the volume)
select volume xNow simply write clear and this will reset the SD card and can now be reformatted.
clean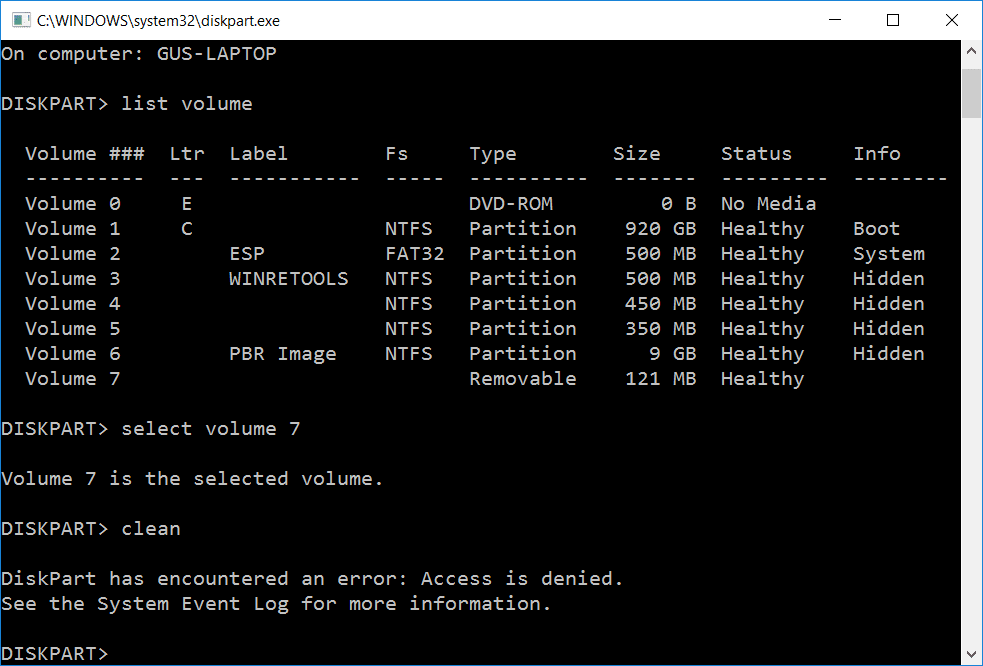
You will notice that you may get an error saying access is denied to the disk but you will find that it has correctly wiped the disk and is accessible in Windows again.
I hope you have been able to get the Raspberry Pi Chromium installed and working correctly. I hope that it is proving to be a decent alternative to Raspbian. If you come across any problems or anything else that you would like to say, then please feel free to leave a comment below.


As of 11/24/2017 it is a bust on a Pi-Top. The over/underscan cannot be corrected meaning that one can do nothing. The upper left corner of the desktop is all that is visible. My experience is that Raspbian is probably the best general purpose os while LibreElec provides the video support. Hopefully a means to modify parameters would correct the Flint issues. I see people talking of /boot/config.txt. Does Flint support SSH/Putty?
ctrl + alt + f2to open terminal, & to close it
ctrl + alt + f1However when i tried it says pepperflash is only for x86 cpu, but maybe i tried the wrong one.
I have exactly the same problem as Alex Jason. I have seen some solutions in Internet installing Pepper Flash extension, but, in order to do that, you have to access to the Linux console (terminal) and I haven’t been able to do it. Ctrl + Alt + T brings you to “crosh”, but you can’t execute commands from there. Anybody can help? Thanks