In this Raspberry Pi Apple Filing Protocol tutorial, we will show you how you can share directories on your Pi using the Apple Filing Protocol (AFP).
The Apple Filing Protocol is Apple’s proprietary network protocol for delivering files over a network. It is Apple’s alternative to the Server Message Block (SMB) and Network File System (NFS) protocols.
By following this tutorial, you will be able to share any directories on your Raspberry Pi using AFP and easily connect to them from a device running the Mac OS X operating system.
All of this is made possible by the “Netatalk” software. This software implements the “AFP” protocol at a server level allowing your Raspberry Pi to serve files over it.
There are plenty of other NAS solutions that you can take advantage of so if this doesn’t take your fancy I highly suggest taking a look at them.
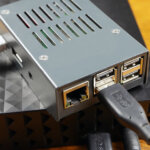
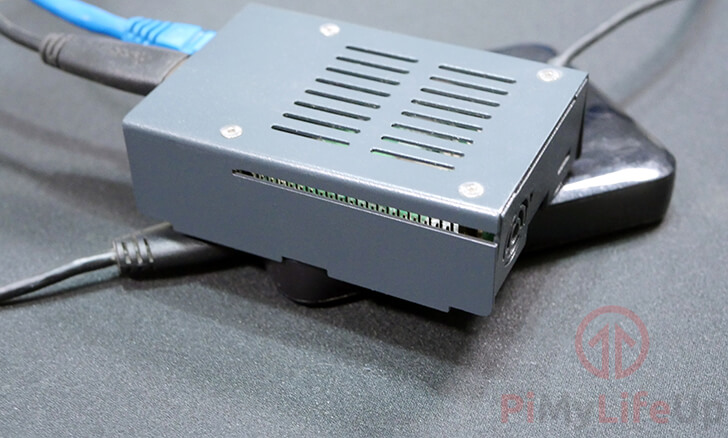
Equipment
Below is all the equipment that you will need for setting up the Apple Filing Protocol on your Raspberry Pi.
Recommended
- Raspberry Pi Amazon
- Micro SD Card Amazon (8GB+)
- Ethernet Cable Amazon or Wi-Fi Amazon
- External Hard drive Amazon
Optional
Note: The USB ports on the Raspberry Pi might not be enough to power an external drive so you might need to invest in a powered USB hub.
Setting up Apple File Protocol (AFP) On your Raspberry Pi
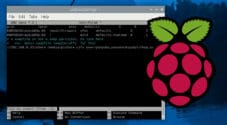
1. Now before we can setup the Apple File Protocol (AFP) on your Raspberry Pi, we must first ensure that the operating system is up to date.
To ensure everything is up to date run the two commands below.
sudo apt update
sudo apt upgrade
2. With the Raspberry Pi now up to date, we can now proceed to install the package that will be handling everything.
The package that we are installing is called Netatalk. Netatalk is a free and open source implementation of the Apple Filing Protocol (AFP).
The Netatalk program acts as a file server that is capable of serving many Mac clients as it allows your Raspberry Pi to act as an AppleShare file server.
Install the Netatalk application to your Raspberry Pi by running the following command.
sudo apt install netatalk3. As we have now installed the netatalk software, we will now have to go ahead and configure it to share different directories.
We will explain how to make a connection to thedr AFP share in our next section but for now, let’s look into adding directories to be shared.
To do this, we must modify the “afp.conf” file by running the command below.
sudo nano /etc/netatalk/afp.conf4. Within this file add the following text to the bottom of the file.
Adding Home Directories
[Homes]
  basedir regex = /home
This block defines our home directories. This block will allow any connecting user to access their respective home folders.
We define the “basedir regex” so that the Netatalk software knows where to look for the users home directory.
If you would like to lock the user to a specific directory within their home path, you can add the following option. With <foldername> being the name of that directory.
[Homes]
  basedir regex = /home
  path = <foldername>
Adding Custom Directories
[My AFP Share Name]
  path = /path/to/directory
Using something like above we can share any directory that we want.
Within the square brackets ([ ]) that designate the start of the share is the name given to said share.
The “path=” option is the path to the directory that you want to share over the AFP protocol.
Making a share an Apple Time Machine share
[My AFP Share Name]
  path = /path/to/directory
  time machine = true
You can specify any share as a time machine capable share by simply adding the option “time machine = true” under it.
Making a share read only
[My AFP Share Name]
  path = /path/to/directory
  read only = true
If you would like to make a share read-only, all you have to do is add “read only = true” to it. This option is useful for shares, such as sharing a media library.
Setting the guest account
[Global]
  guest account = pi
You can specify a guest account to utilize for connections by setting “guest account =” under the “[Global]” header. By default, this is set to “nobody“.
You can find more information about the options that you can specify by going to NetaTalk’s configuration documentation.
5. With changes to the configuration complete, you can go ahead and save the file by pressing CTRL + X then Y followed by ENTER.
6. As we have made changes to Netatalk’s configuration, we need to restart the service so that it can utilize the new config.
We can restart the service by running the following command.
sudo systemctl restart netatalk7. Before we connect to our newly shared folders, we should retrieve the IP address assigned to our Raspberry Pi.
Make sure you have an active network connection by using either WiFi or an Ethernet cable.
Write this IP down as we will need it for connecting to the shared drive.
sudo hostname -IConnecting to your Pi’s AFP share on MAC OS X
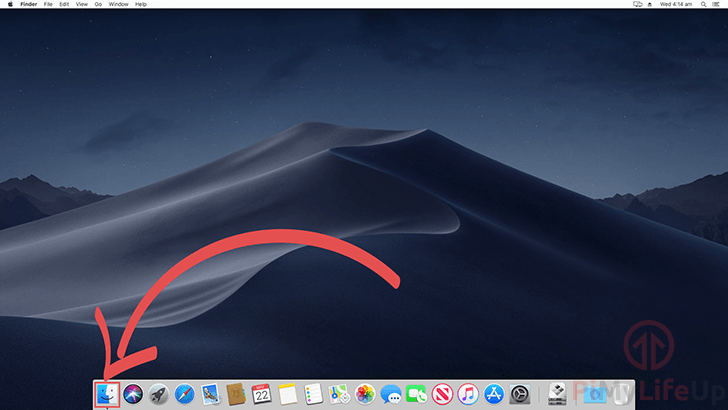
1. To connect to your Raspberry Pi’s AFP share begin by opening the “Finder” application available on the Mac OS X operating system.
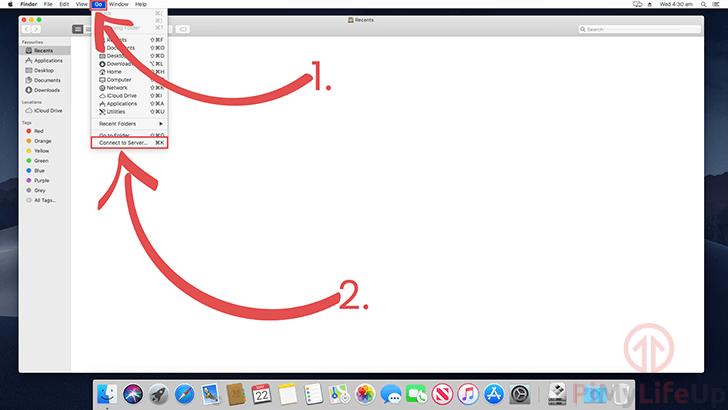
2. Now that we have opened up the “Finder” application go ahead and click “Go” (1.) in the toolbar at the top of the screen. Next, click the “Connect to Server…” (2.) option.
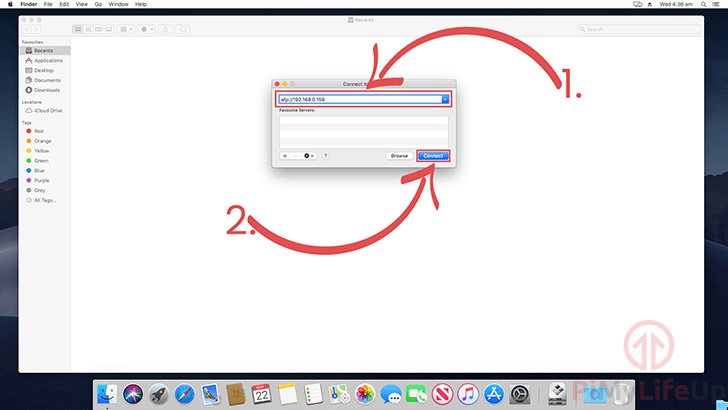
3. Within this dialog, you will need to enter your Raspberry Pi’s IP address in front of the “afp://” protocol (1.).
For example, with our Raspberry Pi’s IP address being “192.168.0.159” we need to enter “afp://192.168.0.159” into the input box.
Once entered, click the “Connect” button (2.) to proceed.
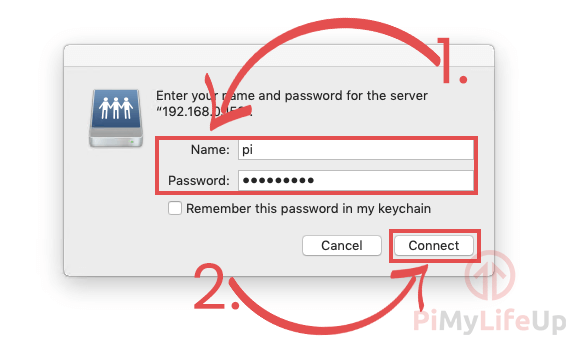
4. Upon connecting to your Raspberry Pi, you will be greeted by a dialog asking you to enter a username and password to connect to the Apple Filing Protocol server (1.).
As we are just using the default user, we only used “pi” as the name and “raspberry” as the password.
Once you have entered a user to connect with, go ahead and click the “Connect” button (2.) to proceed.
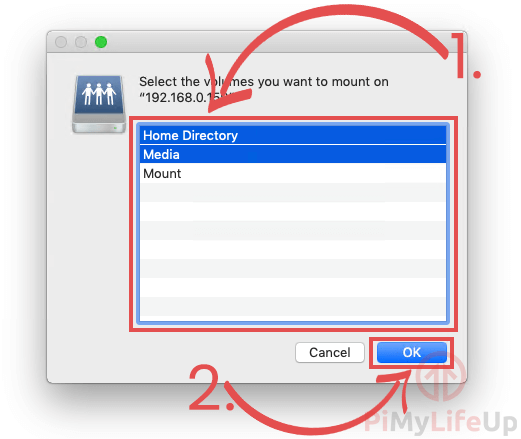
5. Upon successfully logging into your Raspberry Pi’s AFP share you will now be asked what volumes that you want to mount.
This dialog will show all directories that you set up earlier in the tutorial, each referenced by the name you put next to that share in the config file.
Select the volumes that you want to be mounted (1.) Then click the “Ok” button to proceed.
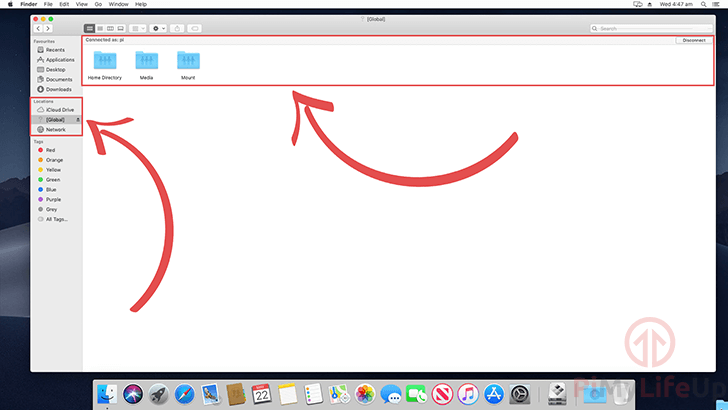
6. Finally, you will now be able to see the shares that you mounted to your Mac OS X device.
Below we have included a screenshot showing the networked drives under “Locations” in the sidebar. We also show the shared volumes that are within the “Finder” application.
At this point, you should now have the Apple Filing Protocol running on your Raspberry Pi. You should also be able to use a MAC OS X device to connect to your shared folders over the AFP protocol successfully.
If you have any feedback regarding this tutorial, then please don’t hesitate to leave a comment below.

Can this article please be updated with the latest updates? The Netatalk for example is no longer found.
Hi Marko,
Thank you for the heads up about this. It appears that Netatalk was removed in Bookworm and the earliest it may re-appear in the repository is with the release of Debian Trixie.
I will likely rework this tutorial to use the Docker builds of Netatalk instead as that will save us from this problem in the future.
Kind regards,
Emmet
omg this works SO much better than Samba if you’re mostly an Apple household. I was having intermittent connectivity issues with Samba for DAYS before I discovered this article. Rock solid since.
I eventually got it working brilliantly once i saw the comment about removing the semi colons and I can login and view my files.
However one slight snag. I can’t copy anything to the afp even though I don’t believe I have any read only permissions set through the conf file.
I am quite new to all of this so would appreciate if someone could help.
And if it helps at all I have a media library that I want to transfer files between and can’t copy files onto the afp only from it.
Are you loged onto the Pi using the Pi’s userid and password?
I can copy files from my Mac -> Pi and from Pi -> Mac with no issues.
When copying Mac -> Pi the Pi user must have permission to add files. If you ar in the Pi users home folder it should work.
When copying Pi -> Mac, the mac user must have permission to copy to that folder.
On the mac you can check the permissions by doing a ‘get info’ on the folder.
On the Pi, you can check permissions by using the command line and (assuming the folder ou want to add to is in your home folder) run
ls -al
and looking at the results.
Its working great thx a lot guys… all fine.
Does someone has a idea how to access files on a Apple Time Capsule from the RPI? I spend hours and no success. from the Mac no problem…
Cheers
Stefan
Your advice helped a great deal! I’m using Ubuntu 20.04.1, but your tutorial walked me through setting it up on my PC.
Thank you again!
Excellent tutorial, thank you. I successfully mounted a USB drive connected to my Pi4 on my Mac, and was able to copy files back and forth. Woohoo!
This article alerted me to the existence of the .conf file. I eventually figured out that I had to remove the semicolons from the beginning of the [Homes] and based in the .conf template file for things to actually work. But… they’re working now.
Thank you for ending four frustrating days of trying to get afp to work.
Thanks for the clear recipe. If you are using Buster on the Pi and mounting via AFP on macOS, you end up with a desktop volume named ‘Pi’s home’ which is useless for me because (i) it has an apostrophe, (2) it has a space, and (3) I could not tell the difference between my different Pi’s.
Solution is to edit /etc/netatalk/afp.conf and append the following:
[$h]
path = /home
home name = $h
With this, the Buster Pi appears as a volume on my desktop using the Pi’s hostname. I use simple hostnames like pi4, pi15, and pi12. This way, I can tell all my Pi’s apart and when I write code, I do not need to deal with special characters and spaces. Finally, I can access a pi with its hostname, for example pi4, via /Volumes/pi4
Hope this reply helps others…
Once I got my two pi’s up on the network, I could see what you mean. I’ve implemented your suggestion. Thanks.
I was have issues with Netatalk on Buster. Your post guided me in the right direction. Great Job!
I lost you in step 3. Looking in the /etc/netatalk directory, I don’t see a file called AppleVolumes.default. Are you sure that’s the location of the file?
Hi Koroush,
Are you running Raspbian Buster by in chance?
It appears as if this tutorial may of been broken by the recent update, as it looks like it moved Netatalk from V2 to V3 which changed the configuration format so everything resides within the afp.conf file.
We will hopefully update this tutorial soon to reflect the new changes.
Cheers,
Emmet
Hi Kourosh,
A follow up to the previous comment, we have now updated it so that should now work with the latest version of the Netatalk and Raspbian Buster.
Cheers,
Emmet