In this tutorial, we will show you how to run Seafile on Linux using Docker.
Seafile is a self-hosted, open-source file-sharing platform. This software allows you to easily synchronize files between computers and mobile phones.
This software even has a super easy-to-use web interface that makes managing your files a super simple process from your favorite web browser. Best of all, self-hosting and using this software isn’t a very complicated process.
If you have ever used cloud services like Dropbox and Google Drive, you will be very familiar with the way Seafile works. You install a client on a device that uploads files to your Seafile server. Other clients connected to the same account can then download and synchronize these files.
The most significant advantage of using Seafile over these public clouds is that you retain complete control over your files and folders. You don’t have to worry about a company potentially snooping on what you are hosting.
In a way, Seafile is a bit like other software like Nextcloud, but it focuses more on the file side of things. It isn’t bloated with other functionality you might not need.
To make self-hosting Seafile as straightforward as possible, we will use Docker. Docker allows us to install this software without having to set up additional software, such as a web server. Instead, we can write a neat Docker Compose file that will start up this file-sharing server and the database it requires.
As long as your system runs Linux and you can install and use Docker, you should be able to follow the steps we have written below.
Installing and Running Seafile on Linux using Docker
In the following steps, we will walk you through installing and running Seafile on your Linux device using Docker.
If you intend to use a domain name with Seafile, we highly recommend that you set that up before continuing. Your domain name should point to the machine on which you are hosting this file service.
Installing Docker
1. Docker is the key software we require to run Seafile on Linux. If you have Docker installed already, skip to the next step.
If you don’t have Docker installed, we highly recommend our installation guide.
https://pimylifeup.com/linux-docker-install/Preparing your System to run Seafile using Docker
2. With Docker installed, our next step is to create a location to store the Seafile Docker Compose file and Seafile’s data.
We can use the mkdir command and the “-p" option to create this directory and any missing parts of the path.
sudo mkdir -p /opt/stacks/seafileCopy3. Once the directory has been created we will want to move to it.
You can change to this newly created directory using the cd command within the terminal.
cd /opt/stacks/seafileCopyWriting a Docker Compose File for Seafile
4. Now that we have everything in place, we can move on to writing the Docker Compose file for Seafile. This Compose file is a set of instructions that Docker will use to launch and control Seafile.
We can start writing this file using the nano text editor sing the following command.
sudo nano compose.yamlCopy5. With your new file open, you must type in the following lines. With these lines, we are setting up three different services:
- The first container is the MariaDB database that Seafile will use to store information
- The second is memcached, which will act as a temporary cache for the file storage server
- Finally, the third container is the Seafile storage server itself.
There are a few placeholders in this file that you must fill out with your own information.
<DBPASSWORD>: The first value you must replace is the DB password. This value is the password for the root (admin) user, so you will need to ensure you set this to something secure.
There are two occurrences of this placeholder in our example that must be replaced with the same password.<TIMEZONE>: The next placeholder allows you to set the time zone Seafile will use for all its dates and times.
Replace this value with a valid TZ identifier. Wikipedia has a list of areas and their appropriate TZ identifier. For example, we will be using “Australia/Hobart“.<ADMINEMAIL>: With a TZ identifier set, you next must set an email that you will use to log in to your Seafile interface.<ADMINPASSWORD>: After setting an email for your admin account, your next step is to type out a temporary password that Docker will use when setting up Seafile on your Linux machine.
While we will replace this password later in the guide, we recommend you still set something secure.<ENABLELETSENCRYPT>: If you use Seafile with a domain name, you must set this value to “true“. Additionally, you must also uncomment the “443” port by removing the hashtag (#) at the start of its line.
If you aren’t using a domain name, set this to “false“.<HOSTNAME>: If you are using a domain name and have set the “ENABLELETSENCRYPT” option to “true“, you will want to type in your domain name here.
Delete this option if you aren’t intending on using Seafile with a domain name.
services:
  db:
    image: mariadb:10.11
    container_name: seafile-mysql
    environment:
      - MYSQL_ROOT_PASSWORD=<DBPASSWORD>
      - MYSQL_LOG_CONSOLE=true
      - MARIADB_AUTO_UPGRADE=1
    volumes:
      - ./mysql-data/db:/var/lib/mysql
    networks:
      - seafile-net

  memcached:
    image: memcached:1.6.18
    container_name: seafile-memcached
    entrypoint: memcached -m 256
    networks:
      - seafile-net

  seafile:
    image: seafileltd/seafile-mc:11.0-latest
    container_name: seafile
    ports:
      - "80:80"
#     - "443:443" #Uncomment if you are using HTTPS
    volumes:
      - ./seafile-data:/shared
    environment:
      - DB_HOST=db
      - DB_ROOT_PASSWD=<DBPASSWORD>
      - TIME_ZONE=<TIMEZONE>
      - SEAFILE_ADMIN_EMAIL=<ADMINEMAIL>
      - SEAFILE_ADMIN_PASSWORD=<ADMINPASSWORD>
      - SEAFILE_SERVER_LETSENCRYPT=<ENABLELETSENCRYPT>
      - SEAFILE_SERVER_HOSTNAME=<HOSTNAME>
    depends_on:
      - db
      - memcached
    networks:
      - seafile-net

networks:
  seafile-net:Copy
6. After filling out the Docker Compose file, save and quit by pressing CTRL + X, Y, and then ENTER.
Starting the Seafile Container
7. With the Compose file written, starting your Seafile Docker container is as simple as using the following command.
Docker will automatically download all three images you require and start them. We are using the “-d” option so that Docker will detach from the current terminal session once it has started.
docker compose up -dCopyAccessing the Seafile Web Interface
8. Seafile is now running on your Linux device using Docker, so you will want to know how to access its web interface.
Before you can access the Seafile interface, you will need to know your machine’s IP address. If you don’t know the IP, you can often use the hostname command as shown below.
hostname -ICopy9. In your favorite web browser, go to the following address. Ensure that you replace “<IPADDRESS>” with the IP of your device.
http://<IPADDRESS>Alternatively, if you are using HTTPS and have a domain name configured, you should be able to access your device using that.
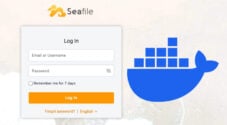
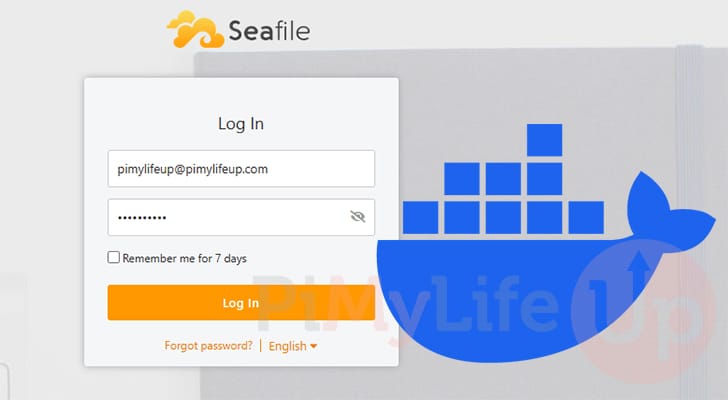
https://<DOMAINADDRESS>10. To access your new Seafile installation, enter the email and password you set in your Docker Compose file earlier (1.).
Once you have filled out your information, click the “Log In” button (2.).

11. You now have access to Seafile and can begin to use it to upload and synchronize your files.
Setting a Password for your Admin Account
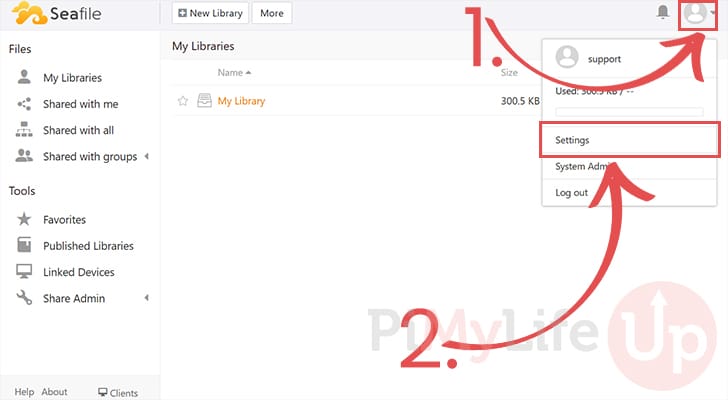
12. Since we created your admin account for Seafile using the Docker Compose file, you will want to change your password.
To access the password change screen, click the portrait (1.) in the top-right corner.
In the drop-down menu that appears, click the “Settings” option (2.).
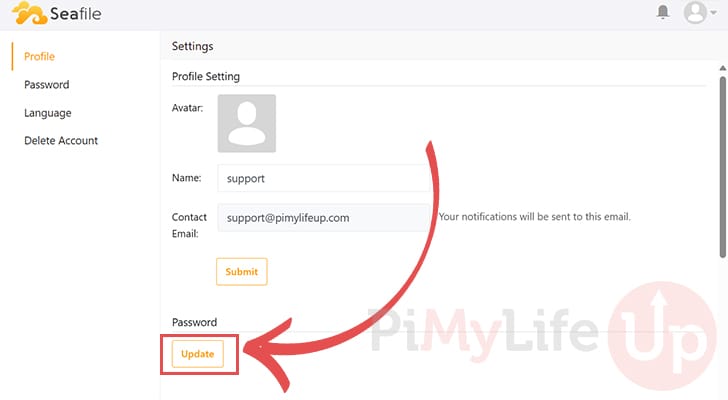
13. Once you are on the settings screen, you can change your user’s password by clicking the “Update” button underneath the “Password” header.
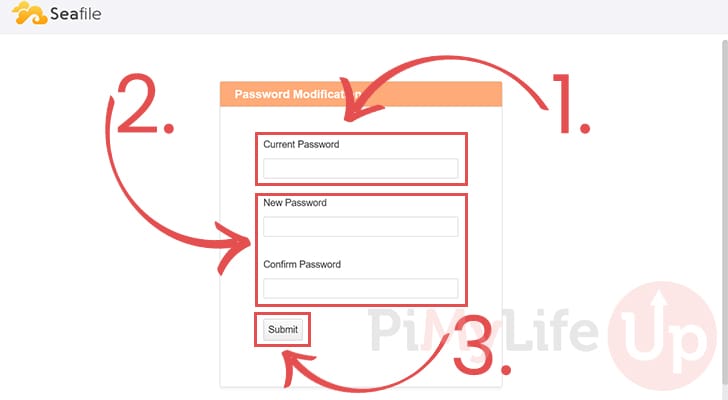
14. On this screen, you must first enter the original password you set for your Seafile admin account (1.).
Next, you can proceed to specify the new password you want for your admin (2.).
After entering the new password, click the “Submit” button (3.) to complete the password change.
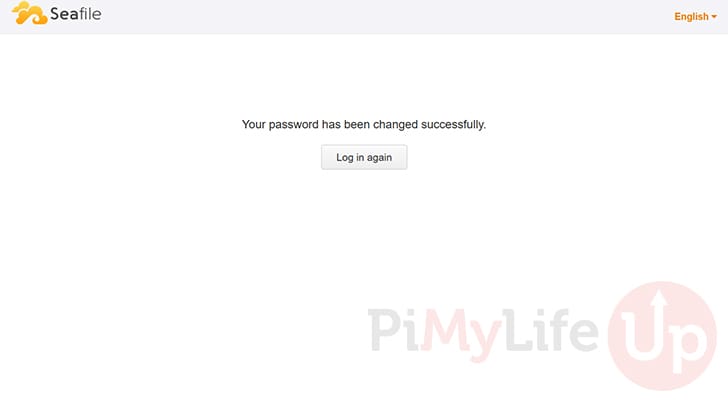
15. If your password change was successful, you should see a message like the one below.
You must log back into your account using your new password.
Updating your Seafile Docker Container
A key advantage of using Docker to run Seafile on Linux is that it makes the setup process relatively more straightforward.
Also, you don’t have to worry about the software introducing any new dependencies, as the updated container will have everything packaged for you.
Over the next couple of steps, we will show you an easy way of updating to the latest version of Seafile.
1. Before we can update the Seafile Docker container, we must ensure we are in the same place where we wrote the Compose file.
You can change to the correct directory by running the command below.
cd /opt/stacks/seafileCopy2. After changing to the correct directory, we can get Docker to download the latest version of any out-of-date containers by running the command below.
With this command, Docker will read the Compose file and check each of the three containers for updates.
docker compose pullCopy3. Even though we pulled a new version of Seafile to our Linux device, Docker won’t automatically move the containers to the new version.
Luckily, you can use the command below within the terminal to move to the new release. Docker will detect when a new version is available and restart the running container to the latest version.
docker compose up -dCopyConclusion
Hopefully, at this stage in the guide, you will have successfully set Seafile up and running on Linux, thanks to our use of Docker.
Docker is a great tool for self-hosting tools like Seafile, as the whole process is relatively simple. Seafile is a super useful tool if you ever need to upload and share folders.
Please comment below if you have any issues with getting Seafile running using Docker.
If you liked this guide, we recommend you check out our many other Docker guides.