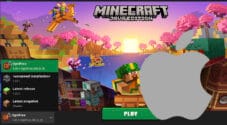
In this tutorial, we will be showing you how to install Minecraft Java Edition on a Mac.

Minecraft is one of the most popular games in the world and is able to run on almost any device and almost any operating system.
This is helped in large thanks to the Minecraft Java Edition. This edition uses the Java language that has been implemented on most operating systems, including macOS.
The steps covered throughout this tutorial will work on both the ARM (M1 and Newer) and x86 (Intel) versions of Mac.
There are no prerequisites to installing Minecraft to your Mac, except of course, having an active internet connection.
Installing Minecraft Java Edition on your Mac
Over the next few sections will be showing you how to install Minecraft Java Edition to your Mac.
During this installation process, you will end up with the Minecraft Launcher. This launcher is what you will use to login to your account and manage Minecraft on your Mac.
Downloading the Minecraft Launcher
1. Your first step is to open a web browser on your Mac.
In our case we will be using the Edge Browser. The URL and steps should remain relatively similar no matter which browser you choose to use.
2. Once you have a web browser open, you must go to the downloads page on the Minecraft website (1.).
https://www.minecraft.net/downloadAfter going to this page, you should see a big button labeled “DOWNLOAD LAUNCHER FOR MACOS“. Click this button (2.) to download the Minecraft Launcher installed to your Mac.

3. Now bring up the downloads page or pop up on your web browser (1.). Typically, this is opened using the download button in the top-right corner of your browser.
Within this box, find “Minecraft,dmg” and click the “Open” button (2.) or double-click the item.

Installing Minecraft
4. With the installer open, all you need to do is drag the “Minecraft” logo over to the “Applications” folder.

Launching Minecraft on macOS
5. Now that we have installed Minecraft to your Mac, let us show you one of the easiest ways to open it.
First, open up macOS Spotlight by pressing COMMAND + SPACEBAR.
6. With Spotlight open, use the search box to type in “minecraft” (1.).
Spotlight should automatically detect that you are wanting to open “Minecraft” (2.), and you can now press the ENTER key.

7. The first time you launch Minecraft on your Mac, you will get a warning about it being downloaded from the web.
As you know you downloaded this application from the official Minecraft website, you can click the “Open” button.

8. The Minecraft Launcher will now begin to download everything it requires and updates itself.
Depending on your internet connection, this can take a couple of minutes to complete.

9. Once the update completes, you must begin the process of logging in to your Microsoft account. Mojang requires a Microsoft account to verify ownership of the game,
You can begin this process by clicking the “MICROSOFT LOGIN” button.

10. You will now see an additional prompt where you can begin logging in to your account.
Follow the steps within this dialog login to your Microsoft account.

11. After logging in, you will see a welcome message for your account.
To proceed with using this account, click the “LET'S GO” button.

12. At this point, all you need to do to launch the latest version of Minecraft is to click the big “Play” button.
After clicking the button, it will begin to immediately download the select version of Minecraft to your client.
If you want to play a different version of Minecraft, click the “Installations” tab and add a new profile using that dialog.

13. Below you can see that we have Minecraft Java Edition up and running on our Mac.

Conclusion
Hopefully at this stage, you will now have successfully installed Minecraft Java Edition to your Mac.
Minecraft Java Edition is a game that runs great on both versions of the Mac. However, if you want to get more out of your game, we highly recommend you installing the OptiFine mod. This mod improves performance and offers more graphical features.
Please feel free to comment below if you can’t get Minecraft to run on macOS.
If you found this tutorial to useful, we have many other tutorials for macOS.


