In this tutorial, we will be showing you how to install Minecraft Java Edition on the Ubuntu operating system.
While Ubuntu is a great operating system to run a Java Edition or Bedrock Minecraft server, it is also a good system to run Minecraft on.
Thanks to the Minecraft game client being written in Java, it can easily run on Linux operating systems such as Ubuntu.
Best of all, the Minecraft team has ported the Minecraft launcher to Linux. You will use this launcher to run and manage the various versions of Minecraft.
There are advantages to using this launcher on Ubuntu. The main one is that it allows you to install your desired version of Minecraft to Ubuntu very easily. Thanks to the launcher’s profile feature, it is easy to install mods separate from the vanilla client.
By the end of the following sections, you will be able to play Minecraft on Ubuntu.
Installing Minecraft Java Edition on Ubuntu
Over these following steps, we will be showing you how to install the Minecraft launcher on Ubuntu.
Before you proceed, you will need to have the terminal open on your Ubuntu device. You can open this terminal by pressing CTRL + ALT + T.
Preparing your System for Minecraft
1. Our first step in this guide is to update the current operating system by using the following two commands.
The first command updates the package list cache. The second one updates any out-of-date packages using the updated cache.
sudo apt update
sudo apt upgrade -yCopy
2. Next, we must ensure that the “wget” package is installed on our system. We will use wget to download the Minecraft package to our Ubuntu system.
You can ensure that this package is installed by using the following command.
sudo apt install wgetCopyDownloading and Installing Minecraft on Ubuntu
3. At this point, we can finally download the Minecraft launcher on Ubuntu by using the command below.
With this command, we use wget to download the latest launcher from Mojang’s server.
wget https://launcher.mojang.com/download/Minecraft.debCopy4. Once you have downloaded the “.deb” file to your system, we can now use the apt package manager to install it.
We use the “--fix-broken” option to ensure that the system will download any other packages it requires to run Minecraft on Ubuntu.
sudo apt install ./Minecraft.deb --fix-brokenCopyLaunching Minecraft on Ubuntu
Now that we have installed Minecraft on your Ubuntu system let us launch it.
1. We will be exploring two different ways that you can use to open Minecraft on your Ubuntu system.
The first and actually easiest method is to use the terminal. You only need to type in a single command to launch the game.
The second way of launching Minecraft is to search for it within the activity screen. While this method is still simple, it requires a couple of additional steps.
Using the Terminal
a. To launch Minecraft on Ubuntu from the terminal, you only need to use the following command within the terminal.
After running this command, you should see the Minecraft launcher begin to open, and you can now skip to the “Opening the Minecraft Launcher for the First Time” section.
minecraftCopyFrom the Desktop Interface
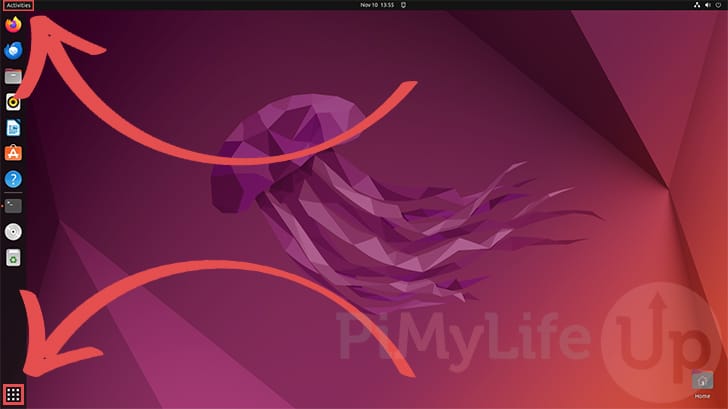
a. While on your desktop, you will want to start by opening up the activities screen.
You can open this screen by clicking the top or bottom left side of the screen.
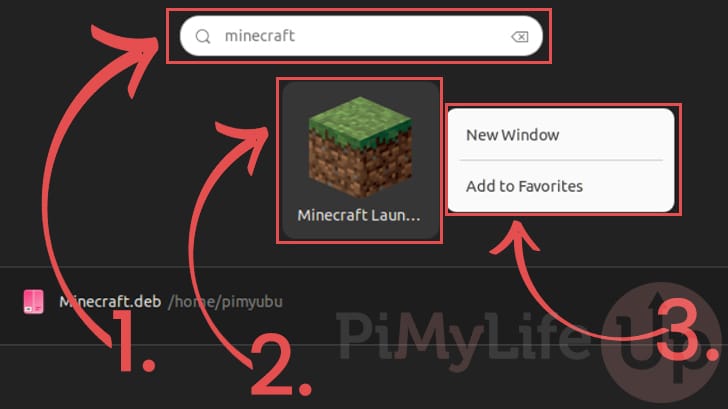
b. With the activities screen open, you will want to use the search bar (1.) in the middle and type in “minecraft“.
You should eventually see the Minecraft icon appear on the screen (2.), all you need to do is click it to open the client on your Ubuntu device.
It is also possible to use this same screen to add Minecraft to your Ubuntu favorites menu. Right-click the Minecraft icon and click the “Add to Favorites” option (3.).
c. At this point, you should have the Minecraft Launcher opening on Ubuntu.
You can now continue on to the next section.
Opening the Minecraft Launcher for the First Time
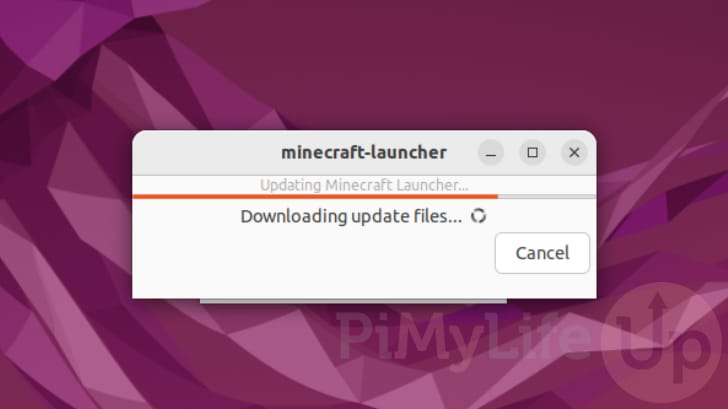
2. When you first run the Minecraft Launcher on Ubuntu, it will need to download and update itself.
This process can take a couple of minutes to complete.
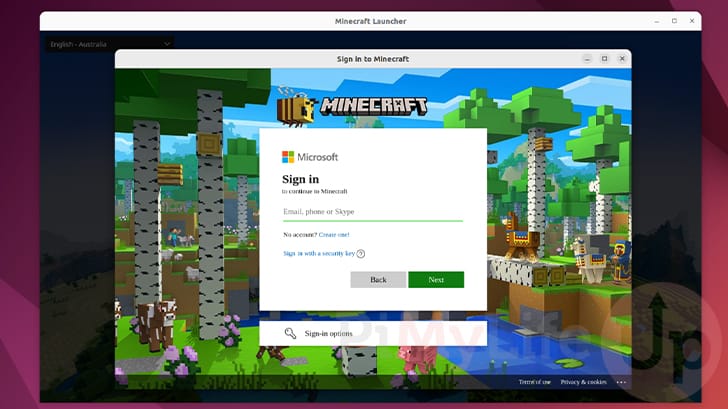
3. Once Minecraft has finally opened up on your device, you must log in to your account.
You can start this process by clicking the big “MICROSOFT LOGIN” button.

4. Now follow the prompts to login to your Microsoft account.
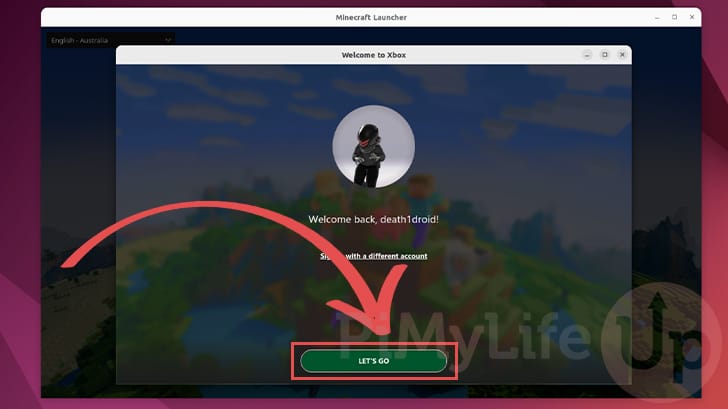
5. After logging in to your account, you will see a message saying welcome back. All you need to do now is click the “LET'S GO” button.
Launching Minecraft on Ubuntu
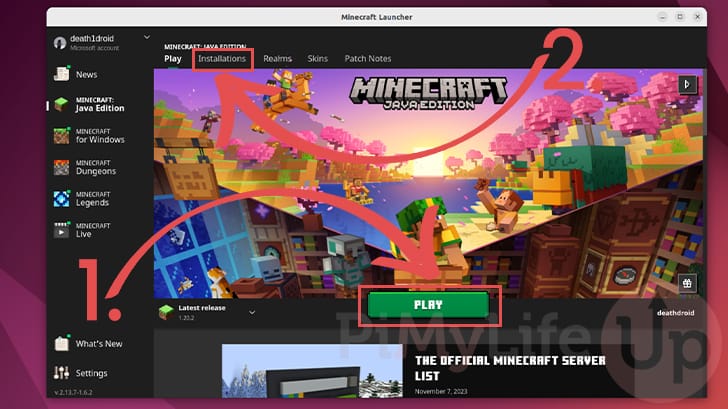
6. You are now finally at the point where you can run Minecraft on your Ubuntu device.
The launcher will already be set up to download and install the latest version of Minecraft. If you want to use an older version, click the “Installations” button (2.) and follow the prompts on that screen.
Otherwise, you can start the latest version of Minecraft straight away by clicking the “Play” button (1.).
7. The launcher will begin to download the specified version of Minecraft. This process can take a few minutes, depending on your internet speed.
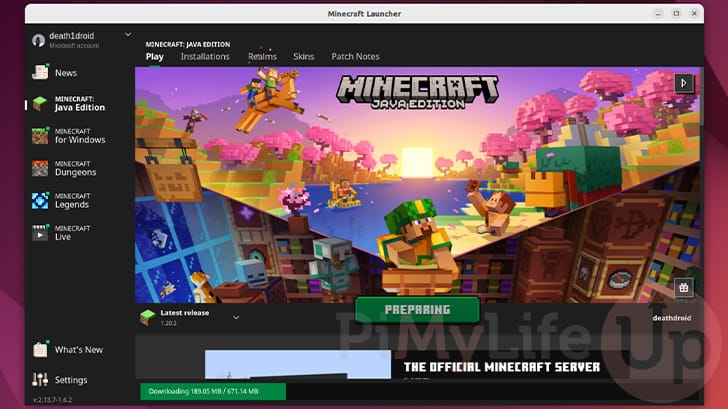
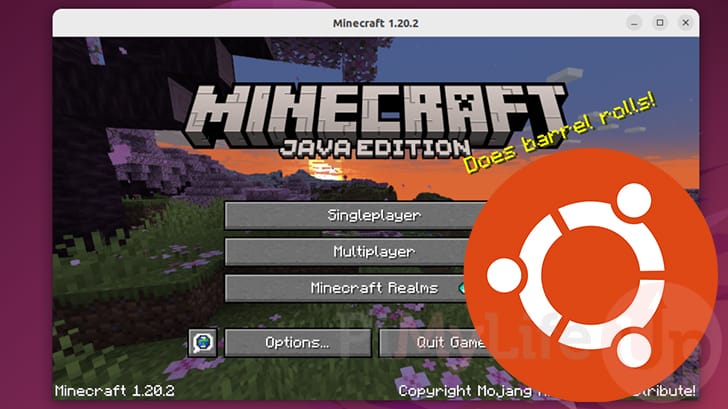
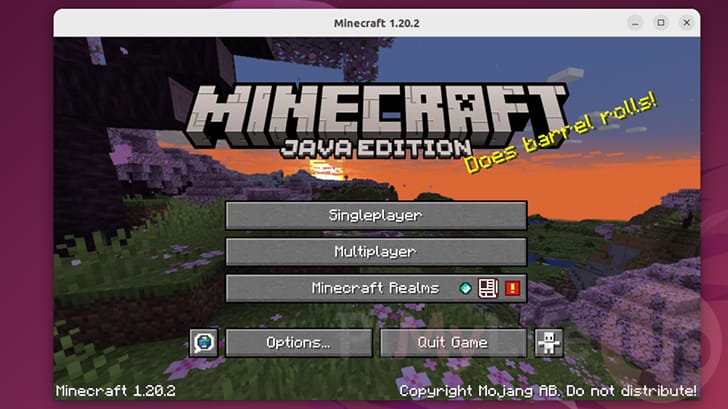
8. You should now hopefully have Minecraft running on your Ubuntu device.
Conclusion
At this stage, you should hopefully have Minecraft Java Edition installed on your Ubuntu system.
If you are interested in setting up a server to play on, we highly recommend you check out our tutorial on setting up a Minecraft Java Edition server.
Please feel free to comment below if you have any issues installing Minecraft to your system.
If you found this tutorial to be useful, be sure to check out our many other Ubuntu tutorials.