In this tutorial, we will show you how to install and play Minecraft Java Edition on your Steam Deck.
Thanks to the Steam Deck coming with a fully featured operating system, it is possible to install games unavailable through the Steam store.
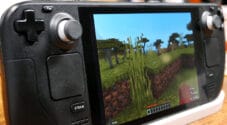
One of these games you may want to install to your Steam Deck is Minecraft. Minecraft is an incredibly popular sandbox game that can easily run on the handheld’s hardware.
To install Minecraft on your Steam Deck, we will use a custom launcher called Prism. This launcher lets you install the exact version of the game client you want to run.
By the end of this guide, you will have the Java edition of Minecraft up and running within the Steam Deck gaming mode.
Installing the Java Edition of Minecraft on the Steam Deck
The following steps will cover everything you need to know to install and run Minecraft on your Steam Deck. These steps are relatively straightforward and shouldn’t take too long to complete.
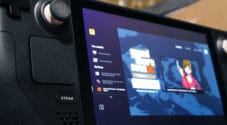
Switching to Desktop Mode
1. Before we can install the Java edition of Minecraft to your Steam Deck, you must exit to desktop mode.
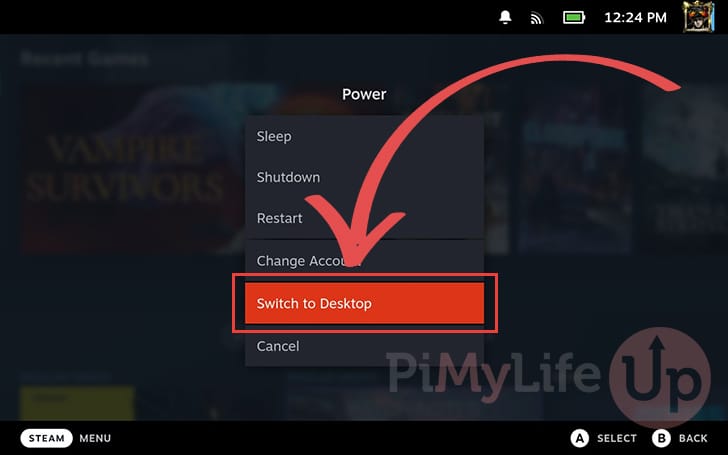
To get to desktop mode, we must first open the STEAM menu by pressing the STEAM button on your device or tapping “STEAM Menu” in the bottom-left of the screen.

2. Now that you have the Steam Menu opened, you will want to navigate down to the “Power” option.
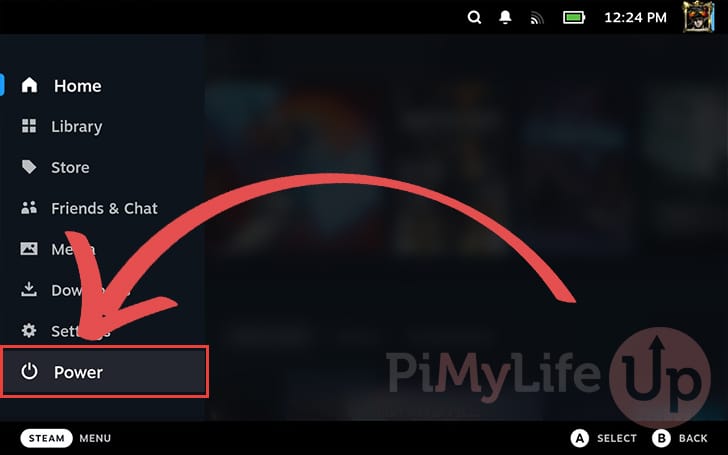
3. With the power menu now open, you must select the “Switch to Desktop” option.
Installing the Prism Launcher to the Steam Deck
4. Once you are in desktop mode, you can move on to installing a piece of software called Prism Launcher.
This launcher will allow you to install Minecraft Java edition to your Steam Deck easily.
To install this launcher, you will want to open the Discover application. You can find this application by clicking the little shopping bag icon in your taskbar.

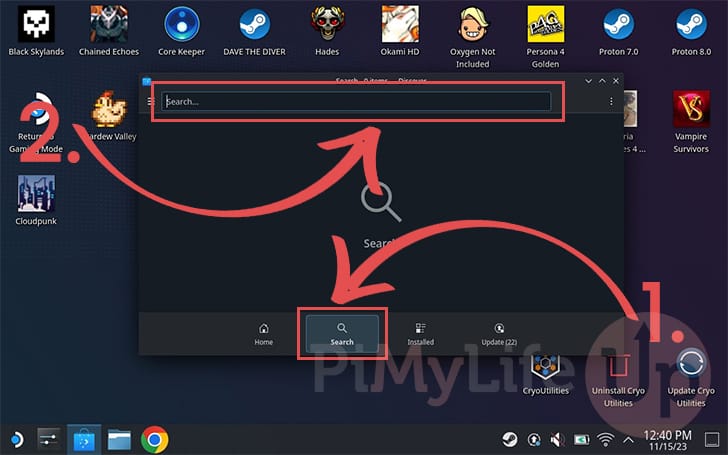
5. With the Discover application open on your Steam Deck, change to the “Search” screen (1.).
Once you are on the search screen, you will want to use the search bar (2.) and type in “prism launcher“.
You can open the keyboard on the Steam Deck’s desktop by pressing the STEAM and X buttons at the same time.
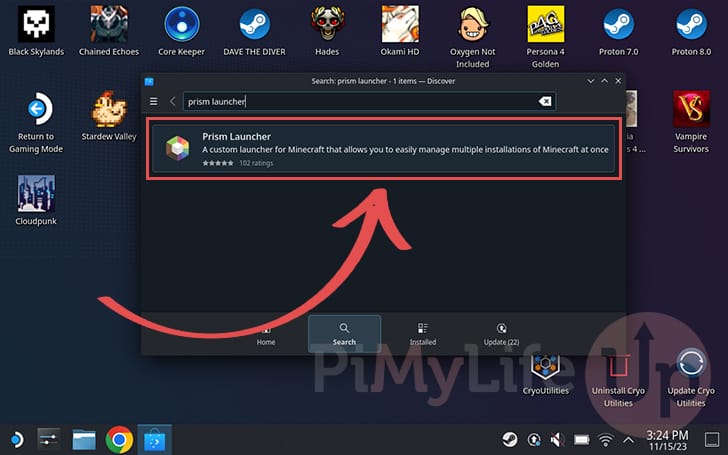
6. After searching, you should see “Prism Launcher” as an option, click it to open its Discover page.
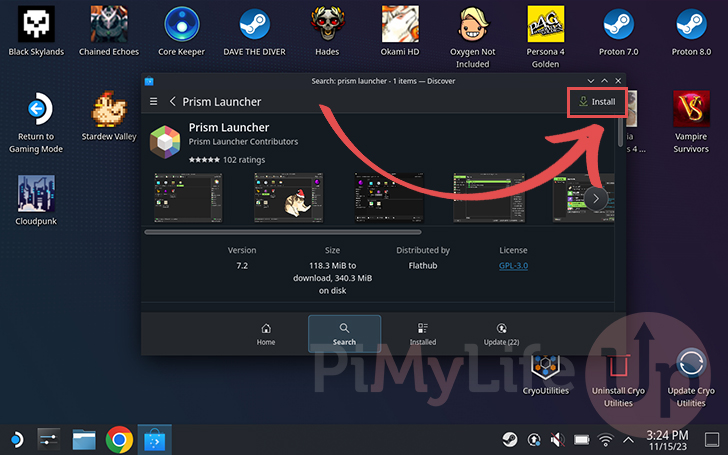
7. Now that you are on the Discover page for the Prism Launcher on your Steam Deck, click the “Install” button in the top-right corner.
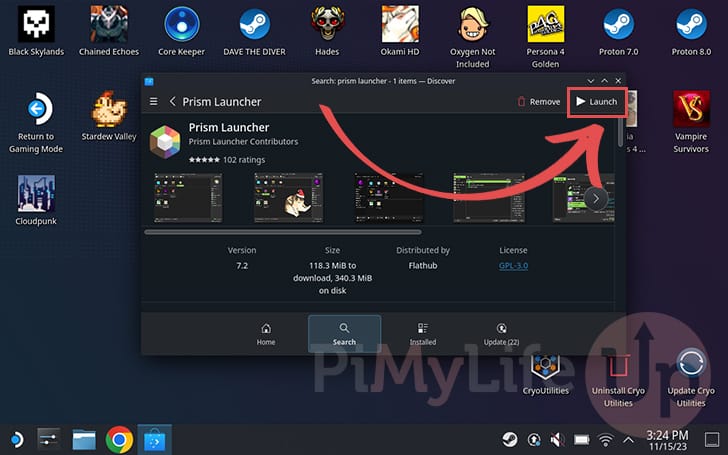
8. Once the Prism Launcher has been installed, we can now move on to launching it.
To launch this custom Minecraft launcher on your Steam Deck, click the “Launch” button in the top-right corner.
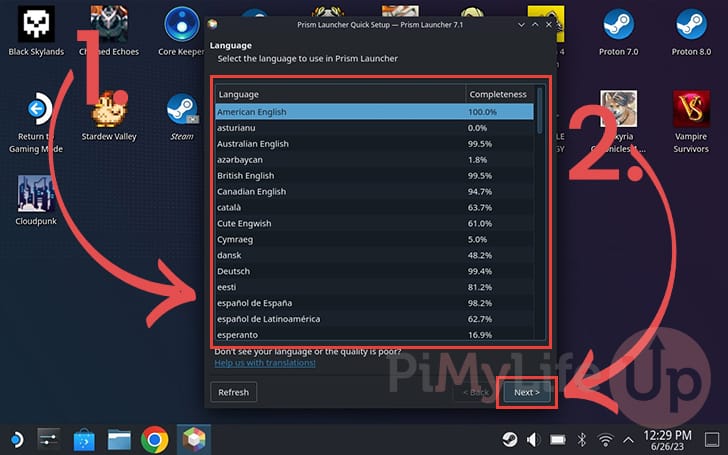
9. When you first run Prism Launcher on your device, you must follow some quick setup instructions.
The first step allows you to select the language for the Prism Launcher (1.). Please note that this does not affect the language for Minecraft.
Once you have a language selected, click the “Next >” button (2.) to continue.
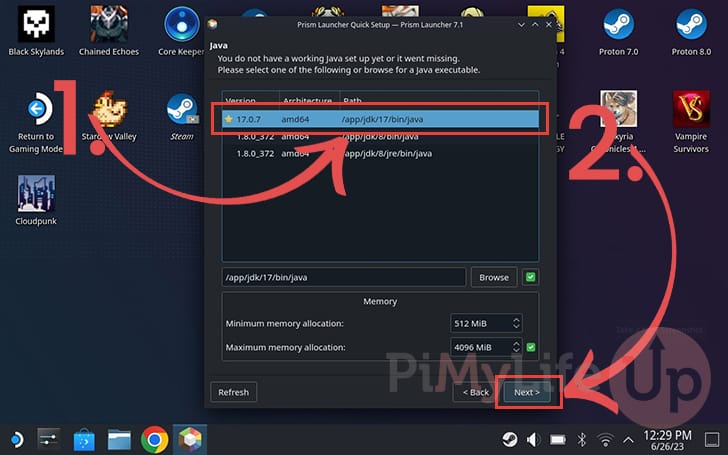
10. You can now select the version of Java that you want to use to run Minecraft on your Steam Deck. The recommended version is typically highlighted with a star and is at the top of the list (1.).
Once you have a version of Java selected, click the “Next >” button (2.) to proceed with the setup.
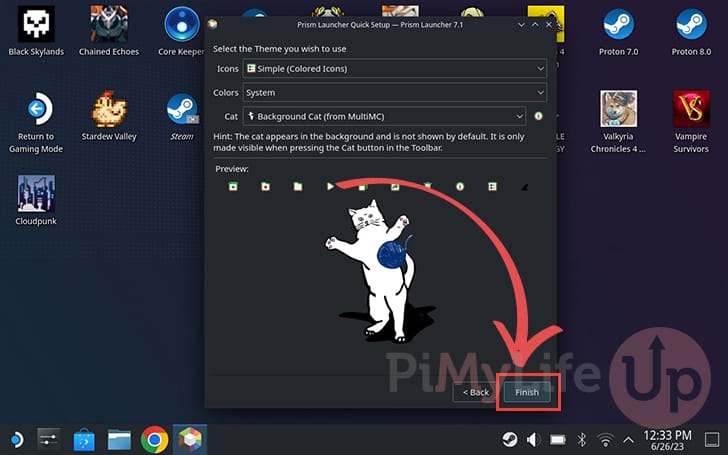
11. On this final screen, you can change the theme for the Prism Launcher.
If you are happy with the default theme, click the “Finish” button.
Adding your Minecraft Account to your Steam Deck
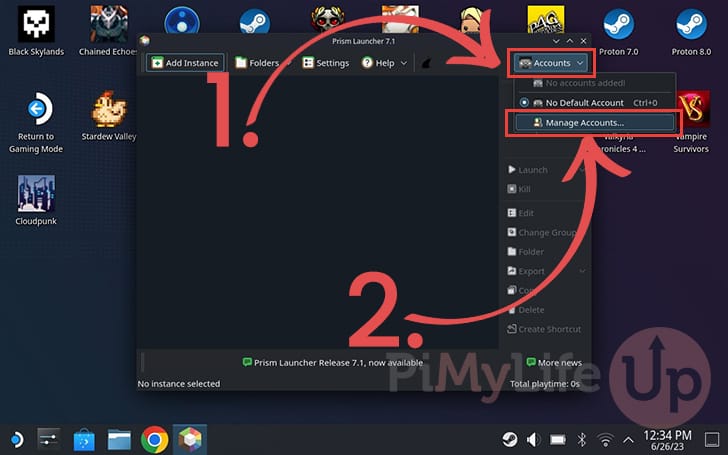
12. Now that the Prism Launcher is installed on your Steam Deck, you must add your Minecraft account.
Bring up the “Accounts” drop-down menu by clicking “Accounts” in the top-right corner (1.).
With the drop-down open, click the “Manage Accounts...” option (2.).
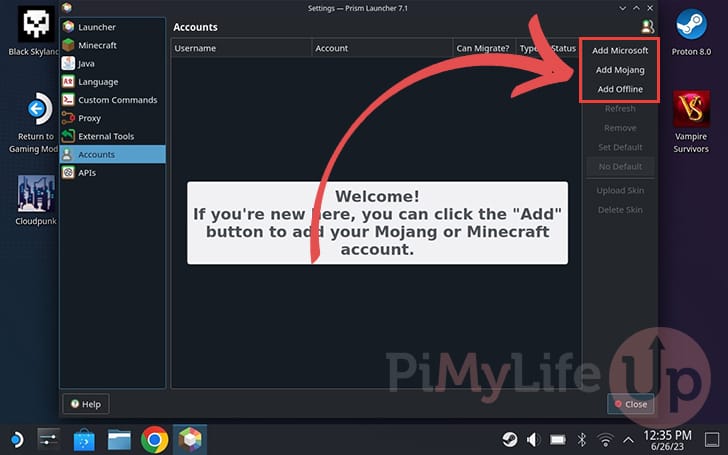
13. Once on the accounts screen, you will want to look to the right side of the window.
Here are three options for adding your Minecraft account to your Steam Deck. Most people will need to click the “Add Microsoft” option.
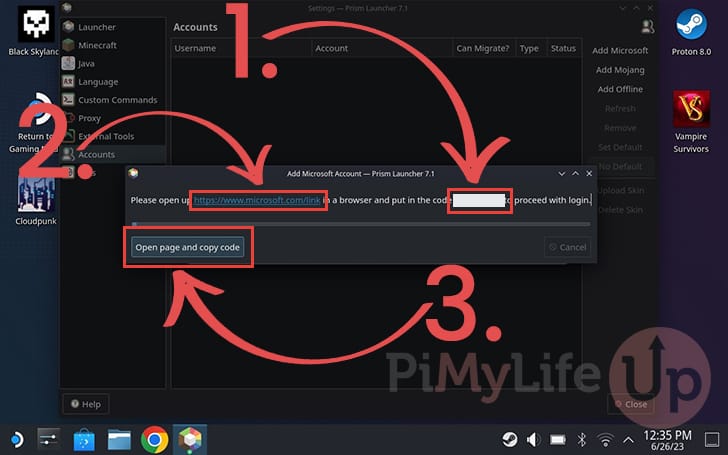
14. Upon clicking the “Add Microsoft” button, you will be greeted with the following dialog. On this screen, you will see a randomly generated code (1.). This code links your Minecraft account through Microsoft to your Steam Deck.
Once you have the code, you can go to the URL specified in the dialog (2.).
To complete this process on your Steam Deck, click the “Open page and copy code” (3.) button.
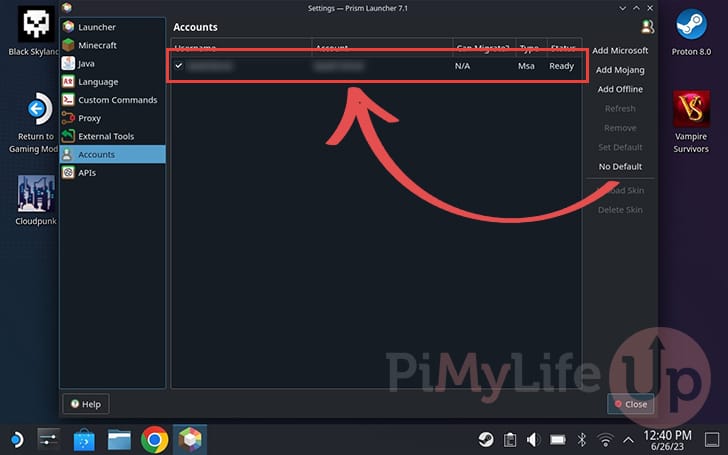
15. After following a few prompts, you should eventually see that your account has been added to the Prism Launcher.
Using Prism to Install Minecraft Java Edition to your Steam Deck
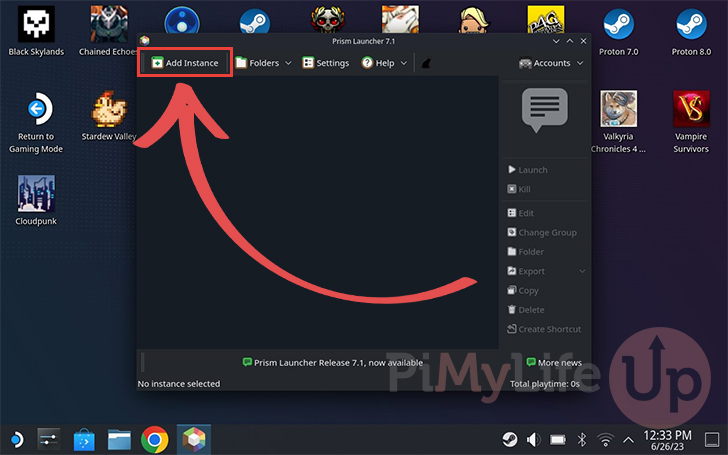
16. We can finally use the Prism Launcher to install Minecraft Java Edition to your Steam Deck.
To begin this process, click the “Add Instance” button at the top of the window.
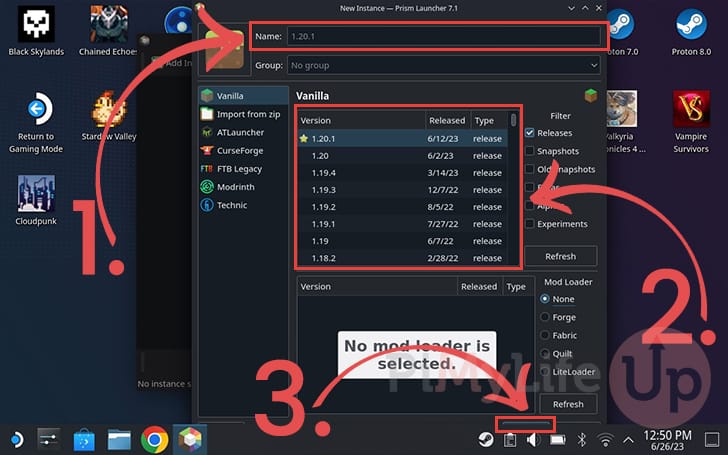
17. You can now choose the details for the version of Minecraft you are installing on your Steam Deck.
At the top, you can name this particular instance (1.). We recommend you leave this as the default, which will be the name of the Minecraft version you are installing.
Next, select the Minecraft version you want to install on your system (2.). If your mods or mod loader only works with a particular version, now is your chance to select it.
Once you are happy with your settings, click the “OK” button (3.) at the bottom of the screen.
Sometimes this button is partially hidden like it is in the screenshot below. However, it is the button on the left side. You can also maximize the window by double-clicking the top bar.
Launching Minecraft while in Steam Deck Desktop Mode
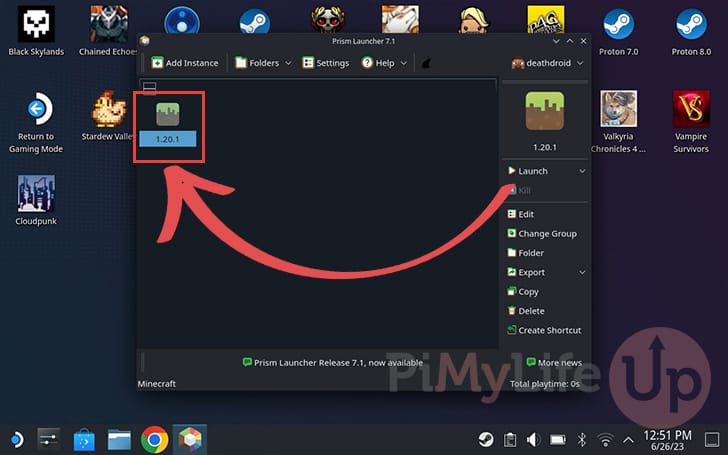
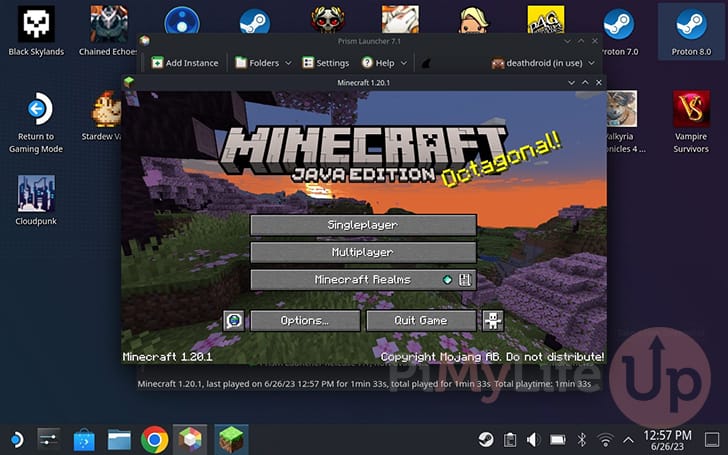
18. Now that you have the Java edition of Minecraft installed on your Steam Deck, all you need to do to run it is to double-click its icon, as shown below.
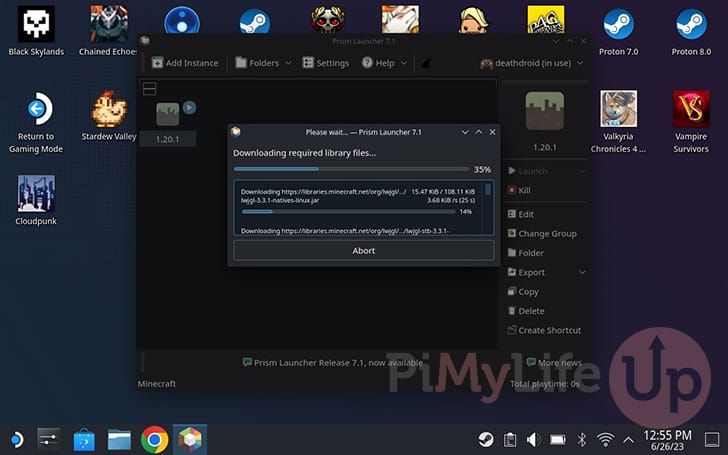
19. When you first launch Minecraft through Prism, the launcher will need to download the game and all the libraries it requires to run it.
Please note that this process can take a few minutes, depending on your internet speed.
20. You now successfully have Minecraft Java Edition running on your Steam Deck while in desktop mode.
Adding Minecraft as a Non-Steam Game
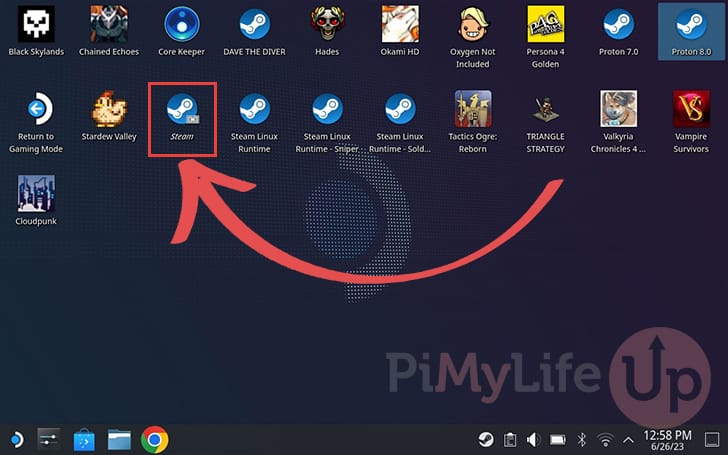
21. Now that you have Minecraft installed, you will likely want to be able to access it through Steam Deck’s gaming mode.
To do this, you must add Prism Launcher as a non-steam game. Start this process by opening the desktop Steam client.
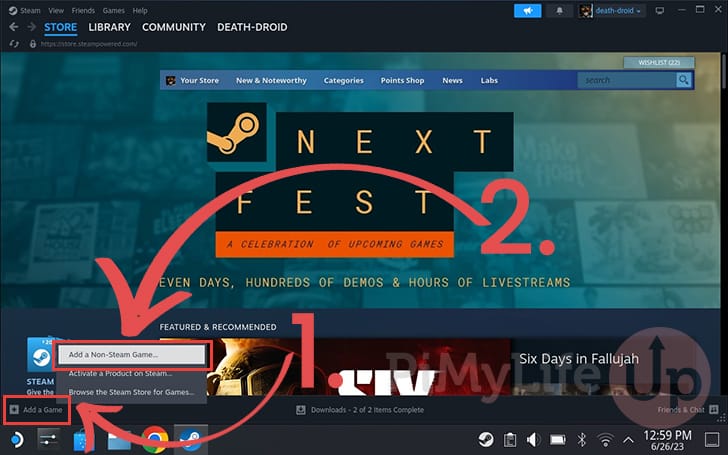
22. With the Steam client open, click the “Add a Game” option (1.) in the bottom-left corner.
Next, click the “Add a Non-Steam Game...” button (2.).
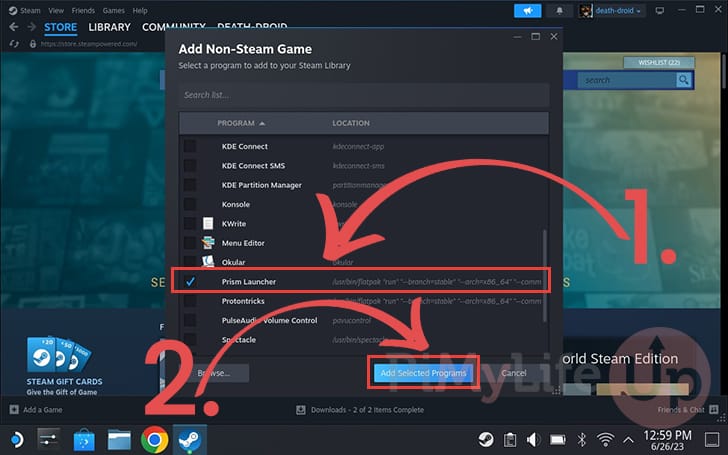
23. Scroll down this list until you see the option labeled “Prism Launcher” (1.) and click the checkbox next to it.
Now all you need to do to add this Minecraft launcher to your Steam Deck is to click the “Add Selected Programs” button (2.).
Changing Minecraft on Steam Deck’s Properties
24. At this point, you may want to rename “Prism Launcher” to something like “Minecraft” to make it easier to find in your Steam Deck library. You can skip to the next section if you are happy with keeping it named “Prism Launcher”.
To begin this process, search for “Prism launcher” using Steams search box in your library (1.).
Eventually, you should see “Prism Launcher” within your library. Once found, click it (2.).

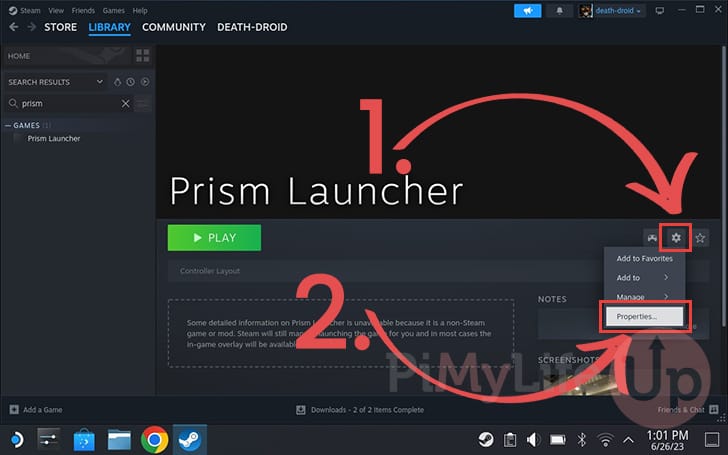
25. Once you have the Steam entry open for the Prism Launcher, click the cog icon (1.) on the left-side of the screen.
In the context menu that appears, you must click the “Properties...” option (2.).
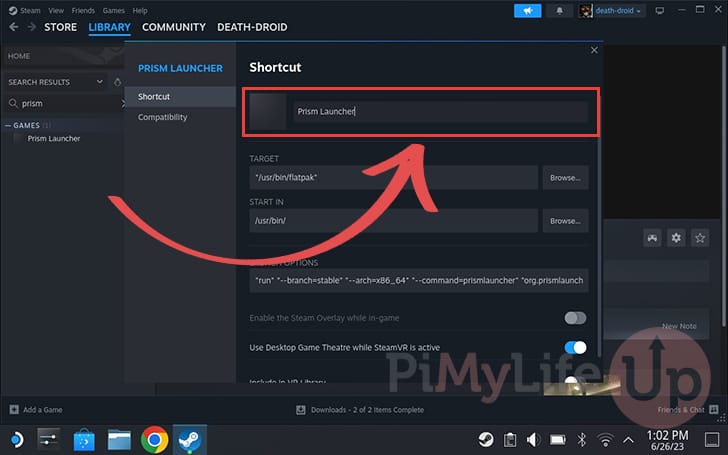
26. You can now use the textbox at the top of the window to rename “Prism Launcher” to something like “Minecraft“.
This allows you to find this client on your Steam Deck’s library just by searching for “Minecraft“.
27. If you want, you can modify the launch options so that the Minecraft shortcut will launch into a specific version.
To do this, you must add “-l” followed by the name you gave your instance. For example, if you kept the default naming you can launch Minecraft “1.20.1” by adding the following the launch options.
"-l 1.20.1"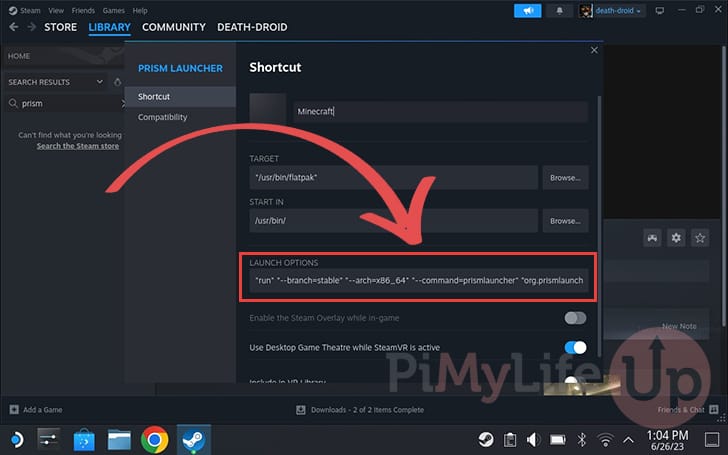
Return to Gaming Mode
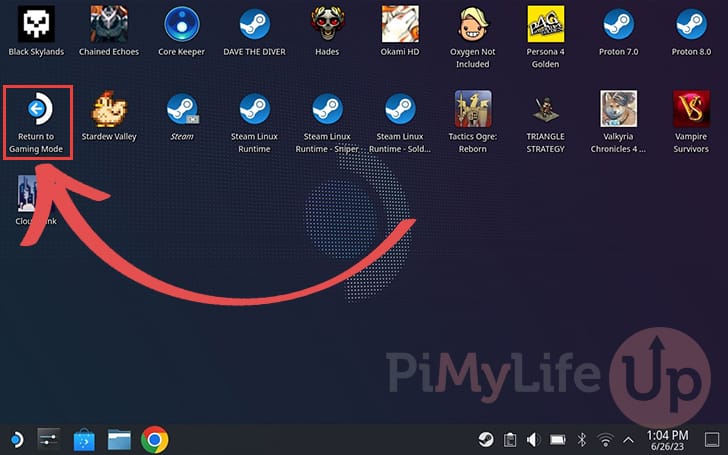
28. Once you have added Minecraft to your Steam Deck’s library, you can launch it in gaming mode.
Returning to gaming mode is as easy as going to the desktop and double-clicking the “Return to Gaming Mode” icon.
Finding Minecraft Java Edition on your Steam Deck
29. Now that you are back in gaming mode, let us find where you can launch Minecraft Java edition from.
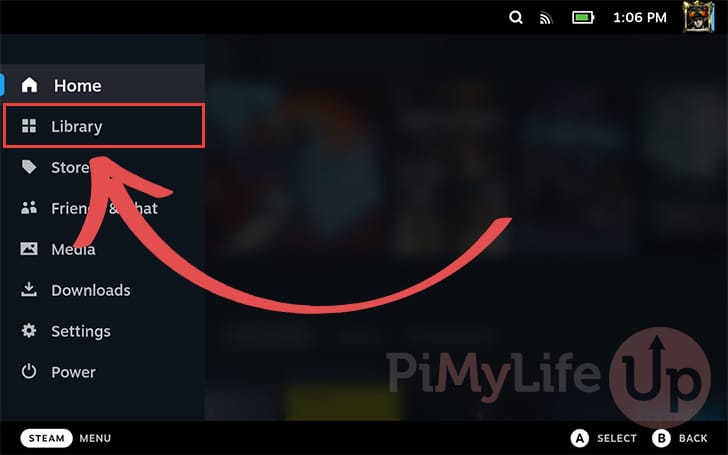
Like all games, you will want to first go to your Steam library using the Steam menu.
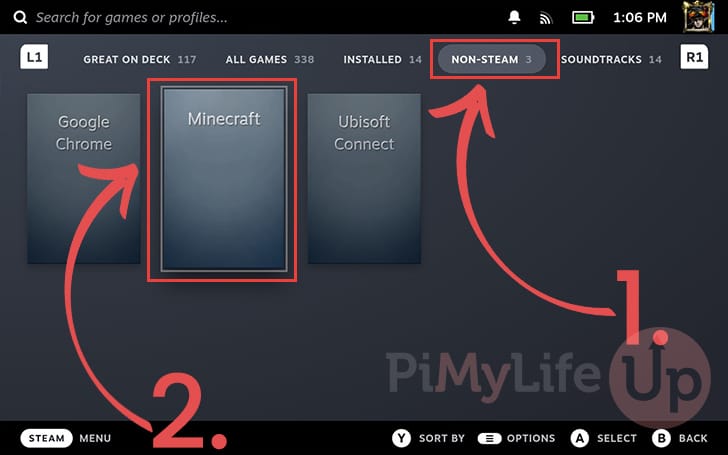
30. Once you are within your Steam Deck library, you must first change to the “NON-STEAM” tab (1.).
Within this tab, you should see an entry labeled “Minecraft” (2.). If you chose not to rename the shortcut, you would see “Prism Launcher” instead.
Fixing Input Controls for Minecraft on the Steam Deck
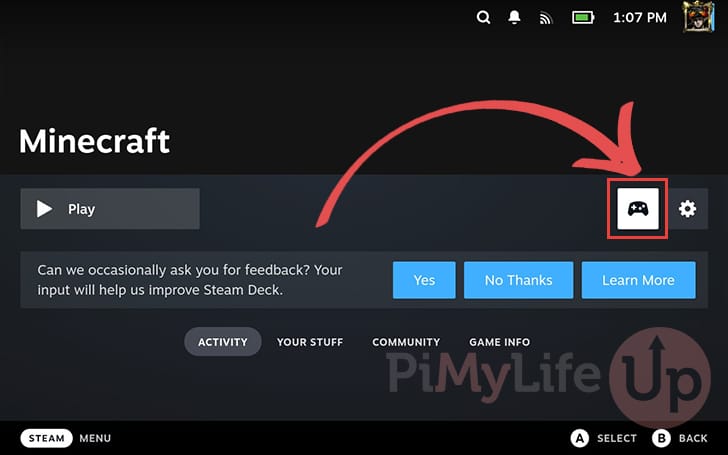
31. The default Steam Deck controls are not the best for playing Minecraft. Luckily for us, the Deck lets you easily change the input layout.
To adjust the control layout for Minecraft, select the controller icon on the right side of the screen.
32. To change the current layout, you will need to select it, as shown below.

33. Once you have selected the current layout, you can select a new one.
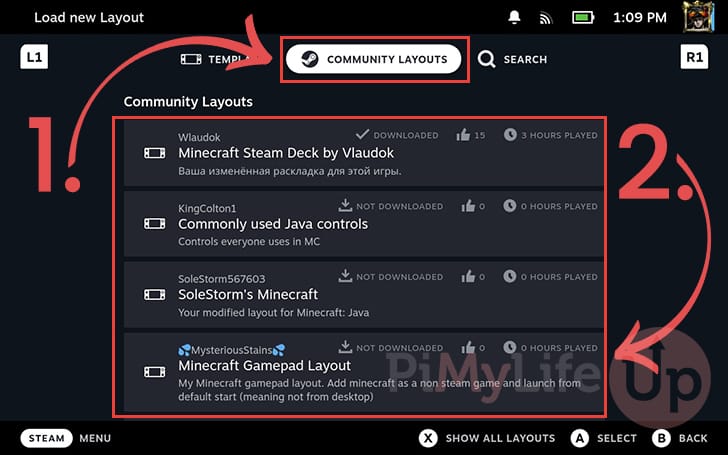
If you are after a layout that a Steam Deck community member has already created for Minecraft, you will want to select the “COMMUNITY LAYOUTS” tab (1.).
Now that you are on this tab, you will see a list of community layouts (2.). Select one that looks like it should work. You can adjust these controls later to better fit how you play.
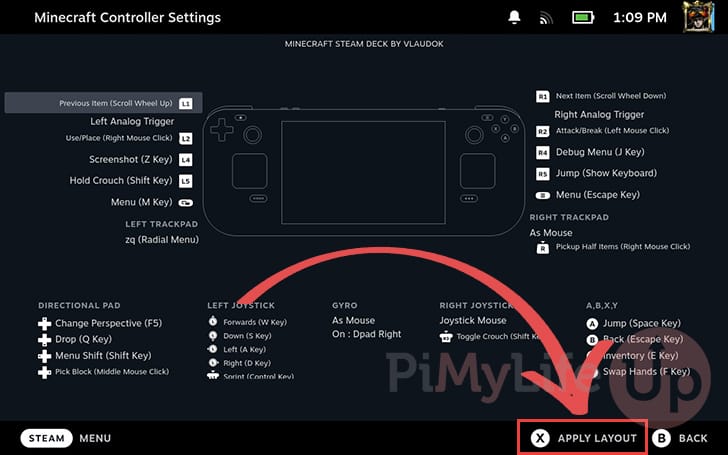
34. Before applying a template, you will see a list of the controls and what they are assigned to.
If you are happy with this layout Minecraft, you can apply it by clicking “APPLY LAYOUT” or by pressing the X button on your Steam Deck.
Launch Minecraft Java Edition in Steam Deck’s Gaming Mode
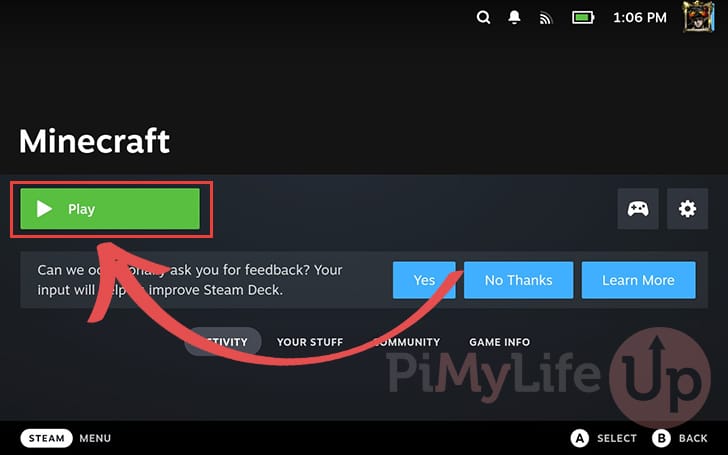
35. With a control scheme all set and Minecraft installed on your Steam Deck, you are now ready to launch the game.
All you need to do now to launch Minecraft is to click the “Play” button.
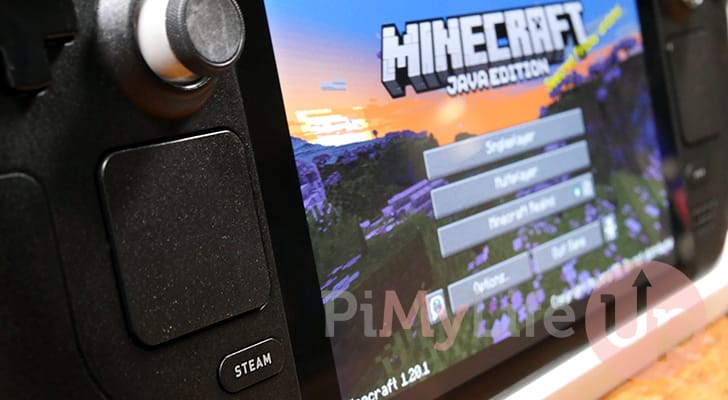
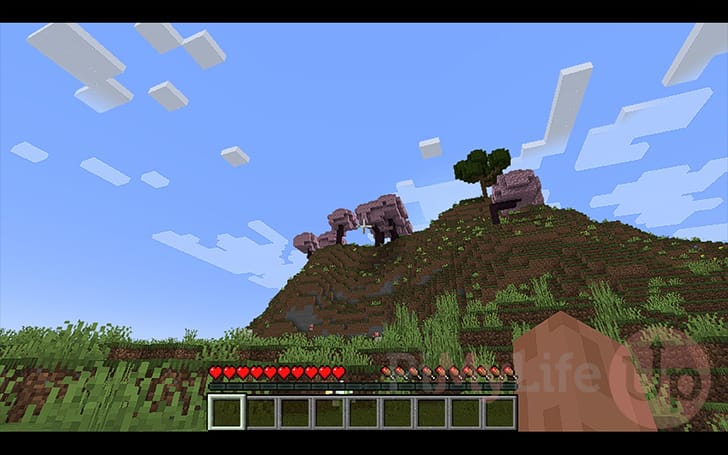
36. Hopefully, you should have Minecraft Java edition running on your Steam Deck.
Conclusion
Throughout this tutorial, we showed you how to install and play Minecraft Java edition on your Steam Deck.
Setting up this game is made incredibly straightforward, thanks to Prism Launcher.
This launcher allows you to install a specific version of the game alongside a mod loader if that is something you desire.
If you found this tutorial helpful, be sure to check out our many other Steam Deck tutorials.