In this tutorial, I go through the steps to connect Roborock vacuums to Home Assistant.

Roborock is a popular brand of robot vacuum cleaners and mops. These smart robots are a great way to clean your floor with very little effort. You can control the robots using an app; however, they are a great item to include into your Home Assistant setup.
Integrating your Roborock vacuums into Home Assistant allows you to monitor its many sensors and send commands. Using data from various devices in Home Assistant, you can build more intelligent automations for when the robot should run.
This tutorial covers installing and configuring the Roborock integration. If you want a decent way to display the data, we recommend you look at a custom vacuum card for the front end.
To complete this tutorial, you will need a Roborock vacuum (Amazon) setup in the Roborock application. You will also need Home Assistant installed, and we recommend installing it on the Raspberry Pi or something similar.
Configuring the Roborock Integration
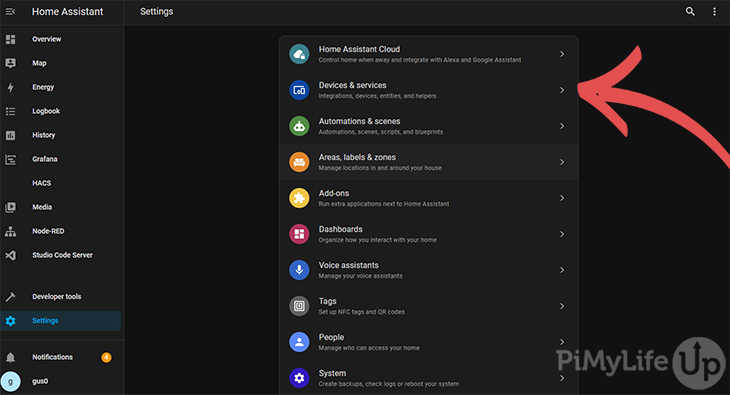
1. Go to the settings page and click Devices & Services.
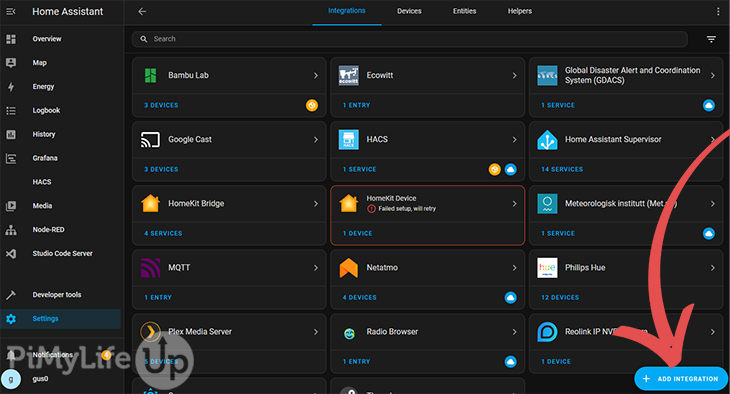
2. On the integrations page, click ADD INTERGRATION in the bottom right corner.
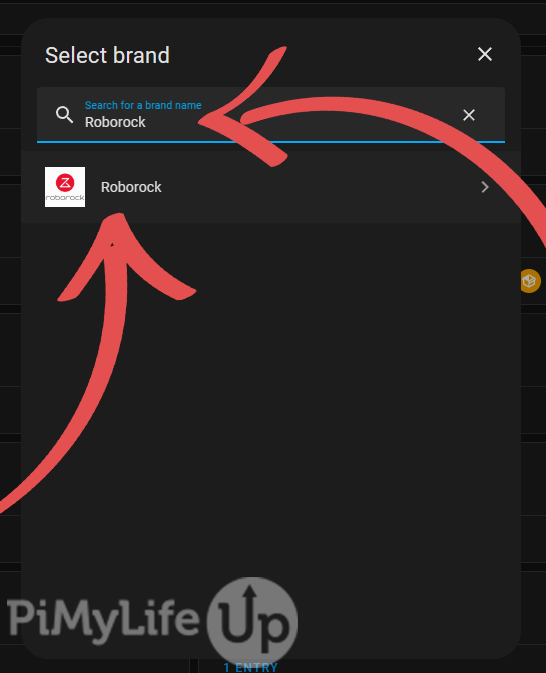
3. In the pop-up, scroll through the app list to look for Roborock or search for it in the search box (1). Once you have found it, click on the app (2).
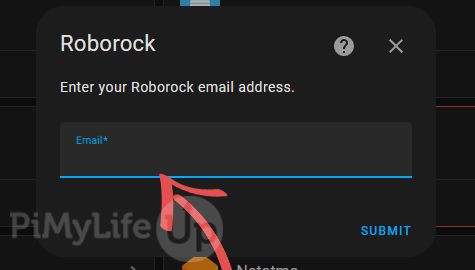
4. Follow the next few prompts to tie your Roborock account with Home Assistant.
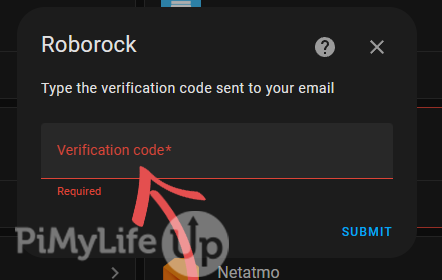
First, you will need to enter the email address for your account.
Next, enter the verification code sent to your email address.
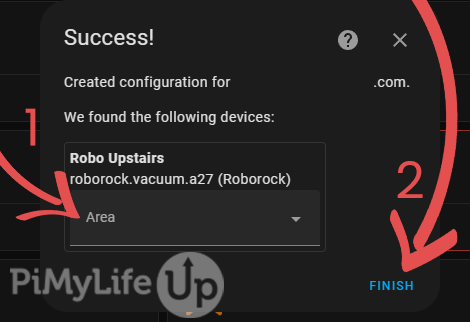
5. You should see a success message if everything has worked correctly. You can now assign the device to an area (1) or close the pop-up by clicking FINISH (2).
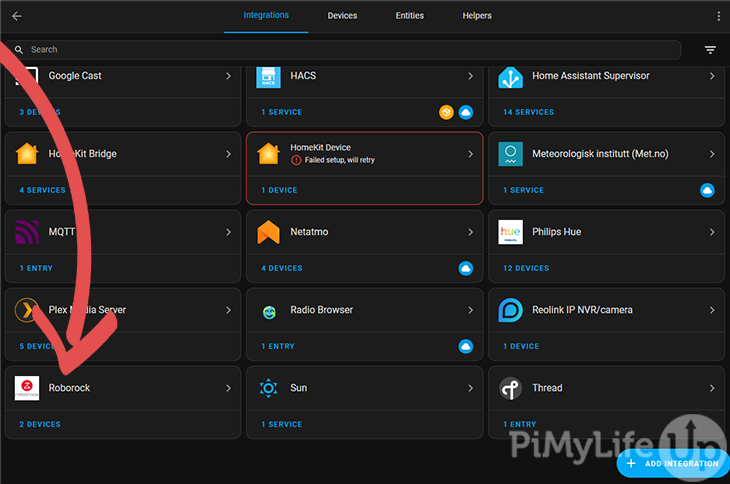
6. Back on the integrations page, find the Roborock integration and click on it.
7. You should see your account email and the devices connected to the account.

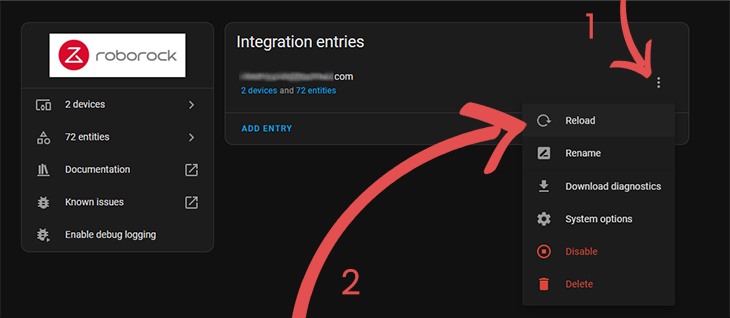
If you are missing devices, you may need to reload the integration.
To reload the integration, click the three dots (1) and then click reload (2). In my case, this helped pick up the missing device, as one was originally missing when I first setup the integration.
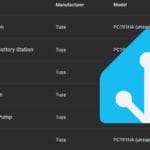
8. To bring up the list of all the Roborock devices imported into Home Assistant, click x devices.

9. You should now see a list of all the Roborock devices with some basic information, such as the model and battery. To bring up more information on a specific device, click on it.

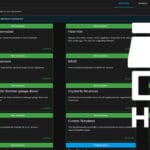
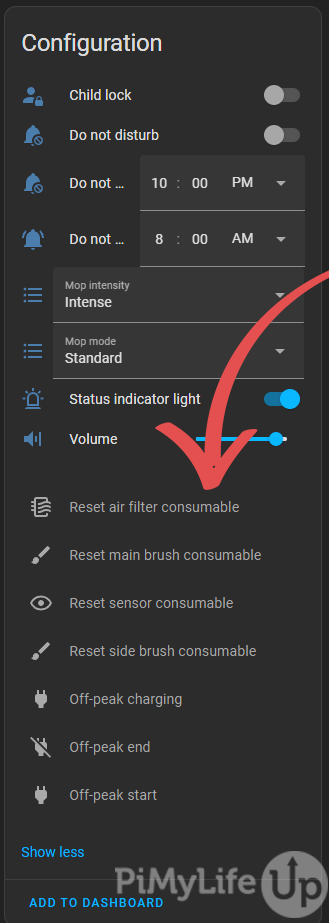
10. On the device page, you can see various configurations, sensor data, and controls. The different data will be useful for monitoring the performance of your robot vacuum cleaner.
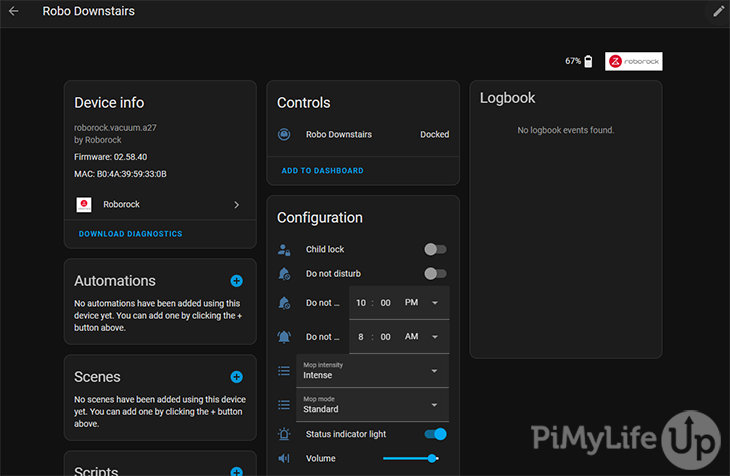
Below is a screenshot of more information provided by the Roborock integration.

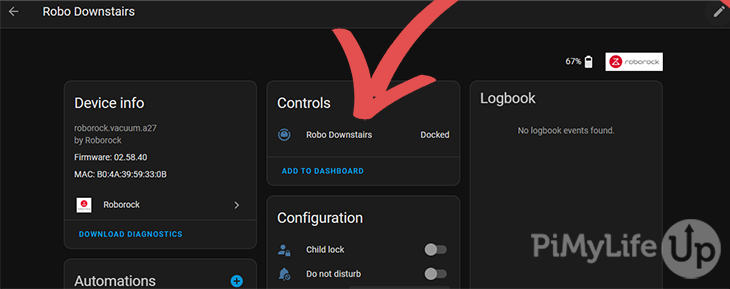
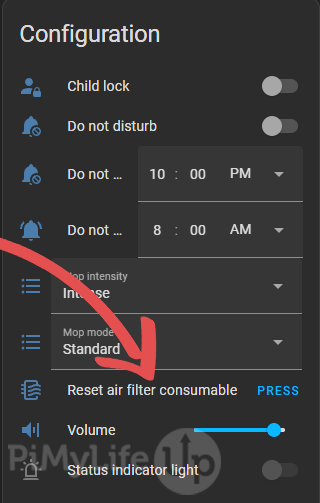
11. Clicking the item in the controls section will bring up a whole range of different options for controlling the robot. These are super useful for sending commands to the robot using Home Assistant rather than the Roborock application.
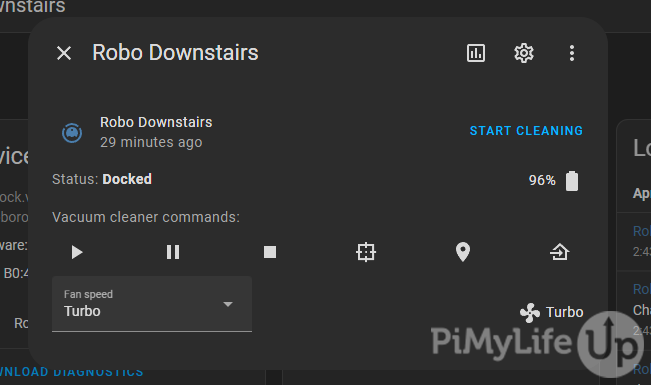
Below is an example of the commands that you can send to the vacuum.
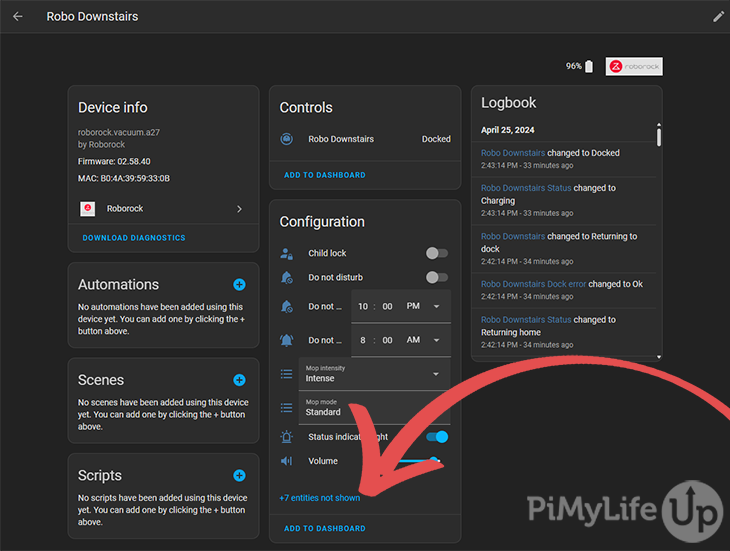
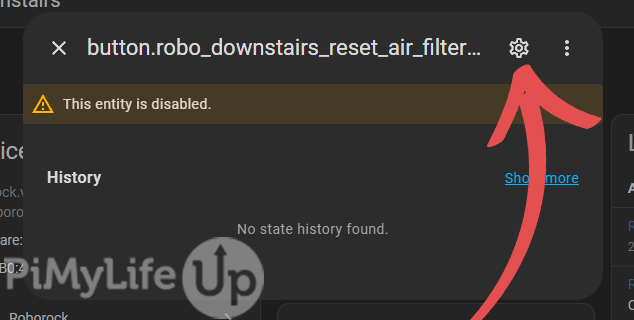
12. Some entities will be hidden by default; to enable them, you will need to click Entities not shown.
13. You should see a range of disabled entities. To enable them, click a disabled entity.
Next, click on the cog in the pop-up.
Now click ENABLE next to the warning message. Alternatively, toggle enable further down the pop-up and click on UPDATE.
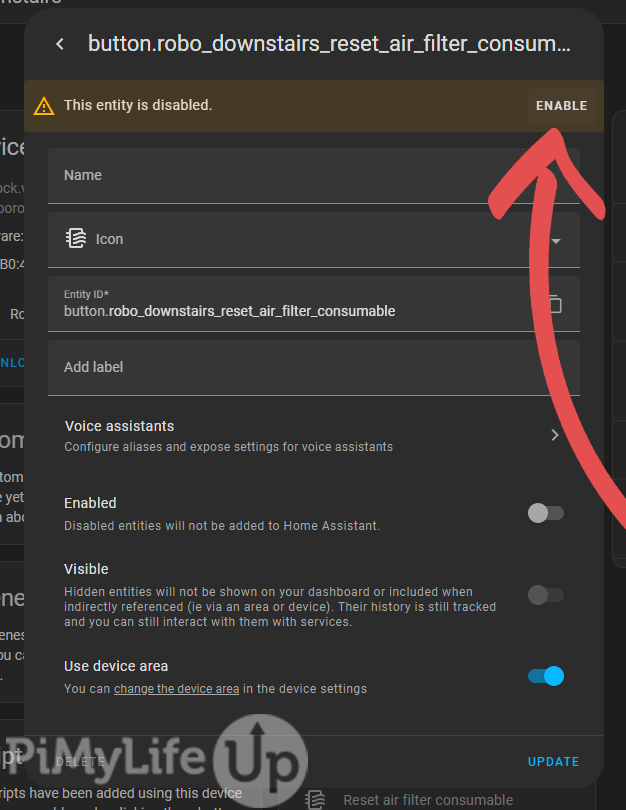
The entity will soon start populating with data. It may take a while, depending on how often the integration polls for data.
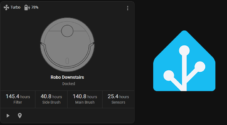
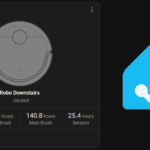
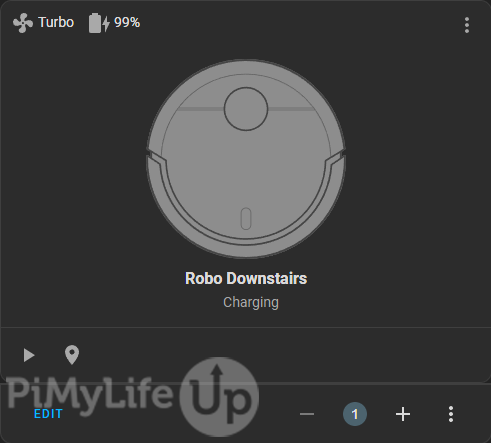
14. To take this to the next level, you might want to install a custom vacuum card for the front end. Below is an example of how we display our data within our Home Assistant.
Conclusion
You should now have your Roborock vacuums in Home Assistant. In addition, you should be able to send commands to the vacuum using the various options available.
As I mentioned throughout this tutorial, I recommend looking at a custom Lovelace card if you want a decent way to display the data on the front end.
There are loads that you can do with Home Assistant. If you want more ideas, be sure to check out our many Home Assistant projects and tutorials.
I hope that this tutorial has helped you set up and configure your Roborock vacuums correctly. If you have feedback, please leave a comment below.