In this tutorial, we will show you how to easily set up a Samba share using a handy Docker container.
Samba is a popular protocol for sharing files or folders from one device to another over a network. It is super easy to set up and is supported by almost every operating system around.
There is a wide variety of ways that you can set up a Samba share, and one of the most common methods is to set it up directly on your device. With this method, you must configure everything yourself. While this works fine for most users, it can be problematic for others.
Another way you can set up a network share using Samba is by using a Docker container. In our guide, we will use a container made by ServerContainers.
The advantage of using this Docker container to set up your Samba shares is that everything has been configured to a good default state for you already. All you need to do is point the container at the directories you want to show, fill out a few fields, and you will be ready to go.
Another plus side of this container is that it comes bundled with additional functionality to make your Samba server even better. For instance, it has Apple time machine support, zeroconf (avahi) and WSD (Web Services for Devices) out of the box.


Installing and Running the Samba Share Docker
In the following sections, we will show you how to set up and use a Docker container that provides Samba shares.
Preparing your System for the Samba Container
1. Before we can set up the Samba Docker container, you must have the Docker runtime installed on your machine.
If you haven’t installed it, we recommend following our instructions for installing Docker on Linux.
https://pimylifeup.com/linux-docker-install/2. After installing Docker, we can now use the mkdir command to create a location where we will store the Docker Compose file for the Samba container.
We will be creating a directory within the “/opt/stacks/” directory. This directory is a great place to organize your Docker Compose files and works well with Dockge.
sudo mkdir -p /opt/stacks/sambaCopy3. After creating the directory, you will want to change into it by using the cd command.
cd /opt/stacks/sambaCopyWriting your Docker Compose File for the Samba Container
4. Our next step is to write the Docker Compose file to set up and manage the Samba container on your system.
Think of a Compose file as a set of instructions that Docker will follow. It is much better than managing your Samba container through the terminal.
You can begin writing the Compose file using the following command in the terminal. We are using Nano here, but you can use whichever text editor you feel comfortable using.
sudo nano compose.yamlCopy5. You will want to enter the following lines within this file. You need to do a fair bit of configuration here, as the Samba Docker container will need to know what user to use and what folders to share.
As there is a bit to go over, let us break this down into the bits you want to configure, and then we will show you the full version of the file.
Defining a Samba Group
Let us start by exploring how a group and user is defined within this file. It is possible to define multiple groups.
GROUP_<GROUPNAME>: <GROUPID>Copy<GROUPNAME>: Replace this with the name you want to use to group your users together.<GROUPID>: Set this a group ID to user for this user. This value must not match the ID used for your user otherwise it will cause issues.
Setting up Users for your Docker Samba Shares
The next thing is defining a Samba user for your Docker shares. Like groups, you can specify multiple users, they just each need their own
      ACCOUNT_<USERNAME>: <PASSWORD>
      UID_<USERNAME>: <USERID>
GROUPS_<USERNAME>: <GROUPNAME>Copy<USERNAME>: Replace this with the username for your Samba user. You will need this when logging into your network share.
It is possible to have multiple network shares using this Docker container.<PASSWORD>: Swap this placeholder with the password you want to use with your Samba network share.<USERID>: Finally, you must specify the user ID to use for the Samba Docker container. The default user on most systems has an ID of1000.<GROUPNAME>: Here you can the name of the group that you want your user to be a member of. This group must be defined within the Docker Compose file.
A Samba user can be a member of multiple groups, just separate each name with a comma.
Defining your Samba Network Share using Docker Config
Each directory you intend to share using Samba and Docker will need to have its own configuration.
<SHARENAME>: Replace this with the name for your share. This should not contain spaces or symbols.<SHARETITLE>: This title will be used to display your share. This can differ from the share name and can contain spaces.
For example, “PiMyLifeUp Share“, would be a valid share title.<USERNAME>: If you want to lock this share to a particular Samba user, you will want to replace
Remove this line entirely if you don’t intend on locking this share and having it publicly available.<ALLOWGUESTS>: This option allows you to control whether anonymous logins are allowed to access this shareyes: Setting this value to “yes” will allow public access.no: By setting this to “no” only valid Samba users will be able to access this share
<BROWSEABLE>: Browseable allows you to control whether this share will be listed as an available share.yes: Setting this placeholder to yes will allow anyone to easily find this share.no: With this value set to no, you will need to manually type in the address for the share. It won’t be publicly listed.
<READONLY>: Using this value you can set whether you are able to write any data to this Docker powered Samba share.yes: Setting this value to “yes” will stop you from writing anything to this Samba network share.no: With this set to “no” you can write new data to this share.
      SAMBA_VOLUME_CONFIG_<SHARENAME>: |
        [<SHARETITLE>]
          path = /shares/<SHARENAME>
          valid users = <USERNAME> #Remove if not using
          guest ok = <ALLOWGUESTS>
          browseable = <BROWSEABLE>
          read only = <READONLY>Copy
Setting up your Samba Shares
The final thing you will want to know how to configure is the Samba shares. You can specify as many shares as you want; you just need to give each one a unique name.
A key thing to remember is that shares should each be in their own separate folder. For example, using “/shares/test” and “/shares/test/example” as two separate shares will cause issues.
- <LOCALDIRECTORY>:/shares/<SHARENAME>Copy<LOCALDIRECTORY>: Replace this with the full path to where you want this Samba share to exist on your local system.<SHARENAME>: Here you will set where this share will exist within the Docker container. Each share must remain within the “/shares/” directory, so just replace “<SHARENAME>” with the name you want to use for your share.
Avoid using spaces and symbols when setting the share name here.
Full Version of the Docker Compose File
Now that you know what you need to fill out within this file to configure your Docker Samba shares, below is an example of what the full Docker Compose file should look like.
Adjust this file to suit your needs using the information we covered over the last few sections. Additionally, there is one extra placeholder you will want to replace.
<SERVERNAME>: The only config we didn’t cover over the last few steps is how you can set a name for your Samba shares.
Replace this with the name you want to use for your Docker Samba server. This name should avoid spaces and symbols.
services:
  samba:
    image: ghcr.io/servercontainers/samba:latest
    restart: always
    network_mode: host
    cap_add:
      - CAP_NET_ADMIN
    environment:
      MODEL: 'TimeCapsule'
      AVAHI_NAME: <SERVERNAME>

      SAMBA_CONF_LOG_LEVEL: 3

      GROUP_<GROUPNAME>: <GROUPID>

      ACCOUNT_<USERNAME>: <PASSWORD>
      UID_<USERNAME>: <USERID>
      GROUPS_<USERNAME>: <GROUPNAME>

      SAMBA_VOLUME_CONFIG_<SHARENAME>: |
        [<SHARETITLE>]
          path = /shares/<SHARENAME>
          valid users = <USERNAME> #Remove if not using
          guest ok = <ALLOWGUESTS>
          browseable = <BROWSEABLE>
          read only = <READONLY>

    volumes:
      - /etc/avahi/services/:/external/avahi

      - <LOCALDIRECTORY>:/shares/<SHARENAME>Copy
6. Once you have finished filling out this Docker Compose file, you can save and quit out of Nano by using CTRL + X, Y, and then ENTER.
Starting up your Samba Docker Shares
7. Now that you have your Docker Compose file written and your Samba shares specified within we can start up the container.
Use the following command within the terminal to bring up the container.
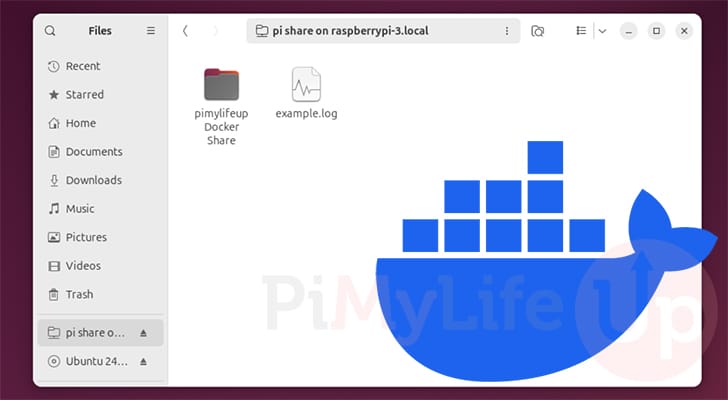
docker compose up -dCopy8. Once the container finishes starting up, you should now be able to access your network shares. You can access them using an IP address or your hostname.
We have a guide that covers how you can mount a network share on Ubuntu.
Updating to the Latest Version of the Samba Docker Container
While the Samba Docker container we are using isn’t updated often, fixes are pushed as they become available.
Once a new version is made available, updating to the latest version of the container is relatively simple. Over these next few steps, we will show you how easy it is to update the container.
1. To update this Samba Docker container, you must change to the directory where you originally wrote the Compose file.
Assuming you used the same directories as we did, you should be able to change to the correct location by running the following command.
cd /opt/stacks/sambaCopy2. After changing to the correct directory, you can get Docker to pull the latest version of the container by using the Compose pull command.
This will download the latest version of the Samba container but won’t update your already running instance.
docker compose pullCopy3. To get Docker to automatically migrate your container to the new Samba image, use the command below.
Docker will detect a new version of the image is available, stop the currently running container, and restart it on the new image.
docker compose up -dCopyConclusion
Hopefully, by this point in the tutorial, you will now have a good idea of how you can set up Samba shares on your
While you could always just set up the Samba server on your machine, some people prefer to keep things handled within Docker containers.
Please feel free to comment below if you have had any issues with getting this Samba container running on your machine.
If you like this tutorial, we recommend checking out our many other Docker tutorials to see other software you can easily self-host within a container.


Excellent guide. Very clear.
thank you…works great.