In this tutorial, we will show you how to self-host Uptime Kuma on your machine using Docker.
Uptime Kuma is an open-source and completely free self-hosted monitoring tool. It is packed with features and is a
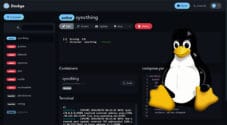
This software has the ability to monitor using a wealth of protocols such as HTTP, TCP, ping, and DNS records. It can even monitor the status of your Docker containers.
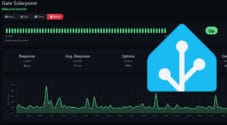
The status of the services you monitor is all tracked in an incredibly fast, sleek, and usable web interface. You will quickly find Uptime Kuma to be one of the cleanest tools to use to monitor the uptime of services, especially if you are already comfortable with self-hosting.
Traditional uptime monitoring tools can quickly become prohibitively expensive or be more complicated to use than they should be. We use Uptime Kuma to monitor our website and services, such as Home Assistant, that we run locally.
If you want to use Uptime Kuma to monitor uptime, the best way to self-host is to utilize Docker.
Docker enables you to install Uptime Kuma with just a couple of simple commands and doesn’t require you to set up additional software to keep it running.
The development team provides builds of this software for both ARM and x86 systems. This means it should work on almost any device you throw at it, including the Raspberry Pi.


Installing and Running the Uptime Kuma Docker Container
Over the following sections, we will walk you through setting up and running Uptime Kuma using Docker.
These instructions should work for any Linux based operating system, including Ubuntu and Debian.
Preparing your System
1. The first thing you will need to do is install the Docker runtime onto your Linux machine
If you haven’t installed Docker before, we highly recommend our guide.
https://pimylifeup.com/linux-docker-install/2. Once Docker has been installed, you can use the mkdir command to create a directory to store the Compose file for Uptime Kuma.
sudo mkdir -p /opt/stacks/uptimekumaCopy3. After creating the directory, change into it by using the cd command. We will need to be in this folder for the next few steps of this guide.
cd /opt/stacks/uptimekumaCopyWriting a Docker Compose File for Uptime Kuma
4. Now that you have changed to the new directory, we can write the Docker Compose file that will set up and manage Uptime Kuma on our device.
To write this file on our device, we will be using Nano, but you can use whatever editor you feel comfortable with.
sudo nano compose.yamlCopy5. Within this file, all you need to do is enter the following information. There is no configuration you need to do here.
With this Compose file for Uptime Kuma, we are mounting two volumes. The first is the one where the software’s data will be all stored on your machine.
The second volume gives Uptime Kuma access to the Docker socket. This will allow is to monitor the uptime of your other Docker services. By default, containers can’t communicate with each other unless they are a part of the same network. Giving Kuma access to the sock file simplifies things.
services:
  uptime-kuma:
    image: louislam/uptime-kuma:1
    volumes:
      - ./data:/app/data
      - /var/run/docker.sock:/var/run/docker.sock
    ports:
      - 3001:3001
    restart: unless-stoppedCopy
6. After you have finished filling out the Compose file, save and quit by pressing CTRL + X, Y, and then ENTER.
Starting up the Uptime Kuma Docker Container
7. With everything in place, our next step is to start up the Uptime Kuma Docker container.
Starting this container using the Compose file we wrote is as straightforward as running the following command in the terminal. With this command, we are using the “-d” option to detach Docker from the terminal to allow it to run in the background
Docker will automatically start Uptime Kuma every time your machine powers on and attempt to restart the service if it crashes.
docker compose up -dCopyAccessing the Uptime Kuma Web Interface
8. Now that Uptime Kuma up and running on your machine using Docker, you will want to access its web interface. This web interface is how you will manage your monitors and view things such as the uptime and ping graphs.
You can get the IP address of your machine by using the hostname command.
hostname -ICopy9. Within your favorite web browser, you will want to go to the following address.
Ensure that you swap out “<IPADDRESS>” with the IP of the machine where you are hosting Uptime Kuma.
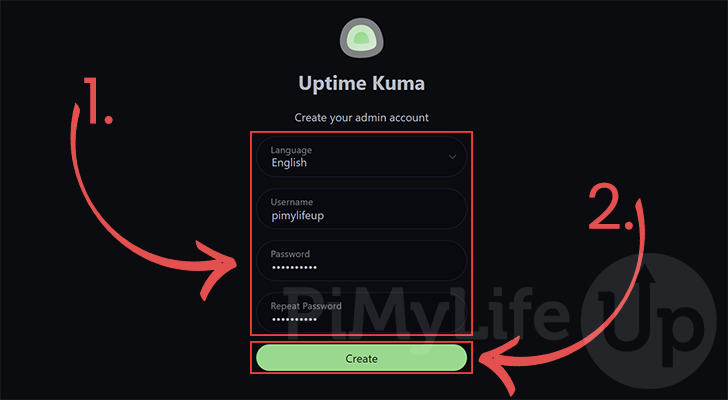
http://<IPADDRESS>:300110. The first time that you access Uptime Kuma, you must follow out details that will be used for your admin account.
Select your language and fill out a username and password (1.) that you will use to access Uptime Kuma’s web interface.
After filling out your account details, click the “Create” button (2.).
Monitoring your Docker Containers with Uptime Kuma
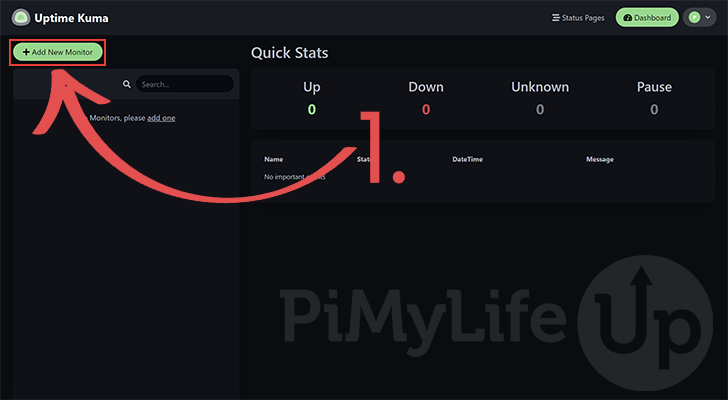
11. Now that you can access your Uptime Kuma web interface, you will want to add a new monitor.
You can add a new monitor by clicking the “Add New Monitor” button in the top-left corner. For this example, we will be walking you through the steps to monitor other Docker containers.
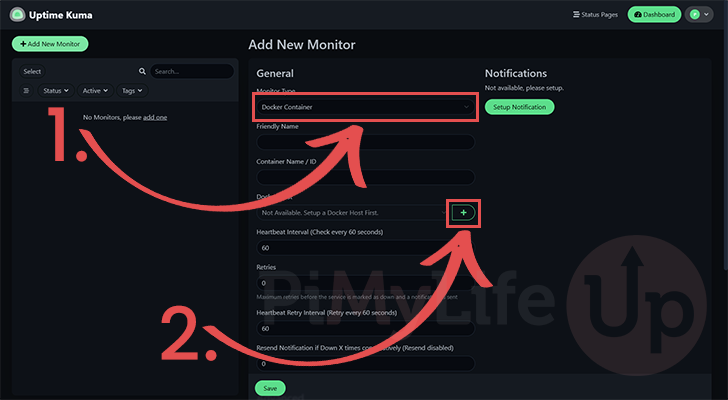
12. To monitor a Docker container from Uptime Kuma, the first thing you need to do is change the “Monitor Type” (1.) to “Docker Container“.
Next, since this is the first time you have added a container to monitor, you will need to add a Docker host (2.).
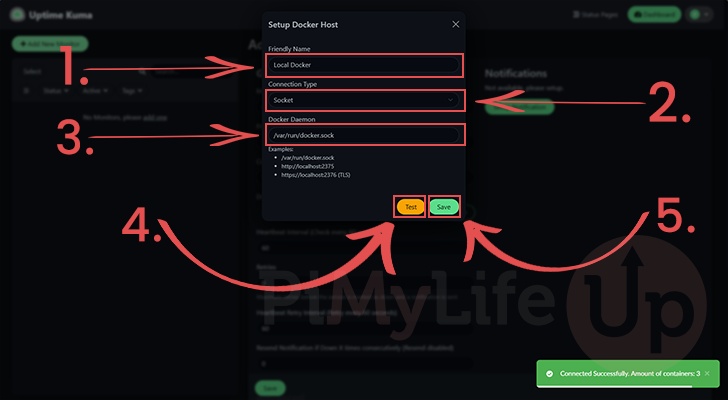
13. Uptime Kuma needs to know the Docker host to talk to. This allows it to support multiple Docker hosts outside your local system.
- The first option you need to set is the friendly name. Since this is the local Docker instance you are communicating with, we recommend something like “
Local Docker“. - Next, ensure that the connection type is set to “
Socket“. - Your next step is to set the “
Docker Daemon“, since we are setting this up for the local Docker instance we will want to set this to “/var/run/docker.sock“.
Once you have filled out the details of your Docker instance, click the “Test” button (4.) to ensure everything is working.
If you see a “Connected Successfully” message then you can click the “Save” button (5.).
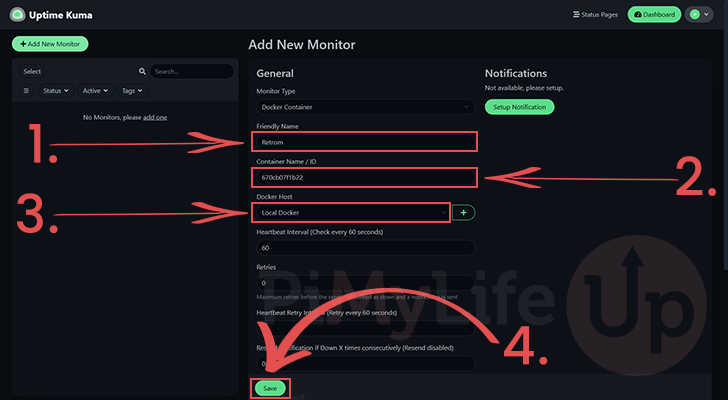
14. Now that you have connected your Uptime Kuma instance to your Docker host, we can now add a container to monitor.
The first step is to set a friendly name for the container you want to track (1.). This is how you will see this monitor within the Uptime Kuma interface.
Next, use the “Container Name/ID” to specify either the name of your container, or the ID of the container (2.). If you don’t know these values, follow our guide on listing Docker containers.
Finally, ensure that the “Docker Host” option has been set to the Docker host we set up in the last step (3.)
Once everything has been set, click the “Save” button (4.).
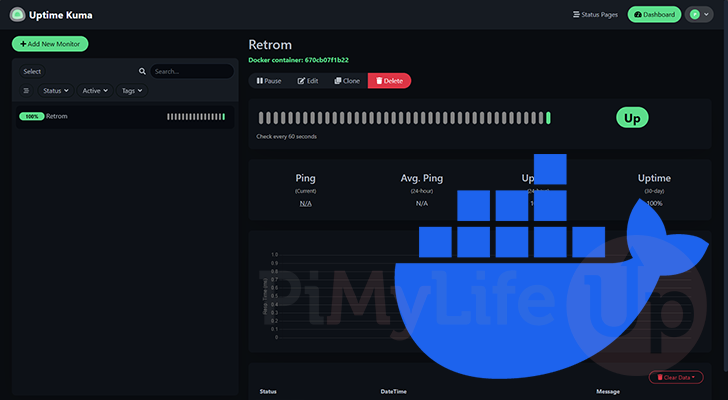
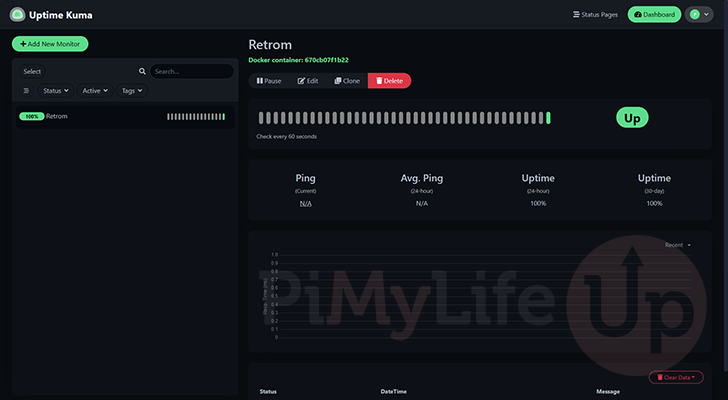
15. You should now have successfully added your first monitor to your Docker based Uptime Kuma instance.
The software will immediately begin to poll your service and check whether it is running or not.
Updating to the Latest Version of Uptime Kuma using Docker
One of the neatest things about using Docker to run Uptime Kuma is that updating to the latest version is relatively simple.
These next few steps will walk you through how to update to the latest release with a few short commands.
1. Your first step is to change to the directory where we wrote the Compose file for Uptime Kuma.
Assuming you followed our tutorial, you can change it to the correct folder by using the following command.
cd /opt/stacks/uptimekumaCopy2. We can now get Docker to pull the latest version of Uptime Kuma to your machine by using the following command.
This will grab the latest image for Uptime Kuma, but it will not upgrade your already running container.
docker compose pullCopy3. To get Docker to update your already running container, all you need to do is use the command below.,
With this command, Docker will detect the new image we just downloaded, stop the running container, and restart it with the new image.
docker compose up -dCopyConclusion
Hopefully, by this stage in the tutorial, you will have successfully gotten Uptime Kuma running on your machine using Docker.
Uptime Kuma is one of the best open-source uptime monitoring tools that you can use. It is packed with a ton of features and is incredibly easy to set up and get running.
Please feel free to comment below if you have had any issues setting up this software.
If you found this tutorial helpful, we recommend you check out our many other Docker projects. There is a huge number of software you can easily self-host.