In this tutorial, we go through the steps to setting up Uptime Kuma in Home Assistant.
Uptime Kuma is an open-source monitoring software that can check whether your devices and services are reachable or unreachable. It also has other features, such as certificate monitoring. It is an excellent alternative to the many paid options available.
Installing Uptime Kuma within Home Assistant allows you to keep it up to date and monitored by Home Assistant’s watchdog. However, the downside is that it may go offline if the Home Assistant device has problems. If you like to keep your software on a single device, this tutorial is for you.
This tutorial will cover installing the Uptime Kuma add-on and a brief walkthrough on configuring the software to monitor services. If you require more information on some features and functionality, please check out the Uptime Kuma Wiki on GitHub.
Installing the Uptime Kuma Add-on
The steps to installing Uptime Kuma within Home Assistant are relatively straightforward.
It is essential to use a version of Home Assistant that supports add-ons, such as Supervised or the Operating System. Otherwise, you must run Uptime Kuma on another device, such as a Raspberry Pi.
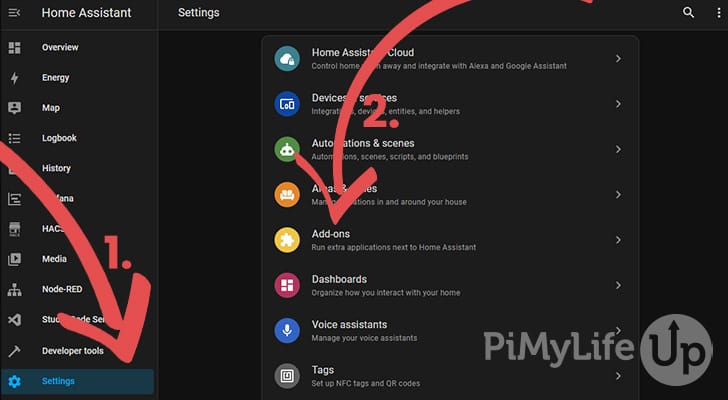
1. Go to the Settings page (1) and click Add-ons (2).
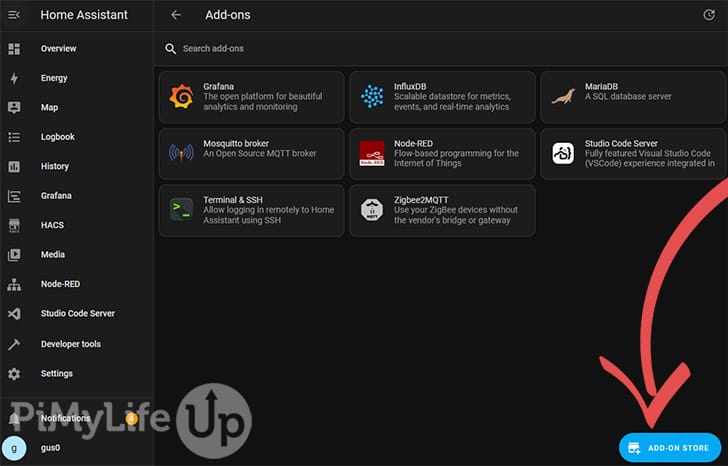
2. On the Add-ons page, click the ADD-ON STORE button in the bottom right corner.
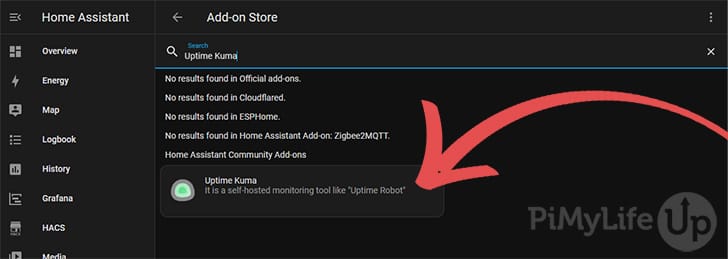
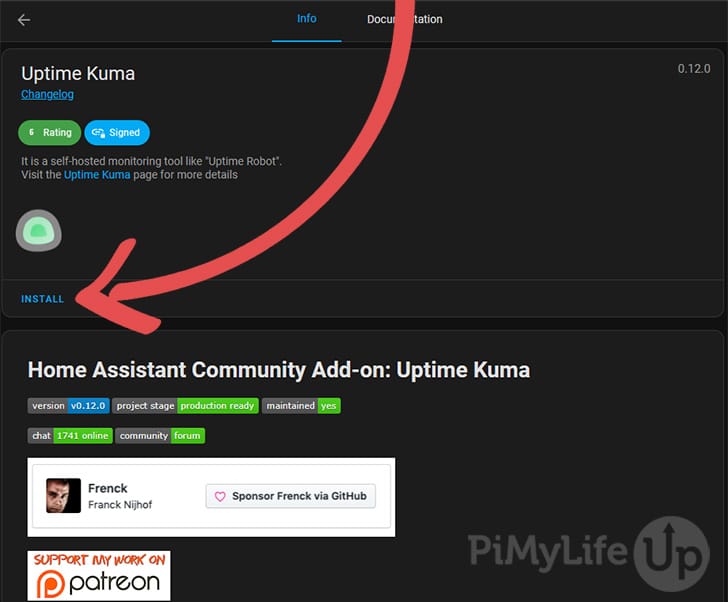
3. Next, search for Uptime Kuma or find it within the list of add-ons. It will be within the Home Assistant Community Add-ons section.
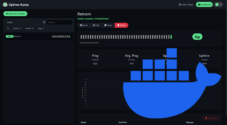
4. The screen will display information on the Uptime Kuma add-on. Once you are ready, click on Install.
It may take a few minutes to install the add-on to Home Assistant.
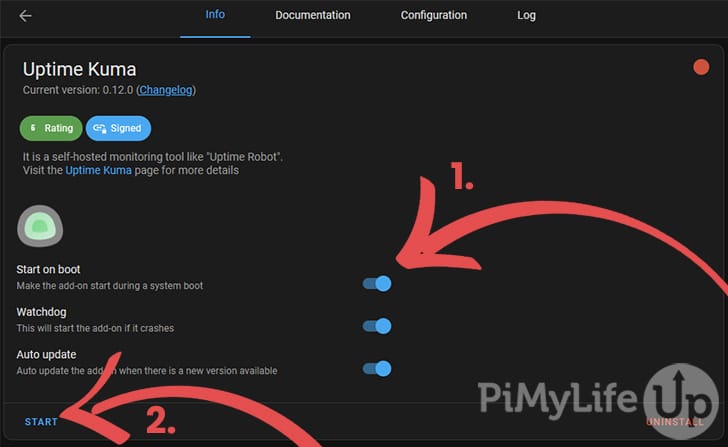
5. Once the add-on is installed, you should see a few options. I recommend turning on all three options: start on boot, watchdog, and auto update (1).
Once you’re ready, click on START (2).
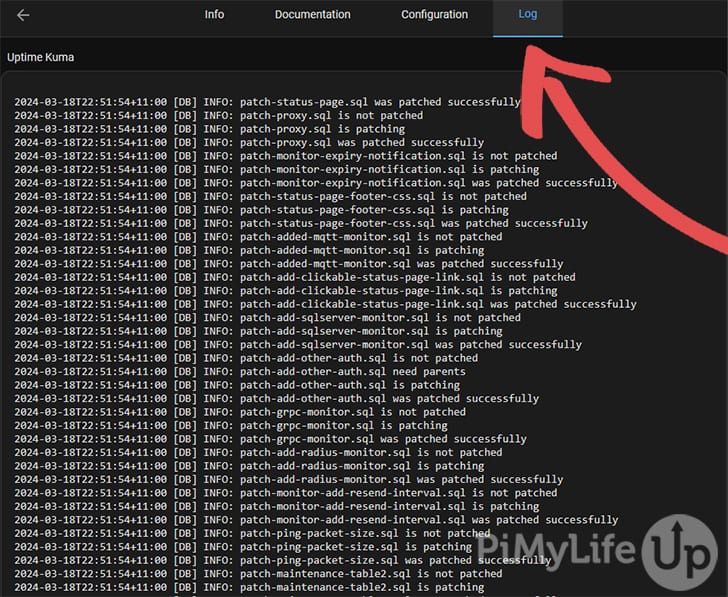
6. Check the logs to ensure that the add-on has started correctly. If you see errors, you may need to investigate further to ensure the add-on will work as intended.
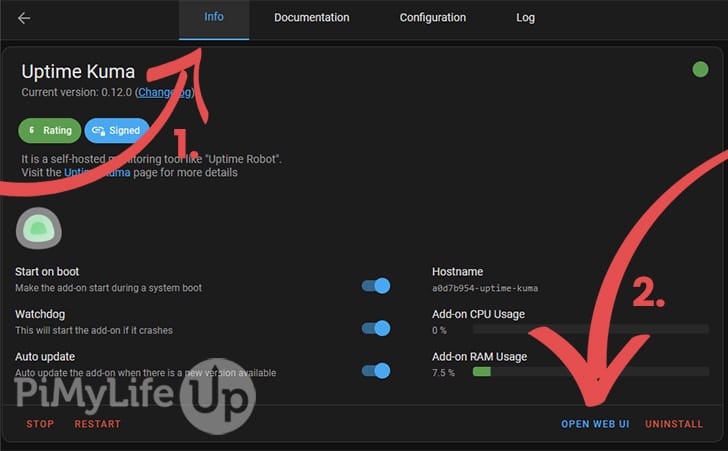
7. Navigate to the info tab (1) and click on OPEN WEB UI (2).
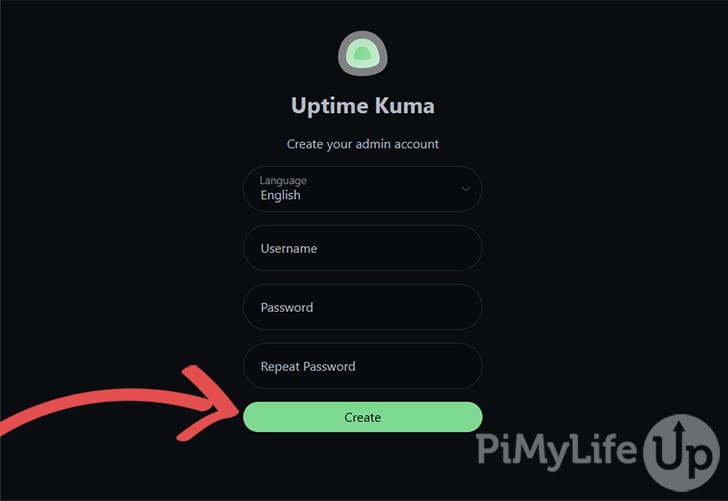
8. You should now see a screen prompting you to create an Admin account. Fill out the relevant details and click on the Create button.
Configuring Uptime Kuma
Configuring Uptime Kuma is a relatively easy task, but that can heavily depend on how many services you need to monitor. In this section, we will touch on some of the basics of configuring everything correctly.
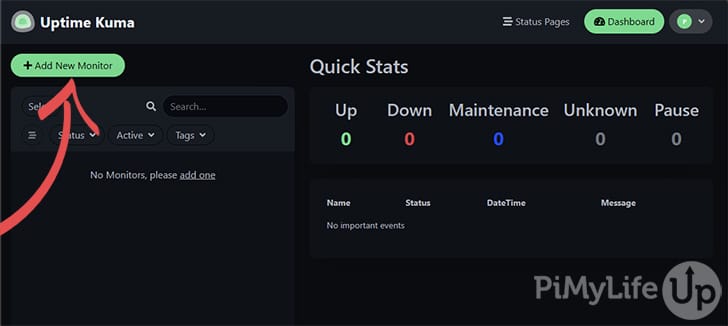
1. The first screen you will see is the main dashboard. This dashboard will be empty for now as we do not have any monitors set up.
To add a new monitor, click the Add New Monitor button.
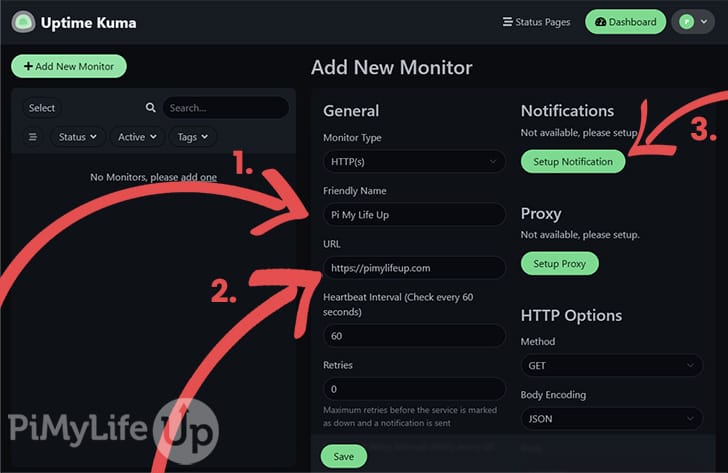
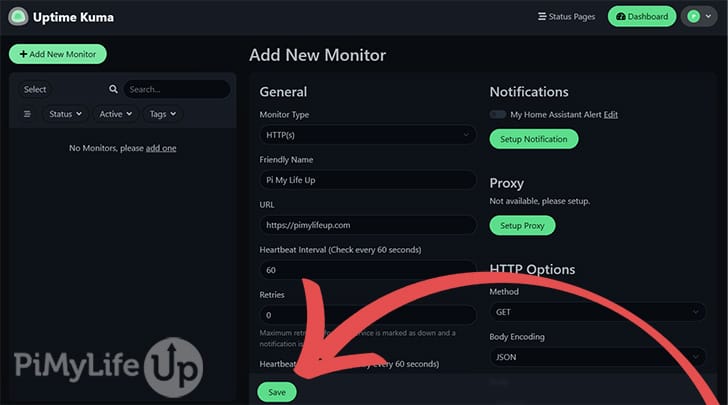
2. On the Add New Monitor screen, you can fill out all the details for your monitor. Depending on the service you are configuring, you may need to alter some of the default settings.
For a simple monitor, you should only need to enter a “Friendly Name” (1) and URL (2). If you want notifications, you will need to click on Setup Notification (3).
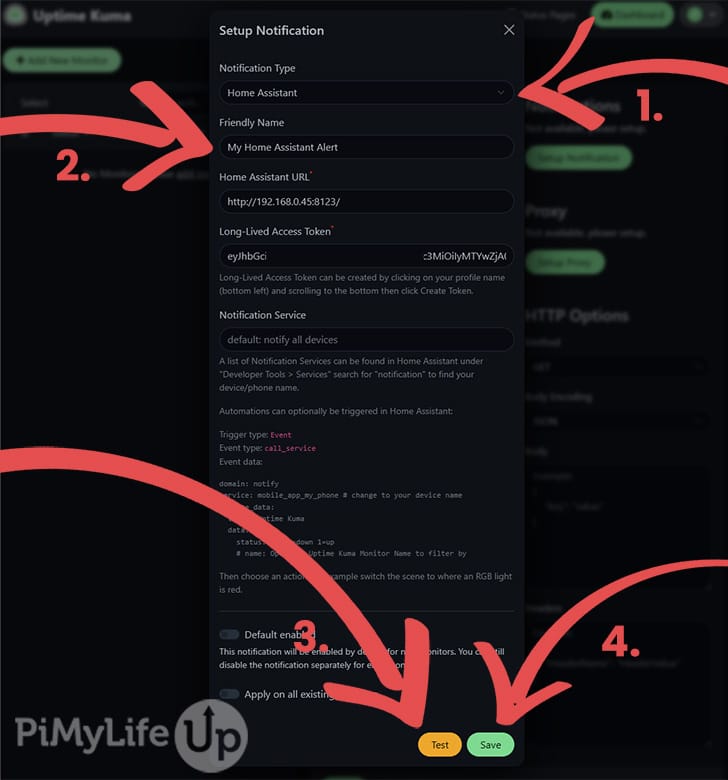
3. The notifications button will bring up a screen with various options.
- Notification Type (1): This is the service to which you wish to send the notification to. There are many options to pick from, so choose the one that best suits your needs.
- Friendly Name (2): This is the notification’s identifier, so you can easily find it within Uptime Kuma.
- The rest of the options will vary depending on your chosen notification type. For example, Home Assistant will require a URL and a Long-Lived Access Token.
The example below uses Home Assistant to send notifications, but you can use any preferred service.
Once you’re ready, click the Test button (3) to ensure Uptime Kuma can communicate with the service you set up. Once everything is confirmed, click on the Save button (4).
4. Once you’re happy with all the monitor settings, click the Save button.
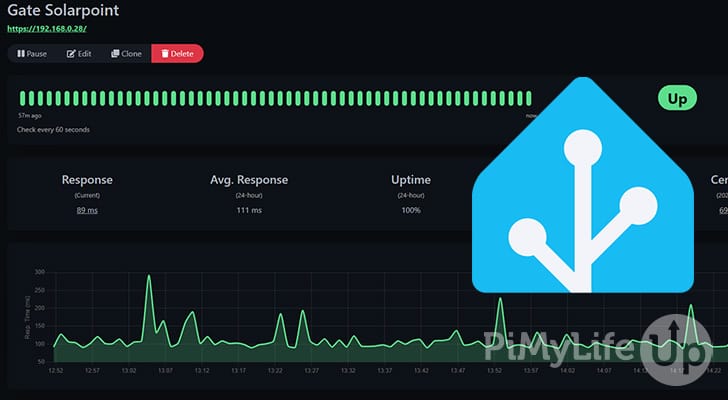
5. You should now see the monitor in the dashboard. The system will provide all the statistics of the monitored URL. This data includes response time, uptime, certificate expiry, status code, and more.

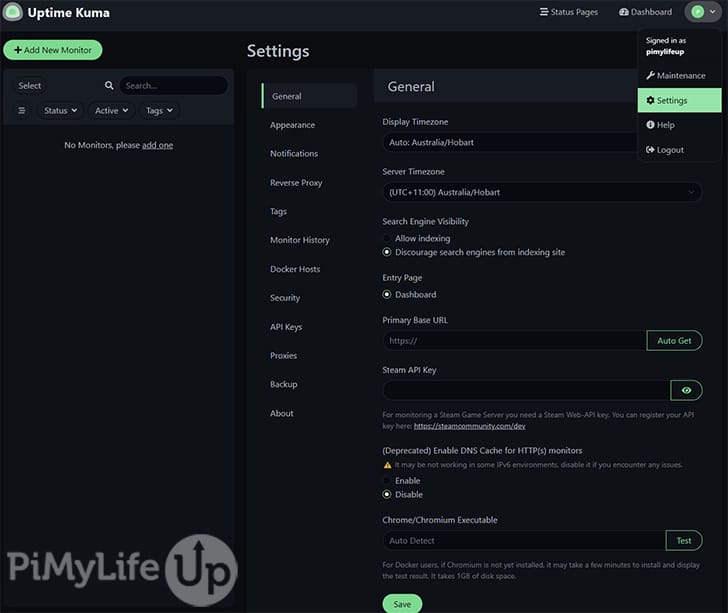
6. If you need to alter Uptime Kuma’s general settings, simply click on the drop-down menu in the top right corner and click Settings. This will bring up a range of different settings that you can adjust to fit your needs.
7. Uptime Kuma should now be installed and configured to monitor your services. I use it to monitor the wide range of devices that Home Assistant collects data from and actively uses for home automation.
Conclusion
By now, you should have set up Uptime Kuma within Home Assistant and have it checking that all our services and devices are up and running.
If you are looking to continually build your smart home, I recommend checking out some of our other Home Assistant tutorials. We are always working on adding more, so if you have any suggestions, be sure to let us know.
If you have any questions or feedback, please leave a comment below.