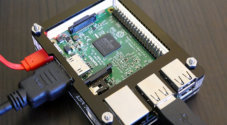
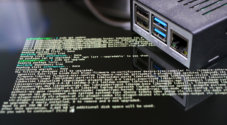
In this guide, we will take you through all the steps on you how to upgrade Raspbian Wheezy to Raspbian Jessie.

There are a fair few steps to the upgrade process as a fair bit changed between Raspbian Wheezy and Jessie.
We will walk you through the upgrade process and all the steps that you will need to do to get your Raspbian installation upgraded to Raspbian Jessie successfully.
This upgrade guide includes the process of installing the new packages that come with the default installation of Raspbian Jessie.
Before starting the upgrade process you should first backup your SD Card just in case this process fails.
You should also do this using a keyboard and mouse with direct access to your Raspberry Pi and not over SSH,
The Upgrade Process to Raspbian Jessie
1. To begin updating Raspbian, we need first to edit the /etc/apt/sources.list file to point to Raspbian Jessie instead of Raspbian Wheezy.
We can begin by running the following command in the terminal.
sudo nano /etc/apt/sources.list2. Within the sources.list file, find and replace all occurrences of Wheezy with Jessie as we have below.
Find
deb http://mirrordirector.raspbian.org/raspbian/ wheezy main contrib non-free rpiReplace
deb http://mirrordirector.raspbian.org/raspbian/ jessie main contrib non-free rpiOnce you have finished replacing Wheezy with Jessie you can save and quit by pressing Ctrl + X then Y and finally pressing Enter.
3. Next we have to also modify the /etc/apt/sources.list.d/raspi.list file. This file acts as another way of adding entries to the sources.list file we modified in the previous step.
Run the following command to begin editing the file.
sudo nano /etc/apt/sources.list.d/raspi.list4. Within the raspi.list file we need to modify the first entry changing Wheezy to Jessie. We also need to add “ui” to the end of the line, just like we have shown in our example below.
Find
deb http://archive.raspberrypi.org/debian wheezy mainReplace
deb http://archive.raspberrypi.org/debian jessie main uiOnce you have finished modifying the file you can save and quit by pressing Ctrl + X then Y and finally pressing Enter.
5. Before we begin the update process itself, we need to create a directory. This directory is a requirement for some of the new and updated packages that are in Raspbian Jessie.
Type the following command into the Raspberry Pi’s terminal to create this directory.
mkdir /home/pi/.config/autostart6. We can now finally begin the update process, and please be prepared for this to take a couple of hours as it is quite an extensive process.
Run the following two commands on your Raspberry Pi to begin the update process.
sudo apt-get update
sudo apt-get dist-upgrade -y
First Boot after Updating to Raspbian Jessie
1. Once the update process has finished, you need to reboot your Raspberry Pi.
The easiest way to do this is to type the following command into the terminal.
sudo reboot2. Upon rebooting, you will see several messages about “Calling CRDA to update world regulatory domain“. There is no need to worry about these messages, wait until they stop appearing before proceeding.
3. Once the reboot has completed, you can now log in to your Raspberry Pi using your Pi user.
If the GUI fails to start up automatically, you can type the following command into the terminal.
startxBe prepared to have to wait several minutes for the desktop to launch. This delay is due to the desktop software updating required files as it loads.
The screen will go black during this time, but be patient and wait for it to finish.
Adding the New Packages from Raspbian Jessie
Now we can move on with adding the new packages that were introduced with a fresh installation of Raspbian Jessie.
You can simply run the following command to install these packages.
sudo apt-get install rc-gui libreoffice libreoffice-gtk alacarte bluej greenfoot claws-mailThe packages that you are installing, in order of their name are as follows.
- The new GUI version of the raspi-config command line tool.
- LibreOffice and its GTK extension.
- The Alacarte menu editor.
- Both the BlueJ and Greenfoot Java IDE’s.
- Finally we also install the ClawsMail email client.
If you are aiming for a slimmer installation, you can install rc-gui and alacarte. Alternatively, skip the installation of the packages altogether if you have no intention of using the GUI.
Fixing the GUI for use with Raspbian Jessie
Finally, we need to fix various issues with the upgrade to the newer Raspbian Jessie UI.
To do this, we will be issuing numerous commands, and we will explain what each command does underneath it.
To proceed, type in each of the commands shown below.
cp –ax /usr/share/themes/PiX ~/.themesThis command makes Raspbian load in the new version of the PiX GTK theme.
sudo rm /etc/xdg/autostart/clipit-startup.desktopYou will find that this command stops the ClipIt application from automatically starting up on boot.
sudo rm /etc/xdg/autostart/wicd-tray.desktopThis command will stop the Wicd network manager from starting up on boot automatically.
sudo rm –rf /var/lib/menu-xdgThe command above removes a massive list of shortcuts that are automatically placed in the “Other” menu. Most users don’t need to deal with these.
sudo raspi-config nonint do_boot_behaviour_new B4Using this command will tell your Raspberry Pi to boot to desktop and to automatically log in as the default pi user.
sudo rm /usr/share/applications/obconf.desktopThis command hides the menu shortcut for the Openbox Window Manager. We no longer need to link to this as the brand new Appearance Settings application has replaced its functionality.
You should now have a Raspberry Pi that has successfully upgraded from Raspbian Wheezy to Raspbian Jessie.
With any luck, your upgrade would have occurred without running into any issues. If you continue onward, you can then upgrade your Raspberry Pi from Raspbian Jessie to Stretch.


