In this tutorial, we will show you how to set up a WebDAV server on Ubuntu using the Apache web server.
WebDAV stands for web-distributed authoring and versioning. It is an extension of HTTP aimed at allowing users to manage and edit files over the HTTP and HTTPS protocols.
Many operating systems feature support for connecting to a WebDAV share. The key advantage of usign something like WebDAV over other protocols such as FTP is that it runs over HTTP and HTTPS. Running over these protocols can make it more friendly with dealing with restrictive firewalls and networks
A WebDAV share can often be mounted easily as a drive on most operating systems, including Windows.
To set up WebDAV access on your Ubuntu system, you will need to use the Apache web server. In particular, we will be relying on the “dav” and “dav_fs” modules that are available for Apache.
These two modules make setting up WebDAV on Ubuntu a process that you can complete in a few short minutes.


Installing and Running a WebDAV Server on Ubuntu
Over the following sections, we will walk you through installing Apache and setting it up to act as a WebDAV server on your Ubuntu system.
Getting your System Ready
1. Before we can set up WebDAV on Ubuntu, we must ensure that we have an updated operating system to run off of.
You can update the package list cache and upgrade any out-of-date packages by running the following two commands in the terminal.
sudo apt update
sudo apt upgrade -yCopy
2. Once your device is updated, please follow our guide on installing Apache on Ubuntu.
To set up a WebDAV server, we will be relying completely on Apache and its modules.
https://pimylifeup.com/ubuntu-install-apache/Enabling the WebDAV Modules for Apache on Ubuntu
3. Before we can reconfigure our Apache virtual host to host a WebDAV server on Ubuntu, we must enable the “dav_fs” module.
This module is what adds the DAV functionality to our web server. You can enable this module by using the following command in the terminal.
sudo a2enmod dav_fsCopyIf everything has worked correctly, you should see a message like the following. Since we enabled “dav_fs” the “dav” module should also be automatically enabled.
Considering dependency dav for dav_fs:
Enabling module dav.
Enabling module dav_fs.
4. Any changes to Apache’s available modules require the web server to be restarted. You can restart this web server by using the command below.
sudo systemctl restart apache2CopyCreating a Directory to Be Accessible using WebDAV
5. Your next step is to create a directory where your WebDAV files and folders will be located.
For this example, we will create a directory at “/var/www/webdav” using the mkdir command.
sudo mkdir -p /var/www/webdavCopy6. Since Apache will handle everything, the folder and any files within it must be owned by the “www-data” user.
You can change ownership of the example directory by running the following command.
sudo chown -R www-data:www-data /var/www/webdavCopy7. Your next step is to give the directory “755” permissions using the chmod command.
Essentially this gives the “www-data” user full permissions on the directory, and everyone else can only read and execute the files in this directory.
sudo chmod 755 /var/www/webdavCopyCreating a Storage Location for the Lock File
8. To help the WebDAV server work properly on your Ubuntu system, we must create a directory where we will store the lock file as well as the authentication file.
The lock file is super crucial as it helps prevent a race condition from corrupting files on your system.
For this guide, we will store all of this data within the “/opt/apache/webdav” directory.
sudo mkdir -p /opt/apache/webdavCopy9. Again, since Apache needs access to the files we will be placing in this file, use the following command to change ownership to the “www-data” user.
sudo chown www-data:www-data /opt/apache/webdavCopyAdding WebDAV to your Apache Virtual Host
10. We are now finally at the point where we can begin to configure and set up WebDAV on your Ubuntu system. For this step, you will need to edit your Apache virtual host.
For our example, we will edit the default Apache configuration using the following command.
sudo nano /etc/apache2/sites-enabled/000-default.confCopy11. You must add the following line at the top of this file.
This line defines where the DAV module should store the lock database. This database keeps track of what files are currently being written to and locks them so multiple users can’t edit one file at once.
DavLockDB /opt/apache/webdav/DavLockCopy12. Next, find the virtual host block within this code. We will want to add the lines that turn on the WebDAV functionality in this block.
If you use HTTP, your block probably starts with what we have shown below.
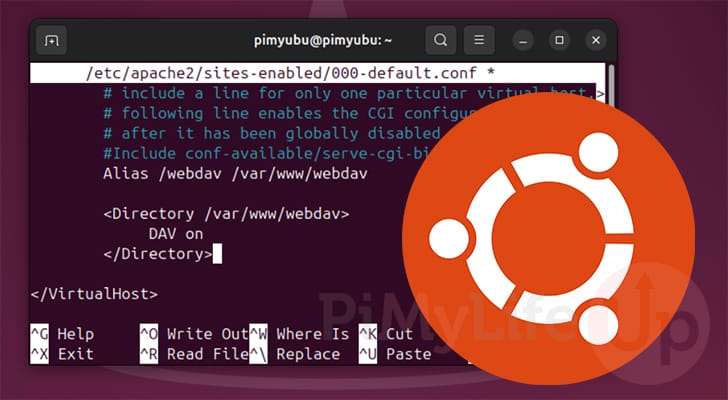
<VirtualHost *:80>CopyAt the bottom of this block and above the “</VirtualHost>” line. Add the following.
With these lines, we define an “Alias” so when you access “/webdav” the contents of the directory “/var/www/webdav” will processed. We then define a directory section so when “/var/www/webdav” is accessed, we turn on DA .
Alias /webdav /var/www/webdav

<Directory /var/www/webdav>
    DAV On
</Directory>Copy
13. With these changes made, you can save and quit by pressing CTRL + X, Y, and then ENTER.
14. For all of these changes to take effect, you will be required to restart the Apache web server.
sudo systemctl restart apache2CopyTesting your Ubuntu WebDAV Setup
15. Now that WebDAV is running on Ubuntu, let us test out this new setup.
So that we see a file when we connect to the file server, we will create an empty file called “pimylifeup.txt” using the touch command.
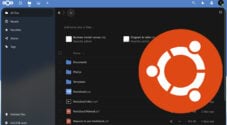
sudo touch /var/www/webdav/pimylifeup.txtCopy16. How you connect to your WebDAV server will differ depending on the operating system you are running. For this example, we are connecting from a Windows PC.
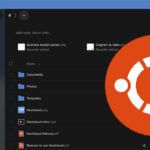
On Windows, you can use the “Add a network location” option and add the address as we have shown below.
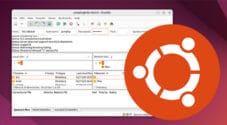
http://<IPORDOMAIN>/webdav17. Below you can see how we have connected to WebDAV running off of our Ubuntu system.
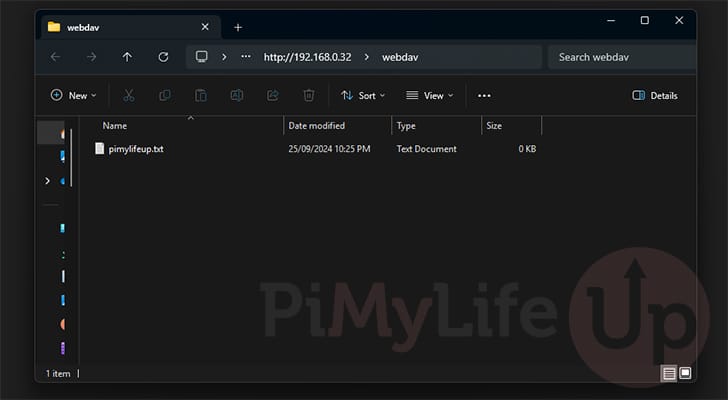
Securing your WebDAV Server with Authentication on Ubuntu
18. Having a file server where anyone can access and write anything is obviously a bad idea. Luckily, we can easily lock down WebDAV using Apache’s Auth module.
The first part of this process is to ensure the “auth_digest” module is enabled by running the following command.
sudo a2enmod auth_digestCopy19. The next step is to use the “htdigest” command to create a new password authentication file and create a new user within that file.
When typing out this command, replace “<USERNAME>” with your chosen username. The “webdav” part of this command is the realm under which this user is being created.
sudo htdigest -c /opt/apache/webdav/.password webdav <USERNAME>CopyAfter running the command above, you will be prompted to enter a password for your new user.
New password:
Re-type new password:
20. Ensure that the “www-data” user owns the new “.password” file we created by using the command below..
sudo chown www-data:www-data /opt/apache/webdav/.passwordCopy21. With an authentication file now generated, our next step is to edit the same web host file that we did earlier.
Again for this example, we will be modifying the default Apache configuration file by running the following command.
sudo nano /etc/apache2/sites-enabled/000-default.confCopy22. Within this file, find the “DAV On” option we added earlier in this guide.
DAV OnCopyBelow the above line, add the following lines. These lines basically tell Apache that it should use the password file we generated earlier for anyone accessing our Ubuntu WebDAV server.
  AuthType Digest
  AuthName "webdav"
  AuthUserFile /opt/apache/webdav/.password
  Require valid-userCopy
23. Once you have added the Auth lines, you can save and quit by pressing CTRL + X, Y, and then ENTER.
24. For all of your changes to take effect, you will want to restart the Apache2 service by using the command below.
sudo systemctl restart apache2Copy25. ou should now be forced to log in to your user every time you access your new WebDAV share.
If you had a previous connection, you should find that it is no longer working.
Conclusion
Hopefully, by this point in the guide, you will have successfully learned how you can set up a WebDAV server on your Ubuntu system.
WebDAV is a neat framework that allows you to easily create and modify documents over the HTTP and HTTPS protocols. Many operating systems have built-in support for this protocol, making it a decent option, especially for those who have to deal with restrictive firewalls.
Please feel free to comment below if you have had any issues with getting WebDAV to work on your system.
If you like this Ubuntu guide, we highly recommend checking out our many other Ubuntu tutorials.