In this tutorial, you will learn how to use the terminal to mount a network drive on the Ubuntu operating system.
A network drive is a great way of sharing the contents of a drive between multiple drives. It is an important part of any NAS and is something we use quite heavily to share files for work projects.
Ubuntu itself can also be set up to act like a NAS by sharing the drives you have attached to your system. Of course, there are plenty of other better solutions if you are just primarily sharing files.
Mounting a network drive using either Samba or NFS is relatively straightforward on Ubuntu, and we will be walking you through that process in this guide.
Out of the box, Ubuntu supports mapping network drives to your Ubuntu system right out of the box for those using NFS. If you have a network drive that is using SMB/Samba, then there is an additional package you will need to install.
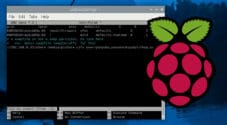
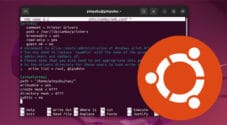
Mounting a Network Drive on Ubuntu Using the Terminal
This section will walk you through mounting a network drive on the Ubuntu operating system using the terminal.
These steps are great for those running a headless version of Ubuntu or simply prefer to use the terminal.
You can mount a network drive on Ubuntu using the terminal in two ways. The first method is only temporary and will revert once your system reboots. The second method involves modifying the fstab file so that your network share will be mounted every time your system boots.
Preparing your System to Mount Network Shares
1. We will need to install some additional software before we can use the terminal to mount a network drive on Ubuntu.
Before you do that, you should update your package list cache and upgrade any out-of-date packages using the following two commands.
sudo apt update
sudo apt upgrade -yCopy
2. With the package list cache updated, we will want to install the “cifs-utils” package. This package provides additional tools that we can use to mount a network share using the SMB protocol.
If you are dealing with a share that uses NFS, you can skip this step entirely.
sudo apt install cifs-utilsCopy3. The next main thing you will need is a location where you intend to mount the network drive to your Ubuntu system.
For this example, we will use the mkdir command to create a folder within the “/media” directory called “networkshare“.
sudo mkdir -p /media/networkshareCopyTemporarily Mounting a Network Drive on Ubuntu
Over the following sections, we will be showing you the various ways that you can temporarily mount a network drive on Ubuntu while using the terminal.
Remember that since these mounting options are temporary, they won’t be present if your system restarts.
Temporarily Mount an Unprotected Network Share
1. Once you have a mount directory lined up, the only other thing you will need to know is the connection details for your network drive.
For its most basic usage, you can use the following command to mount a network share at a given location.
<NETWORKSHARE>: This is the network location where your drive sits at. Typically, this address will start with a double slash. The operating system will usually negotiate and work out the protocol to use to connect to the drive.<MOUNTLOCATION>: With this placeholder, you will want to specify the directory where you want your network share to be mounted to locally on your Ubuntu machine.
mount //<NETWORKSHARE> <MOUNTLOCATION>CopyFor example, if we wanted to mount a network drive that is sitting at “//192.168.0.23/work” to the folder “/media/networkshare” all we would need to do is run the following command.
sudo mount //192.168.0.23/work /media/networkshareCopyMount a Network Drive to Ubuntu using a Username and Password
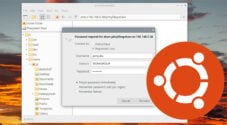
2. Of course, not all network drives that you mount will be unprotected. Many operating systems and NASs require the user to set a username and password.
Luckily, this same mount command we are using allows you to specify a username and password while mounting the network share to your Ubuntu system.
The change we need to make here is to utilize the “-o” option. This option allows us to specify options for mounting a network drive.
The two options we will use are “user” and “password“. When they are typed out in the example below, you will notice that each additional mounting option is separated by a single comma (,).
<USERNAME>: Here you will specify the user you want to use when mounting this network share.<PASSWORD>: Replace this placeholder with the password to use for your given user.
sudo mount -o user=<USERNAME>,password=<PASSWORD> //<NETWORKSHARE> <MOUNTLOCATION>CopyFor this example, we will mount a network drive at “//192.168.0.23/work” to the local folder “/media/networkshare“. We connect to this drive using the username “pimyubu” and the password “pimylifeup“.
sudo mount -o user=pimyubu,password=pimylifeup //192.168.0.23/work /media/networkshareCopySetting the Local User ID When Mounting a Network Share to Ubuntu
3. One of the most common issues you will deal with when mounting network drives on a Linux system like Ubuntu is permission ones.
One of the easiest ways to work around this is to specify the user to whom you want this mounted drive to belong. By default, the root user will own a mounted drive.
Luckily, our mount command allows us to specify the user and group under which a drive should be mounted. All you need to do is know the ID of the user and the group you want to own the mounted network drive.
To specify these, you will use the “uid” and “gid” options like we have shown below.
<USERID>: Replace this with the ID of the user you want to own this mounted drive. An example of a valid value here is “1000“.<GROUPID>: You can also set the group ID by setting the “gid” option. Unless you want to use a different group, this value is often the same as your user id.
sudo mount -o uid=<USERID>,gid=<GROUPID> //<NETWORKSHARE> <MOUNTLOCATION>CopyLike any mounting option, this can also be combined alongside setting a username and password, as shown in the example below.
sudo mount -o user=<USERNAME>,password=<PASSWORD>,uid=<USERID>,gid=<GROUPID> //<NETWORKSHARE> <MOUNTLOCATION>CopyFor example, if we wanted to mount a network share and have it owned by our user with the ID 1000, we would use a command similar to the one shown below.
sudo mount -o user=pimyubu,password=pimylifeup,uid=1000,gid=1000 //192.168.0.23/work /media/networkshareCopyChecking on your Temporarily Mounted Network Drive
4. The easiest way to verify that you have successfully mounted a network share onto your system is to use the ls command.
This command lists the contents of the specified folder. With this, you can see whether all the mounted files exist as they should.
ls <MOUNTLOCATION>CopyFor example, to verify we successfully mounted a network share at “/media/networkshare“, we would run the command below.
ls /media/networkshareCopyUnmounting a Temporary Network Share on Ubuntu
5. If you are done using a mounted network drive on Ubuntu, you are probably wondering how you can disconnect it without restarting your device.
This is a scenario where the umount command comes into play. You only need to specify the directory where you mounted your network share on your system.
sudo umount <MOUNTLOCATION>For example, unmounting our network drive is as simple as using the following command.
sudo umountCopyPermanently Mounting your Network Share on Ubuntu
If you want a network drive to be mounted every time your Ubuntu system starts, you will need to make some modifications to the “fstab” file.
The operating system uses the ” fstab ” file to specify disk information and where to mount them. Editing this file has a few risks, such as bricking your system. Be careful with any changes you make, and you should be fine.
Before proceeding, there are a few pieces of information that you must know.
<NETWORKSHARE>: The network location of the drive that you want to mount to your Ubuntu system.
For example, if we had our drive at “192.168.0.32/share” we would use a value like “//192.168.0.32/share“.<MOUNTLOCATION>: This is the directory to which you will be mounting the network share. This must be a full path.
For example, the directory “/media/networkshare” would be a valid path.<FILESYSTEM>: This is crucial, as fstab needs to be as fast as possible to not slow your system booting down you need to know whether the network drive you are mounting to Ubuntu is using the NFS or CIFS protocol.cifs: Use this value if you are using SMB/Samba to share your network drive. If you are sharing your drive from a Windows device, this is the protocol you will want to specify.nfs: NFS is a popular protocol for mounting network drives on Ubuntu thanks to its performance. Typically, Linux based systems like Unraid will offer this as a protocol you can use.
<OPTIONS>: The final placeholder we will be using in these examples is where you will specify each option you want to use to mount the network drive onto Ubuntu.
Each option that you use here should be separated by a comm (,) and not a space.user=<USERNAME>: Not all network drives you mount will be public. If you are using a passworded share you will want to use this option to set the user.password=<PASSWORD>: Use this option to set the password to use when mounting your network share.uid=<USERID>: By default your mounted network drive will be set to use the root user. Use this otpion to specify the user ID of the user who should own the files on the attached drive.gid=<GROUPID>: Like above, but you can also set the ID for the group that should own the mounted drive.
Modifying the fstab File to Mount a Network Drive
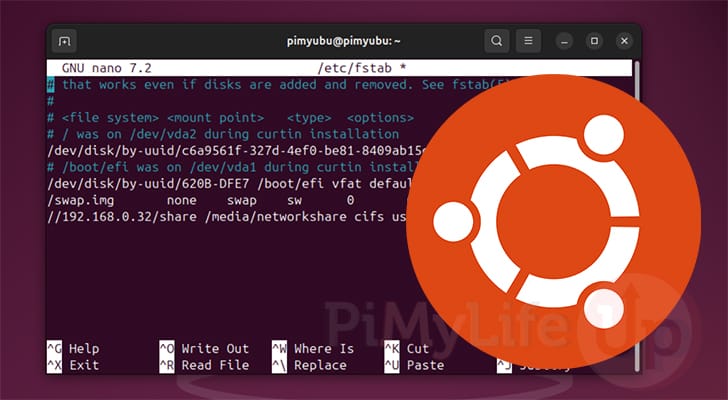
1. To permanently mount a network drive on Ubuntu, you must modify the “fstab” file.
You can begin editing this file by using the following command within the terminal. We are using Nano as it is one of the easier text editors to get started with.
sudo nano /etc/fstabCopy2. To the end of this file, you will want to add the following line. Replacing the placeholders with values for your network drive.
<NETWORKSHARE> <MOUNTLOCATION> <FILESYSTEM> <OPTIONS> 0 0For example, if we were to mount the network drive we used as an example earlier in this guide, we would end up adding the following line to the file.
Here you can see our network share, the mount location, the “cifs” filesystem since we are mounting a network share, and the additional options we require, such as the username and password to connect.
//192.168.0.32/share /media/networkshare cifs user=pimyubu,password=pimylifeup,uid=1000,gid=1000 0 03. Once you have typed out your fstab file and verified everything has been typed correctly, save and quit by pressing CTRL + X, Y, and then ENTER.
Verifying you Mounted your Network Drive on Ubuntu
4. As we made changes to the fstab file,f your system will want you to restart the system daemon.
You can restart this daemon by running the following command within the terminal.
sudo systemctl daemon-reloadCopy5. Rather than having to restart your Ubuntu machine for the network drive to mount, you can mount it immediately by simply using the “mount” command followed by the mount location.
sudo mount <MOUNTPATH>CopyFor example, to mount a drive we have set to the “/media/networkshare” directory, all we need to do is run the command below.
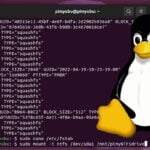
sudo mount /media/networkshareCopy6. You can verify that you have successfully mounted a network drive on your Ubuntu system by using the “df” command.
This command will list each attached file system and the information about it. This includes file systems that have been attached over a network.
df -hCopyBelow is an example of how your network drive may appear when output by this command.
Filesystem      Size  Used Avail Use% Mounted on
//192.168.0.32/share    55T   22T   34T  40% /media/networkshare
Conclusion
By this point in the tutorial, you should have successfully mounted a network drive on your Ubuntu system.
There are a few different ways that you can mount a network drive. We have shown you two of those methods. One was to temporarily mount the network share using the mount command, and the other was to modify the fstab file.
Please feel free to comment below if you have any questions about mounting a network drive on Ubuntu.
If you liked this Ubuntu guide, we recommend exploring our many other Ubuntu tutorials.