In this tutorial, we will be showing you how to mount NTFS partitions on a Linux-based operating system.
NTFS is a proprietary filesystem that Microsoft developed for the Windows system to replace the older FAT filesystem.
Linux support for the NTFS filesystem relies on drivers that re-implement the filesystem. Fortunately, two different ways exist to handle this.
The first way of implementing NTFS on Linux is the NTFS3 drivers. This driver is available to anyone running a system that uses a Kernel version newer than 5.15. This driver is fully functional and requires no extra work from the end user to utilize.
The second way to add support for this filesystem is to install the userland NTFS-3G driver on Linux. This userland driver is helpful for those running an older version of the Linux Kernel. It allows reading and writing to NTFS partitions like NTFS3 but isn’t as performance friendly.
Within this guide, we will show you how to install the NTFS-3G driver on a Linux system and how to mount an NTFS partition.
Installing the NTFS-3G Userland Driver on Linux
This section will show you how to install the NTFS-3G fuse driver on a Linux device. This driver is a re-implementation of NTFS, so Linux will be able to talk with those drives.
You do not need to follow this section if you are running a Linux operating system with a kernel newer than 5.15. In that case, your system will have the NTFS3 driver, which is implemented in newer versions of the kernel.
Verifying you need to Install the NTFS Driver
Before we mindlessly install the NTFS-3G driver, we should check the kernel version the operating system utilizes.
This process is straightforward as you can check the kernel version using a single command.
If you use an operating system with a desktop GUI, you can often bring up the desktop interface by pressing CTRL + ALT + T on most systems.
1. Before we proceed any further, let us use the uname command to check the kernel version.
By running the following command, you will get the current kernel version installed on your system.
uname -rCopy2. You should get a result like the one we have shown below. This result indicates to you the version of your kernel.
If this version starts with “5.15” or is a higher version number, you can skip this section as you already have the NTFS3 driver.
5.4.0-121-genericInstalling the NTFS-3G Driver on Linux
Now that we know you are running an older version of the Linux kernel, we can safely move on to installing the NTFS-3G driver.
Depending on what operating system you are using, these steps will differ slightly as the package manager you use will be different.
Systems Using the apt Package Manager (Debian, Ubuntu, Raspberry Pi OS, Linux Mint, etc.)
1. Before installing NTFS-3G on a system using the apt package manager, we should first run a package update.
Updating the package list ensures we will download the latest version of this NTFS driver for Linux.
sudo apt updateCopy2. Once the package update has been completed, we can install both FUSE and NTFS-3G by using the following command in the terminal.
sudo apt install fuse ntfs-3gCopySystems Using the dnf Package Manager (RHEL 8+, Fedora 22+, CentOS 8+, etc)
1. Installing FUSE and NTFS-3G is very simple with the dnf package manager.
All you need to do to install both of these software pieces is use the command below.
sudo dnf install fuse ntfs-3gCopySystems Using the yum Package Manager (RHEL7, Fedora 21 and , CentOS 7, etc)
1. If you are using an older operating system that still utilizes the yum package manager then you can use the command below to install both FUSE and NTFS-3G to your Linux system.
Please note that newer versions of Fedora, RHEL, and CentOS have moved on to using dnf over yum.
sudo yum install fuse ntfs-3gCopySystems Using the pacman Package Manager (Arch Linux, Manjaro)
1. The final package manager, that we cover in this section is pacman. Pacman is the package manager used primarily by Arch Linux.
You can use the following command to install both FUSE and NTFS-3G to your Arch Linux system.
sudo pacman -S fuse ntfs-3gCopyUsing the “-S” option, we are telling pacman to download these packages and any of their dependencies.
Mounting an NTFS Partition on Linux
This section will show how you can mount an NTFS partition on a Linux-based system such as Ubuntu.
With the NTFS drivers installed, your system should now automatically mount any NTFS formatted partition. However, this isn’t always the case, and sometimes you might want to mount an NTFS partition to a specific location.
There will be two different ways that we will be showing you for mounting an NTFS drive. One involves adding a new entry to the “fstab” file. The other involves temporarily mounting the drive using the “mount” command.
Mounting an NTFS Partition using the fstab File
Let us start by exploring how you can modify the fstab file to mount an NTFS formatted partition on Linux. This solution is helpful if you want a partition to be mounted to the same location.
Please note that before proceeding, modifying the fstab file can be risky. Editing the wrong data within this file can potentially brick your system.
Getting your Drive Unique Identifier
1. To add any new filesystem to the fstab file, we need to get its unique identifier. This unique identifier will never change, making it a crucial value to utilize.
We can retrieve this ID by running the following command within the terminal.
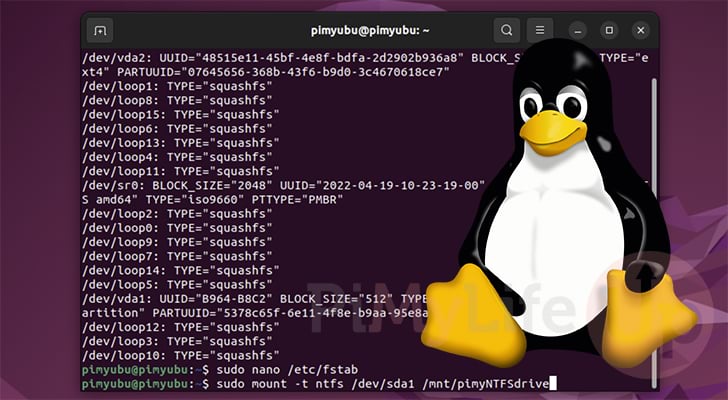
sudo blkidCopyPlease note that if you have multiple partitions, they will all show up when using this command.
2. With the result below, you can see several partitions were listed by this command. We can see that the first two belong to the system as they are labeled “boot” and “rootfs”.
However, our third partition is the one we just mounted. We can see its TYPE as “ntfs” and its LABEL is “PiMyLifeUp” which is what we set when we formatted it on Windows.
/dev/mmcblk0p1: LABEL_FATBOOT="boot" LABEL="boot" UUID="29F5-65C4" BLOCK_SIZE="512" TYPE="vfat" PARTUUID="ac6d8e7f-
/dev/mmcblk0p2: LABEL="rootfs" UUID="cbe4d267-24de-4402-9a4b-1413a1da5eb8" BLOCK_SIZE="4096" TYPE="ext4" PARTUUID="
/dev/sda1: LABEL="PiMyLifeUp" BLOCK_SIZE="512" UUID="6450B00B50AFE252" TYPE="ntfs" PARTUUID="f05f2731-01"
3. Once you have found your partition, you will want to note the “UUID” value.
In our case, the NTFS partition we want to mount on our Linux system is the following.
6450B00B50AFE252Getting the User and Group ID
4. The other piece of information that we require to set up an NTFS partition through fstab on Linux is the ID for your user and group.
Let us start by getting the current user ID using the following command.
id -uCopy5. Next, we can grab the group ID using a similar command to the one we used in the previous step.
These IDs are used to map the NTFS partition to a particular user.
id -gCopyModifying the fstab File
6. Now that we have the drive UUID, we can move on to modifying the fstab file to mount the NTFS drive to our Linux system.
You can begin editing this file by running the following command. Remember to be careful when editing this file.
sudo nano /etc/fstabCopy7. To the bottom of this file, you will need to enter a line similar to the one below.
When typing in this line you will need to replace the “[UUID]” text with the UUID you got in the previous section.
Next, you will want to specify where exactly you want this partition to be mounted. When you have a location in mind, replace “[MOUNTDIR]” with the full directory path.
Lastly, replace “USERID” with the ID you got in step 4, and then replace “GROUPID” with the ID you got in step 5.
UUID="[UUID]" [MOUNTDIR] ntfs uid=USERID,gid=GROUPID,dmask=022,fmask=133 0 0An example of a valid fstab line for an NTFS drive on Linux is the following. We are mounting an NTFS partition with the UUID “6450B00B50AFE252” to the directory “/mnt/example“.
Additionally, our user ID was 1000, and our group ID was 1000.
UUID="6450B00B50AFE252" /mnt/example ntfs uid=1000,gid=1000,dmask=022,fmask=133 0 08. Once you have finished making these changes to your fstab file, you can save and quit.
Since we are using nano, you can save and quit by pressing CTRL + X, then Y, followed by the ENTER key.
Mounting your NTFS Partition using fstab on Linux
9. At this stage, you are now ready to mount your NTFS drive to your Linux system.
All you need to do now is run the following command within the terminal. This command will cause the system to mount all drives specified within the fstab file.
sudo mount -aCopy8. If everything worked correctly, you should now be able to access the data within your NTFS drive in your chosen directory.
Using the mount Command to Mount an NTFS Partition on Linux
An alternative way to mount an NTFS partition on Linux is to utilize the “mount” command. The downside of using this command is that the next time you plug in the drive, it won’t be automatically mounted to the same location.
1. To start, we need to know the device name that Linux assigned our drive. This value will change depending on how many drives are plugged into the system.
To get a list of drives and their partitions, we will utilize the “lsblk” command, as shown below.
sudo lsblkCopy2. After running the above command, you should see something like what we have shown below.
With this result, you can see that we have a drive that was mounted to “sda“, but the NTFS partition itself is mounted at “sda1” (/dev/sda1).
NAME        MAJ:MIN RM  SIZE RO TYPE MOUNTPOINT
sda           8:0    1 28.7G  0 disk
└─sda1        8:1    1 28.7G  0 part
mmcblk0     179:0    0 29.7G  0 disk
├─mmcblk0p1 179:1    0  256M  0 part /boot
└─mmcblk0p2 179:2    0 29.5G  0 part /
3. Now that we know the partition mount name, we can mount it by utilizing the “mount” command in the terminal.
With this command, replace “DEVNAME” with the name you got for your partition in the previous step. Additionally, replace “MOUNTPATH” with the full path to where you want the drive mounted.
sudo mount -t ntfs /dev/DEVNAME /MOUNTPATHCopyFor example, if we wanted to mount our NTFS partition on Linux with the name “sda1” to the path “/mnt/example/” we would use the following command.
sudo mount -t ntfs /dev/sda1 /mnt/example/Copy4. You should hopefully have your NTFS formatted drive mounted to your Linux device.
You can verify this by simply using the ls command to list the drive’s contents. For example, the following command would list the root contents of a drive mounted at “/mnt/example/“.
ls /mnt/example/CopyConclusion
Hopefully, by this point, you will understand how you can utilize NTFS formatted partitions on a Linux system.
While modern Linux operating systems will come with inbuilt support for the NTFS format, older systems will still have to rely on the NTFS-3G userland drive.
Both options still work surprisingly well, even if you have a bit of performance loss when reading and writing to an NTFS drive with the NTFS-3G driver.
Please comment below if you have any issues with getting the NTFS format to work on a Linux-based system.
We have plenty of other Linux tutorials that are well worth checking out. Additionally, we have guides covering many of the commands available to you on a Linux system.