This tutorial will show you how to perform an internet speed test on Ubuntu using the terminal.
When your internet feels like it isn’t working as fast as it should be, one of the best ways to check this is by using an internet speed test provider.
If you had access to your Ubuntu devices desktop, you could do this speed test from within a web browser. However, if you only had access to the terminal, you would need a different method.
Over the following steps, we will show you how to download and install the Ookla Speedtest CLI to Ubuntu.
This command line interface will allow us to quickly perform an internet speed test on our Ubuntu device to various servers.
The following steps will all be completed within Ubuntu’s terminal. You can open the terminal on the desktop interface by pressing CTRL + ALT + T.
Installing the Ookla Speedtest CLI to Ubuntu
This section will show you how to install the internet speed test CLI from Ookla to your Ubuntu device.
This requires a few extra steps as we will need to add the official Ookla repository to our device. However, one of the most significant advantages of using the official repository is that you will always have the latest software version.
Installing Any Required Additional Software
1. Before we can proceed with installing the internet speed test software to Ubuntu, we must first perform a package list update.
You can update the package manager’s package list by using the following command within the terminal.
sudo apt updateCopyAn out-of-date package list can cause issues when your system tries to download a no longer available version or from a mirror that no longer exists.
2. Once the update completes, we can install the four packages we require to use the Speedtest CLI on Ubuntu. We will explain what these packages are for shortly.
sudo apt install curl gnupg1 lsb-release apt-transport-httpsCopy3. With the required packages installed, let us quickly go over each of them so you can understand why they are needed.
curl– We utilize the curl package to grab the GPG key for the Ookla Speedtest repository to our Ubuntu device.
A GPG key is a way of authenticating packages coming from the repository we are downloading them from.gnupg1– Ookla’s internet speed test interface uses thegnpug1package. It allows a secure connection between Ubuntu and the speedtest.net network of servers.lsb-release– Thelsb-releasepackage allows us to grab certain information about the installed system. In our case, we are using it to grab the release name.
By grabbing the release name, we can make a later command simpler.apt-transport-https– The final package we install is for allowing the apt package manager to communicate with repositories running under the “HTTPS” protocol.
New versions of Ubuntu have this software pre-installed. However, we are keeping it here for those running an older release.
Adding the Official Ookla Repository
4. With all the packages required now in place, we can add the official Ookla repository. This repository is where Ubuntu will be downloading and installing the internet speed test software.
Our first task is to download the GPG key for the Ookla repository by using the following command in the terminal. We will save this key within the “/usr/share/keyrings/” directory.
curl -L https://packagecloud.io/ookla/speedtest-cli/gpgkey | gpg --dearmor | sudo tee /usr/share/keyrings/speedtestcli-archive-keyring.gpg >/dev/null
Copy
5. Now that we have saved the GPG key to the correct location, we can add the Ookla repository to the sources list.
We can easily install the speed test software to Ubuntu by adding the repository to the list.
To add this repository to the sources, use the command below the terminal.
echo "deb [signed-by=/usr/share/keyrings/speedtestcli-archive-keyring.gpg] https://packagecloud.io/ookla/speedtest-cli/ubuntu/ $(lsb_release -cs) main" | sudo tee  /etc/apt/sources.list.d/speedtest.list
Copy
This command is where we put the “lsb_release” software to use. It allows us to grab the current release name of Ubuntu and fill in the correct name that the repository requires.
6. After any change has been made to the package sources lists, we must first perform another package list update.
You can perform this update by typing the following command into the terminal.
sudo apt updateCopyIf we don’t perform an update, apt will be unaware that it can now download the Speedtest package to our Ubuntu device.
Installing the Speed Test CLI to Ubuntu
7. We can finally install the key piece of this entire guide. That key is the Speed test CLI. This tool will allow us to measure our Ubuntu device’s internet speed.
To install the CLI, we only need to use the command below in the terminal.
sudo apt install speedtestCopyRunning an Internet Speed Test on Ubuntu
Now that we have successfully installed the Internet speed test software on Ubuntu, we can put it to use. This section will show you the straightforward steps to using the Speedtest CLI.
1. All you need to do to test your internet speed on Ubuntu now is to utilize the following command within the terminal.
speedtestCopy2. When you first run Ookla’s speed test tool, you must agree to its terms and conditions before continuing. You will only have to accept these terms once.
If you agree to all their listed terms and conditions, type in “YES“, and press the ENTER key to continue.
==============================================================================

You may only use this Speedtest software and information generated
from it for personal, non-commercial use, through a command line
interface on a personal computer. Your use of this software is subject
to the End User License Agreement, Terms of Use and Privacy Policy at
these URLs:

        https://www.speedtest.net/about/eula
        https://www.speedtest.net/about/terms
        https://www.speedtest.net/about/privacy

==============================================================================

Do you accept the license? [type YES to accept]: YES
If you live in a European country, you may also be required to accept additional terms for GDPR.
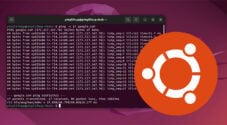
3. Ubuntu will begin to immediately test the speed of your internet against Speedtest.net’s servers. The time this process takes will depend on your internet connection’s speed.
The progress of the test is displayed within the terminal for all three tests that are performed.
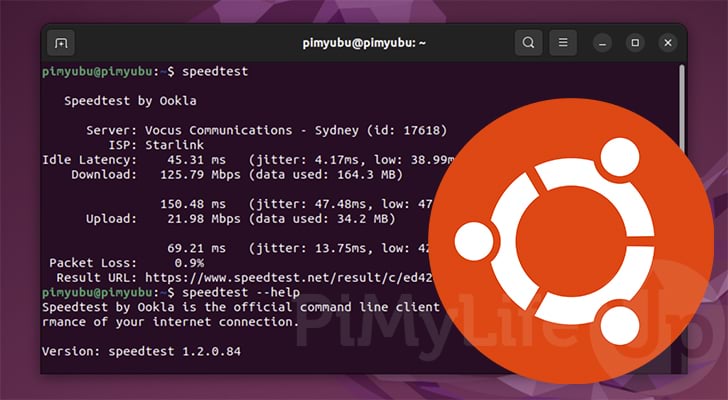
4. Once the test completes, you will end up with a result that looks like the one we have shown below.
From these results, you can see the download and upload speed of your Ubuntu device’s internet. You can also see other helpful information, such as idle latency and packet loss.
   Speedtest by Ookla

      Server: i3D.net - Sydney (id: 21567)
         ISP: Starlink
Idle Latency:    59.97 ms   (jitter: 10.94ms, low: 55.81ms, high: 99.15ms)
    Download:   114.50 Mbps (data used: 125.1 MB)
                137.35 ms   (jitter: 45.05ms, low: 59.44ms, high: 509.56ms)
      Upload:    22.17 Mbps (data used: 28.5 MB)
                106.08 ms   (jitter: 30.34ms, low: 49.57ms, high: 588.11ms)
 Packet Loss:     0.5%
  Result URL: https://www.speedtest.net/result/c/3797b3da-xxxx-xxxx-xxxx-xxxxxxxxxxxx
Conclusion
At this point in the tutorial, you should now have the Ookla speed test CLI installed on your device.
This command line interface allows you to test the internet speed of your Ubuntu devices network easily. Additionally, you can test this against multiple servers to check how your internet performs when connecting to certain locations.
Please comment below if you have questions about performing an internet speed test on Ubuntu.
Be sure to check out our many other Ubuntu tutorials to learn more about this system. We also have many guides that cover how to use numerous Linux commands.