In this tutorial, we will show you two different ways to install FFmpeg on your Ubuntu system.

FFmpeg is an incredibly powerful set of libraries and programs for handling video, audio, and many other multimedia formats.
This software library has become a core part of numerous pieces of software, including YouTube video processing, the video player VLC, and many more. It boasts support for almost every known audio and video codec and even offers hardware decoding and encoding support.
Using this library on your Ubuntu device, you can process your videos or audio. For example, you can use FFmpeg to transcode a video from one format to another. It can even extract the audio layer from videos.
While we won’t cover how to use this software library, you will find it incredibly useful if you ever have to deal with video or audio files.


Installing FFmpeg from the Ubuntu Repository
The easiest way to install the FFmpeg library on your Ubuntu machine is to use the default Ubuntu repository. One downside of this method is that you are stuck with whatever version was shipped in your repository. The older version of Ubuntu you are running, the older version of FFmpeg you will end up with.
If you want to run newer versions of FFmpeg, you will likely want to compile it from the source code instead. However, for most basic use cases, you will probably be fine using the apt repository version.
1. We will need to run an update Before we can install FFmpeg from the default Ubuntu package repository.
This update will populate the package list cache with the latest software versions it can install. It will also update where these packages can be downloaded.
sudo apt updateCopy2. Once the package list cache has been updated, installing FFmpeg on Ubuntu is as simple as running the following command.
FFmpeg shouldn’t take very long to install from the repository as it is relatively small.
sudo apt install ffmpegCopy3. You can verify that FFmpeg has now been installed to your system by simply getting it to output it’s version.
To get FFmpeg to output its version, use “ffmpeg” followed by the “-version” option, as shown below.
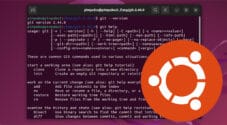
ffmpeg --versionCopyBelow you can see that we installed FFmpeg version 6.1.1 from the Ubuntu repository.
ffmpeg version 6.1.1-3ubuntu5 Copyright (c) 2000-2023 the FFmpeg developers
  built with gcc 13 (Ubuntu 13.2.0-23ubuntu3)
Compiling FFmpeg from Source Code on Ubuntu
The one key downside to using the version of FFmpeg From the Ubuntu repository is that it is often quite out of date. Typically, a new release of FFmpeg is released every three months.
While many users will be completely fine with an older release of these tools, it is often missing key features, especially if you are dealing with a relatively new video or audio format.
We can work around this by compiling the FFmpeg source code ourselves. The following steps were tested on both Ubuntu 22.04 and Ubuntu 24.04. They should continue to work for newer releases of Ubuntu but may not work on older ones.
Preparing your Ubuntu System
1. Before we begin compiling and installing FFmpeg on our Ubuntu system, we should ensure that we have an updated base to work from.
You can update the package list cache and upgrade any out-of-date packages by running the following command.
sudo apt update
sudo apt upgrade -yCopy
2. We now need to install all the required packages to compile FFmpeg. There are a few of these, so the installation process can take a few minutes on a slow internet connection.
These packages give us all the libraries we require and the software that will compile the code itself.
sudo apt install -y git wget autoconf automake build-essential cmake git-core libass-dev libfreetype6-dev libgnutls28-dev libmp3lame-dev libsdl2-dev libtool libva-dev libvdpau-dev libvorbis-dev libxcb1-dev libxcb-shm0-dev libxcb-xfixes0-dev meson ninja-build pkg-config texinfo wget yasm zlib1g-dev libunistring-dev nasm libx264-dev libx265-dev libvpx-dev libfdk-aac-dev libopus-dev libaom-dev libdav1d-dev libnuma-dev libsvtav1-dev libsvtav1enc-dev libsvtav1dec-devCopy3. Once you have installed all the required packages, we must make two directories using the mkdir command. The first is where we will download the FFmpeg source code. The second is where the compiled binaries will sit.
mkdir ~/ffmpeg_sources ~/binCopyDownloading and Extracting the FFmpeg Source Code
4. Before downloading and extracting the FFmpeg source code on our Ubuntu system, we should change to the directory we just created.
You can change to the “ffmpeg_sources” folder using the cd command.
cd ~/ffmpeg_sourcesCopy5. Once we are in the right place, we can use wget to download the latest FFmpeg code snapshot to our directory.
The snapshot variant includes the latest features, fixes, and potentially more bugs.
wget -O ffmpeg-snapshot.tar.bz2 https://ffmpeg.org/releases/ffmpeg-snapshot.tar.bz2Copy6. Once the code has been downloaded, you can extract the contents of the archive by using the tar command, as shown below.
tar xjvf ffmpeg-snapshot.tar.bz2CopyCompiling FFmpeg on Ubuntu
7. With the FFmpeg source code now extracted, change to its directory using the command below.
cd ffmpegCopy8. Before compiling FFmpeg on Ubuntu, we will need to configure the source code using the “./configure” script.
With this script, we are passing in various details, such as where to compile FFmpeg on our machine. We are also enabling the various libraries that we installed earlier. These libraries significantly increase the functionality of FFmpeg.
PATH="$HOME/bin:$PATH" PKG_CONFIG_PATH="$HOME/ffmpeg_build/lib/pkgconfig" ./configure \
  --prefix="$HOME/ffmpeg_build" \
  --pkg-config-flags="--static" \
  --extra-cflags="-I$HOME/ffmpeg_build/include" \
  --extra-ldflags="-L$HOME/ffmpeg_build/lib" \
  --extra-libs="-lpthread -lm" \
  --ld="g++" \
  --bindir="$HOME/bin" \
  --enable-gpl \
  --enable-gnutls \
  --enable-libaom \
  --enable-libass \
  --enable-libfdk-aac \
  --enable-libfreetype \
  --enable-libmp3lame \
  --enable-libopus \
  --enable-libsvtav1 \
  --enable-libdav1d \
  --enable-libvorbis \
  --enable-libvpx \
  --enable-libx264 \
  --enable-libx265 \
  --enable-nonfreeCopy
9. Once the configuration process has completed, you can get “make” to compile the source code by using the following command.
PATH="$HOME/bin:$PATH" makeCopyInstalling your Compiled Version of FFmpeg to Ubuntu
11. After FFmpeg has finished compiling, you can install it on to your Ubuntu system by running the following command.
This command will save the compiled versions to the “bin” directory located in your home directory.
make installCopy12. To get your current session to recognize your new version of FFmpeg, you may need to use the source command to re-read the profile file.
Alternatively, you can always just restart your Ubuntu system.
source ~/.profileCopy13. We can verify that FFmpeg was installed successfully by getting it to output
ffmpeg -versionCopyYou will notice from this result that the version number looks different. This is because we are using a snapshot, so the value shown is that snapshot version.
ffmpeg version N-116300-g350146a1ea Copyright (c) 2000-2024 the FFmpeg developers
built with gcc 11 (Ubuntu 11.4.0-1ubuntu1~22.04)
Installing FFmpeg Globally
14. The way we installed FFmpeg on Ubuntu makes it only available to your current user. There are a few reasons why we do this. One, it won’t conflict with any other versions of FFmpeg you might have on your system. Second, it becomes super easy to uninstall if you ever want to stop using it.
If you want other users to access this compiled version, you will want to copy it to your “/usr/local/bin/” directory.
sudo cp -r ~/bin/* /usr/local/bin/Copy15. To ensure that all of your users and programs can access this compiled version of FFmpeg, you may want to restart your Ubuntu system by running the following command.
sudo rebootCopyConclusion
At this point in the tutorial, you should now have successfully installed or compiled FFmpeg on your Ubuntu system.
FFmpeg is a super powerful library that makes dealing with video and audio files a breeze.
Please feel free to post a comment below if you have had any issues installing this set of tools.
If you liked this guide, we highly recommend that you browse through the many Ubuntu guides that we have on offer.