In this quick guide, we will show you several ways to install Git on the Ubuntu operating system.
Git is one of the most popular ways to implement version control. Version control is crucial in software development, allowing you to track changes and create separate branches easily.
Using this version control software is really simple and makes coding much easier, especially when trying to track problems introduced through code changes.
These days, you don’t need to self-host your own Git server, as places like GitHub offer compelling free plans.
There are two ways of installing Git on Ubuntu that we will cover in this guide.
- The first is to install the version control software from the Ubuntu package repository.
- The second is to compile Git from the source code. This ensures you get the latest release.
Installing Git from the Ubuntu Repository
In this section, we will show the easiest method for installing Git on the Ubuntu system. That method is to install this version control software directly from the Ubuntu package repository.
The only real disadvantage of using the repository is that you are stuck with the version of Git that it provides. For most users, this will not be a problem.
Checking if Git is Already Installed
1. Depending on the version of Ubuntu you are running, Git may be pre-installed. For example, Ubuntu Server typically comes with Git installed.
Checking whether Git has been installed on your system is as simple as getting it to print out the version.
git --versionCopyIf you have Git pre-installed on your system, you should get a version printed to the terminal, as shown below.
In our case, we can see that we are currently Git “2.34.1” on our device.
git version 2.34.1Installing Git
2. If you don’t have Git installed, don’t worry. Installing this version control software is straightforward.
Your first step is to update the package list cache using the following terminal command.
sudo apt updateCopy3. After updating the package list cache, we can install Git to our Ubuntu system by running the command below.
The version of Git that is installed will vary depending on what Ubuntu release you are running. The newer release of Ubuntu, the newer the version of Git that will be installed.
sudo apt install gitCopy4. You can verify that Git has been successfully installed by getting it to print out its version.
To get Git to output its version, you must use the “--version” option.
git --versionCopyBelow, you can see that using Ubuntu 22.04, the version installed was “2.24.1“.
git version 2.34.1Compiling Git from the Source Code on Ubuntu
If you need a newer version of Git than the one provided by the Ubuntu repository, you can choose to compile it from the source code.
This process is simpler than you think. All we need to do is install a few packages and run a couple of commands. Of course, this isn’t as simple as installing the Git package from the repository, but it will ensure you get the latest release.
Preparing your Ubuntu System
1. Before we can compile Git on Ubuntu, we need to ensure that we have all the required packages.
Your first step is to update the package list cache by running the following command. An updated cache ensures that you don’t download an older release or encounter mirror not available errors.
sudo apt updateCopy2. Once the package list cache has been updated, we can install the required packages to compile Git.
You can install all required packages by using the command below.
sudo apt install wget libz-dev libssl-dev libcurl4-gnutls-dev libexpat1-dev gettext cmake gcc autoconfCopy3. With all the required packages, our next step is to create a directory to download and compile Git.
You can create this temporary directory by running the command below.
sudo mkdir /tmpCopy4. With the temporary directory created, we can change into it using the cd command.
cd /tmpCopyDownloading the Git Source Code
5. this point, we can download the source code for Git to our Ubuntu device. Using the following command, we can download the code for Git 2.44.0 to our device.
You can check for the latest releases by checking out the tagged releases on the GitHub page for the Git project. You will want to swap the link in the command below with the “.tar.gz” release you get from the GitHub page.
sudo wget https://github.com/git/git/archive/refs/tags/v2.44.0.tar.gz -O git.tar.gzCopy6. Now that we have downloaded the latest Git release to Ubuntu, we can use the tar tool to extract the source code.
You can extract the archive we downloaded previously by using the command below.
sudo tar -xvf git.tar.gzCopyCompiling Git on Ubuntu
7. To compile Git on Ubuntu we will need to change into the directory where we extracted the code previously.
We can change into this directory using the cd command below.
cd git-*Copy8. Now that we are in the correct place, our first step is to get the make file to generate the configuration script.
This configuration script will prepare Git to compile properly on your Ubuntu system. You can generate the script using the following command.
sudo make configure Copy9. With the configure script now generated, we can use it to prepare the Git code for our system.
We pass in the “--prefix” option so that we can dictate where this new version of Git will be installed.
sudo ./configure --prefix=/usr/localCopy10. As we have now successfully configured the Git code for compilation, all we need to do is compile it.
You can use make to compile the Git source code by running the command below.
sudo make allCopy11. Once Git finishes compiling on your Ubuntu system, all you need to do to install it is to use the following command within the terminal.
Using this command will copy everything where our system expects it. Additionally, it will use the prefix that we set earlier in this guide.
sudo make installCopyTesting your New Git Version
12. To test whether Ubuntu is using our newly compiled version of Git, we will spin up a new terminal session.
You can swap your current session to a new one by simply using “exec” followed by “bash“.
exec bashCopy13. You can now get Git to print out its version by simply using “git” followed by the “--version” option.
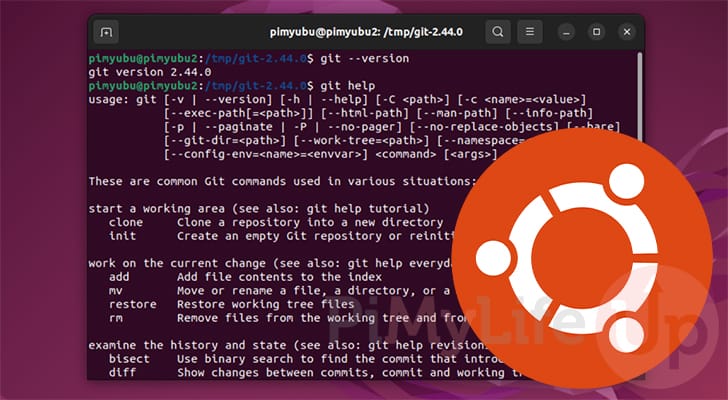
git --versionCopyIf everything has worked properly, you should see that the version of Git on your Ubuntu system reflects the version you compiled.
git version 2.44.0Conclusion
Throughout this guide, we have shown you a couple of ways to install Git on your system. One is fast and easy, and the other gets you the latest available version.
Git is the go-to version control solution for almost every code project. While there are alternatives like SVN, they have reduced significantly in popularity over the years.
Please comment below if you have encountered any issues with getting Git installed on Ubuntu.
If you found this tutorial to be helpful, we recommend investigating our many other Ubuntu tutorials.