This quick guide will show you how to increase or decrease the VRAM allocation on a Steam Deck.
Steam Deck operates with a unified memory system, meaning the CPU and GPU use the same 16GB of RAM.
A portion of this RAM is allocated at bootup to the Steam Deck’s GPU and becomes its VRAM. By default, the Steam Deck reserves 1GB of this memory as its frame buffer. It is also to burst out of this, but the rest of the RAM is prioritized for the CPU.
By increasing the amount of VRAM allocated on the Steam Deck, you can significantly improve the performance and smoothness of some games. This is because the operating system doesn’t have to scramble to increase the VRAM when it’s under pressure.
However, be warned that increasing the VRAM can actually cause issues with some games. For example, Red Dead Redemption 2 runs significantly worse when you have changed the VRAM from the default 1GB allocation.
It doesn’t hurt to give this a try if you are having performance issues with a game, as it is relatively simple to undo. You simply need to reverse the steps in this guide.
Within the Steam Deck’s BIOS, you will find that the VRAM allocation is called UMA Frame Buffer Size. The UMA Frame Buffer Size and VRAM are the same thing on the Steam Deck. UMA stands for Uniform Memory Access and is the system for sharing the memory between the CPU and GPU,
If you want some additional performance tweaks for your Steam Deck, check out CryoUtilities.
Increasing the VRAM on the Steam Deck
Over the following sections, we will walk you through increasing the VRAM on your Steam Deck.
Be warned that by increasing the UMA Frame Buffer Size, you are effectively reducing the RAM available for the CPU. If you play games that are more memory intensive, this could lead to a performance decrease.
For example, if you increase the VRAM size to 4GB from the 1GB, you are only leaving 12GB of RAM for the rest of the system.
Entering the BIOS
1. Before you go any further, you must power your Steam Deck into its BIOS and enter the setup utilities.
If you don’t know how to do this, we highly recommend our guide that shows you exactly how to access the BIOS on the Steam Deck.
We won’t cover it within this guide as the other one covers it in much better detail.
2. Once you have got your Steam Deck into BIOS mode and have opened the “Setup Utility” screen, continue to the next section.
Increase the VRAM Allocation using the Steam Deck BIOS
3. With the BIOS Utility now open, let us move on to increasing the VRAM on your Steam Deck.
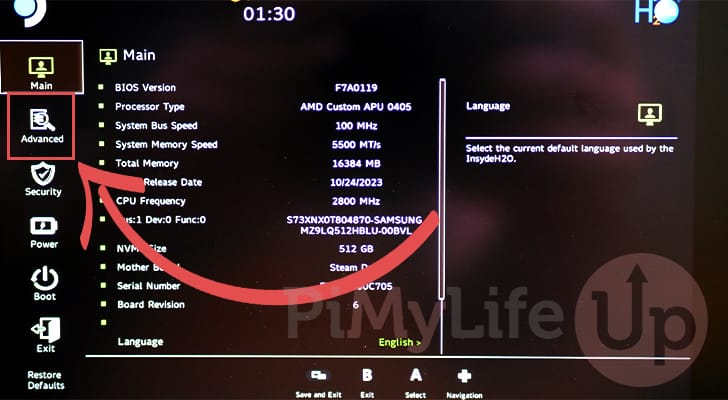
To start this process, change to the “Advanced” tab in the sidebar. You can use the D-PAD to navigate these menus or the right trackpad to move the mouse.
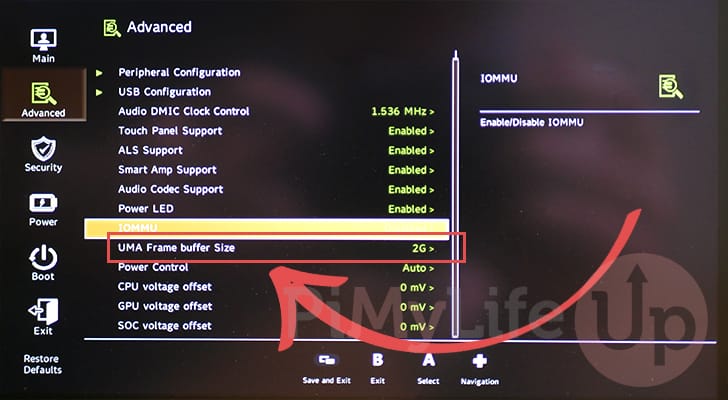
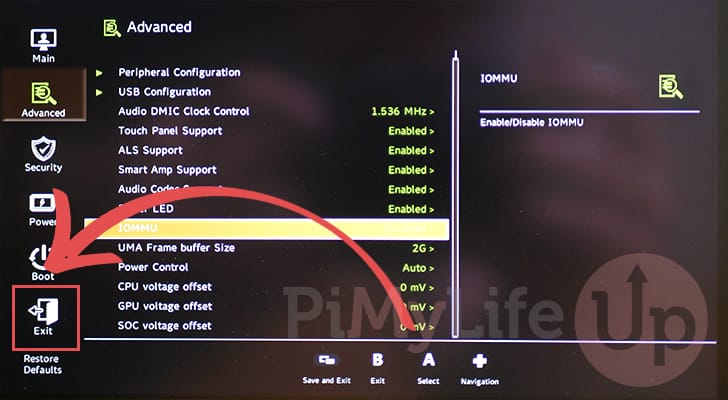
4. With the advanced menu open, navigate down until you find the option labeled “UMA Frame Buffer Size“.
Once you have this option highlighted, and press A to select it start configuring your VRAM size.

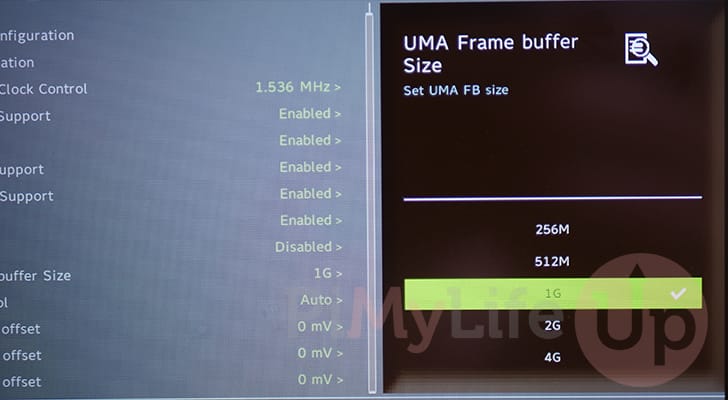
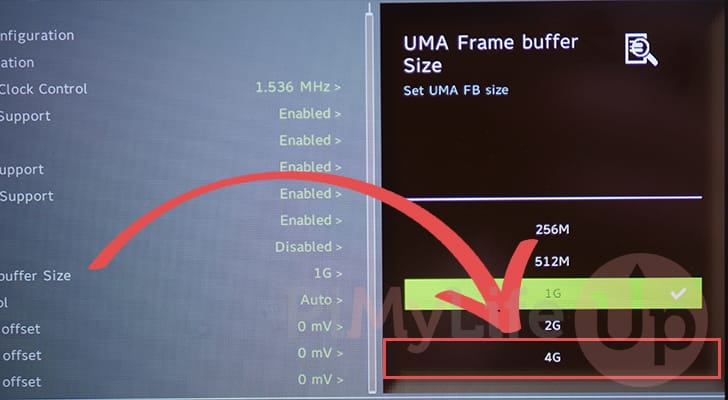
5. You will now have five options for setting the VRAM on your Steam Deck. Most users recommend setting VRAM Allocation on your Steam Deck to “4G“. However, you can try smaller amounts, but it is recommended not to go lower than the default 1GB allocation.
To do this, use the D-PAD to select “4G” and then press the A button on your Steam Deck.
6. Next to the “UMA Frame Buffer Size” option, you should now see your updated VRAM value. Our UMA Frame Buffer Size is now set to 2GB in our example.
Before this change takes effect, you must exit the BIOS and save the changes.
7. To exit the BIOS, select the “Exit” option in the sidebar.
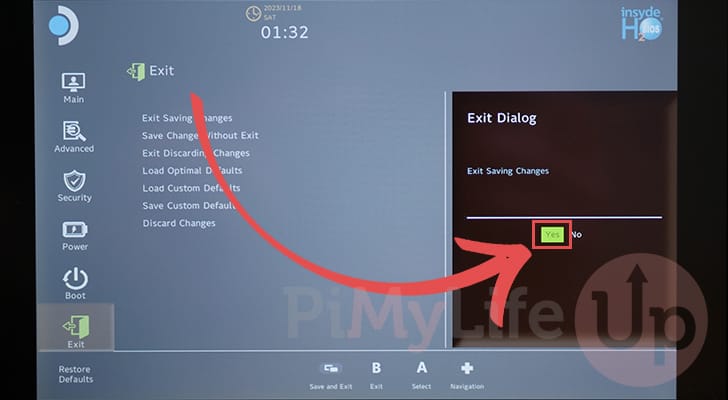
8. Now that you are on the exit menu, you must select the top option labeled “Exit Saving Changes“.

9. You will be asked to confirm whether you want to save and quit with your VRAM increase.
Select the “Yes” option to save and exit.
Conclusion
At this point in the tutorial, you should have learned how to increase the VRAM allocation on your Steam Deck.
This allocation dedicates more of your Deck’s unified memory to the GPU, which can help improve performance. If you experience any issues with the VRAM increase, it is straightforward to return to the BIOS to set it back to 1 GB.
Please feel free to leave a comment below if you have any questions about increasing or decreasing the VRAM.
Be sure to check out our many other Steam Deck tutorials if you want to see what else you can do on your system.


I have got the 1TB model, and I don’t use that much storage on it, so can I allocate more that 4GB? Like 64GB?
Hi,
All currently released models of the Steam Deck have the same 16GB of memory. So 4GB is probably the biggest you would want to go with the frame buffer size. It is also the maximum allocation that the Steam Deck BIOS will allow you to set.
What you’re thinking of is storage space which is completely different. While the operating system can temporarily use storage space for memory (This is called swap memory) it is significantly slower so it would cause huge performance drops.
Hopefully I’ve done a decent job at explaining this.
Kind regards,
Emmet