In this tutorial, we will show you how to set a custom boot animation on your Steam Deck.
A custom boot animation is a simple yet great way of adding your own flair to your Steam Deck. It is also one of the more apparent changes you can make with your Deck, as you will be greeted by the animation every time you wake your device up.
You can set a custom boot animation on your Steam Deck in three ways.
The first method is the officially supported one. This locks you into the boot animations developed and released through the Steam points shop. The big downside is that you need enough points to get them, and the selection is limited.
The second method we will cover means you can set a custom boot animation without installing additional software. A downside is that you do have to go to desktop mode whenever you want to swap out the animation.
The final method is to install a Decky Loader plugin. This method has a significant advantage in that you can easily swap your boot animations without ever leaving gaming mode. The plugin we use will pull the boot videos from the Steam Deck repo website.
Using the Official Custom Boot Animations on the Steam Deck
Valve offers a selection of custom boot animations for your Steam Deck that you can get through its points store.
Official boot animations are advantageous because they are super easy to install and of pretty good quality. You don’t need to install any third-party tools or rely on third-party websites.
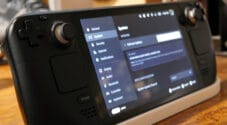
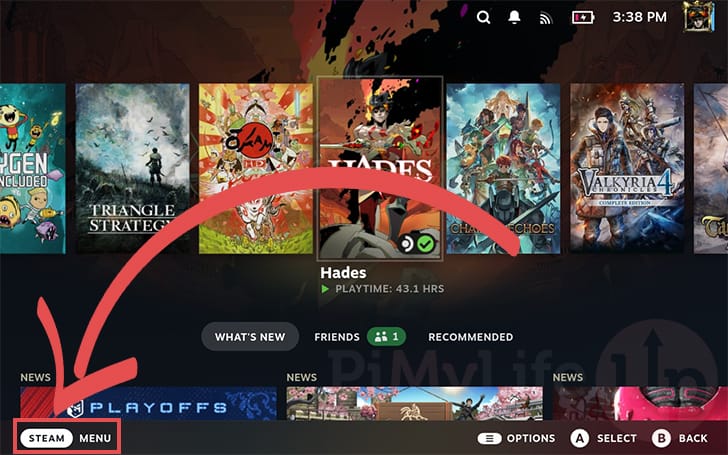
1. To get to the screen where you can customize your boot animation, you will want to first bring up the STEAM Menu.
You can open this menu by tapping “STEAM Menu” or pressing the STEAM button.
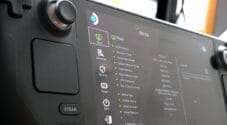
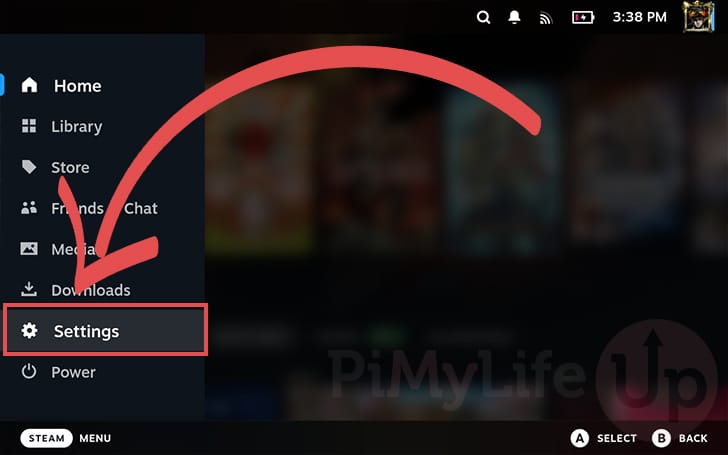
2. With the STEAM Menu open, you will want to navigate to the settings screen.
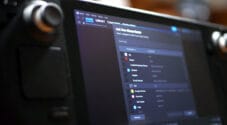
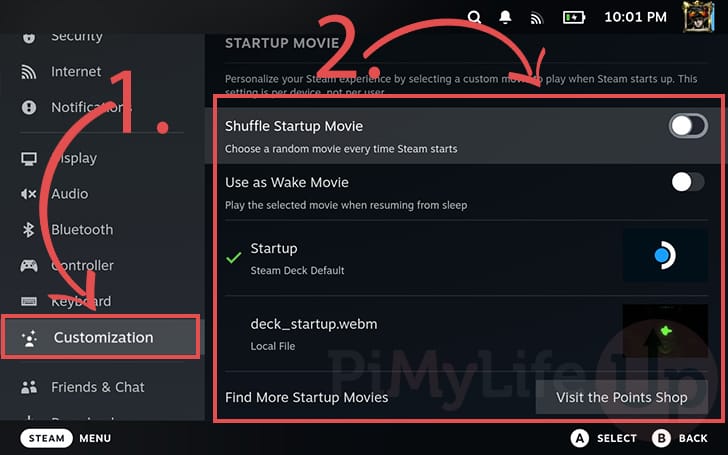
3. Now in your settings screen, use the sidebar to navigate to the “Customization” screen (1.).
If this option is missing, you will need to update your Steam Deck.
On this screen, you will find various options to customize the boot animation on your Steam Deck (2.). To add more to your library, click the “Visit the Points Shop” button.
How to Manually Set a Custom Boot Animation on your Steam Deck
One of the neatest things about the Steam Deck is its ability to be easily customized. In this section, we will show you how to easily override the boot animation with your own.
In this section, we will also point you to a couple of places where you can easily find compatible custom boot animations for your Steam Deck. If you want to make your own, ensure that your video is 1280 x 800 and saved using the WebM format.
Changing to Desktop Mode
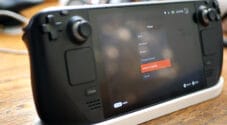
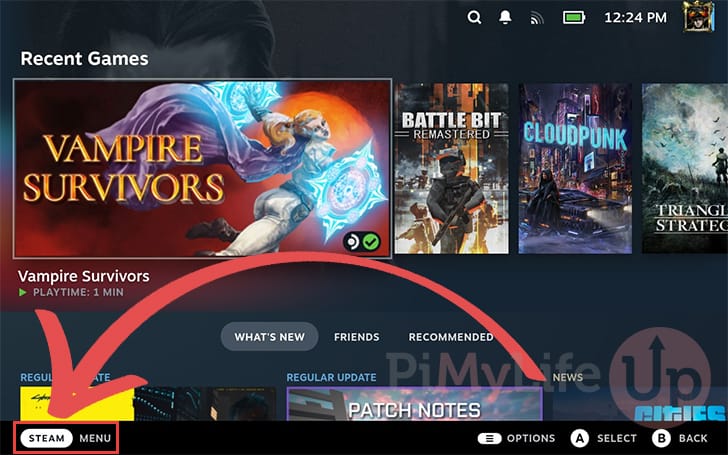
1. Changing your boot animation using this method requires changing to desktop mode.
To swap to desktop mode bring up the STEAM Menu by pressing the “STEAM” button or tapping “STEAM MENU” in the bottom-left corner.
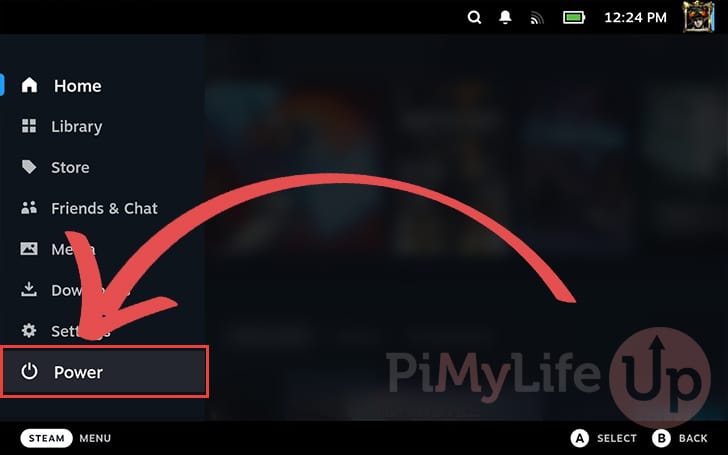
2. Next, you will want to open the “Power” menu.
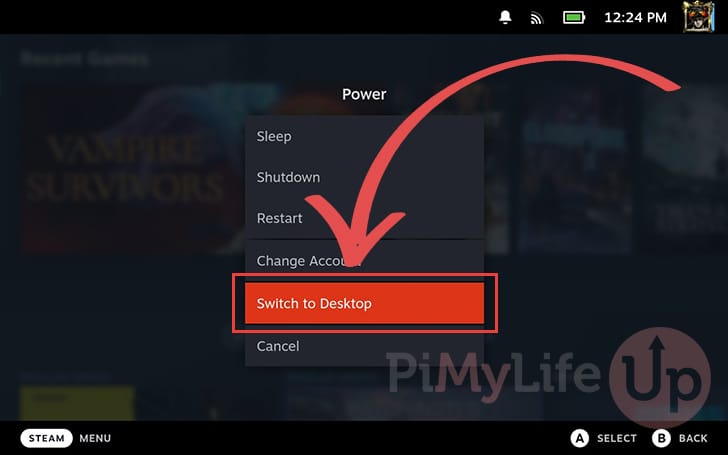
3. From the power menu, click the “Switch to Desktop” button to switch to desktop mode.
Finding and Downloading a Custom Boot Animation
4. Once in desktop mode, you should find and download a custom boot animation for your Steam Deck.
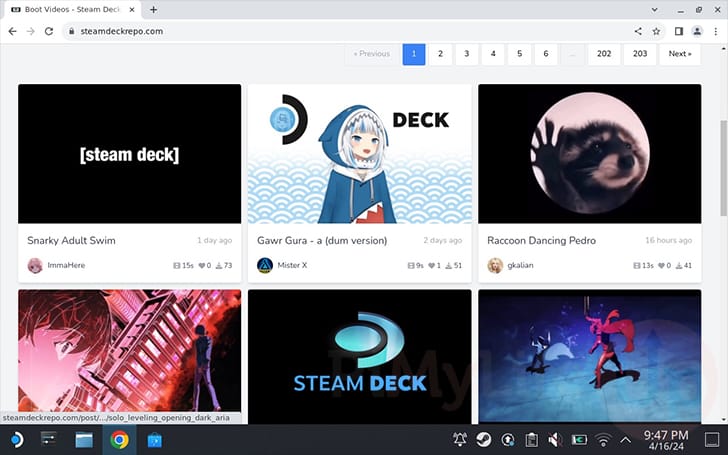
You can search for these animations in two great places: the Steam Deck Repo website, and the SteamDeckBootVids subreddit.
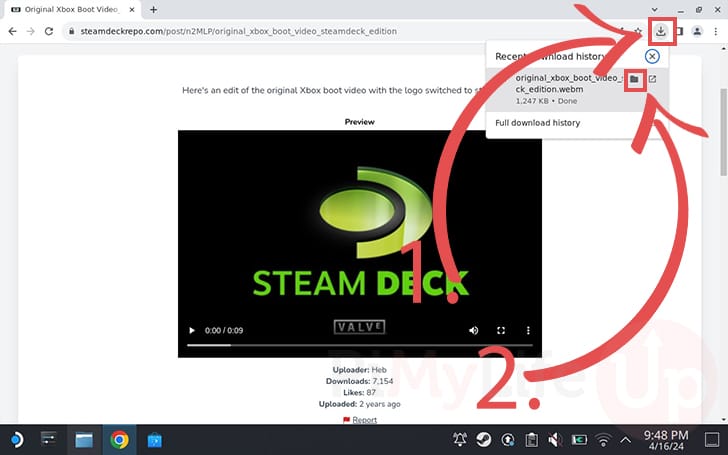
5. Once you have found a custom boot animation and downloaded it to your Deck, you should open the downloads folder.
If you are using Chrome, you can do this by clicking the “Downloads” icon (1.) followed by the “Folder” icon (2.).
Installing a Custom Boot Animation to your Steam Deck
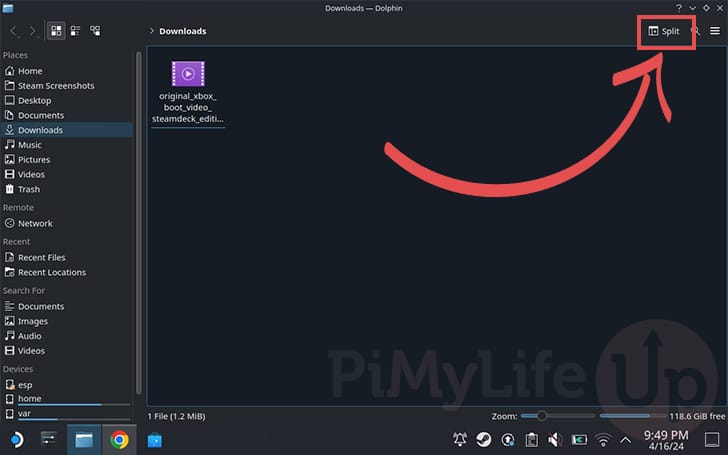
6. Now, the Dolphin file browser should open on your Steam Deck, and your new custom boot animation should appear in the window.
Over the next few steps, we will show you how to install this animation. First, split the browser by clicking the “Split” button.
Finding the Correct Directory
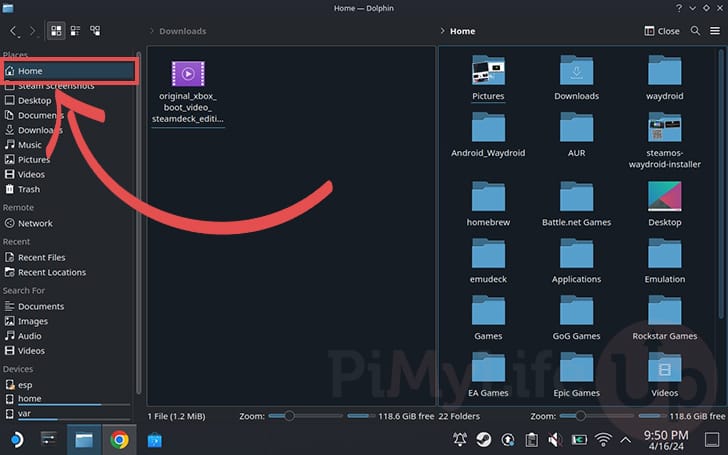
7. With the window split, click the right-hand side panel and click the “Home” bookmark.
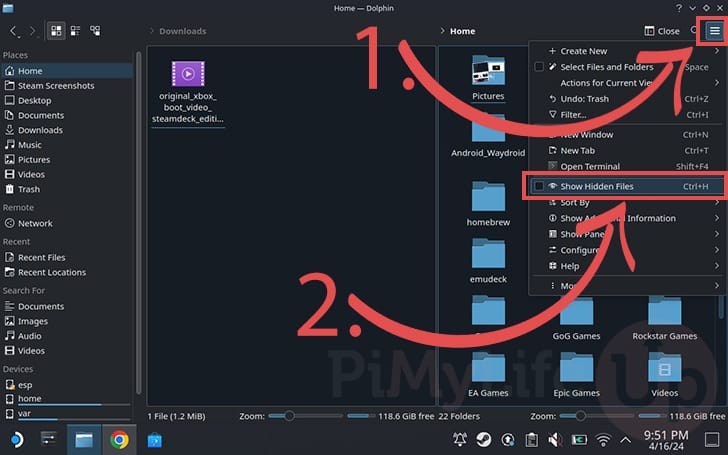
8. Now that you are back in your home directory, we must enable hidden files.
To do this, click the hamburger icon in the top-left corner of the screen (1.). In the context menu that appears, click the “Show Hidden Files” option (2.).
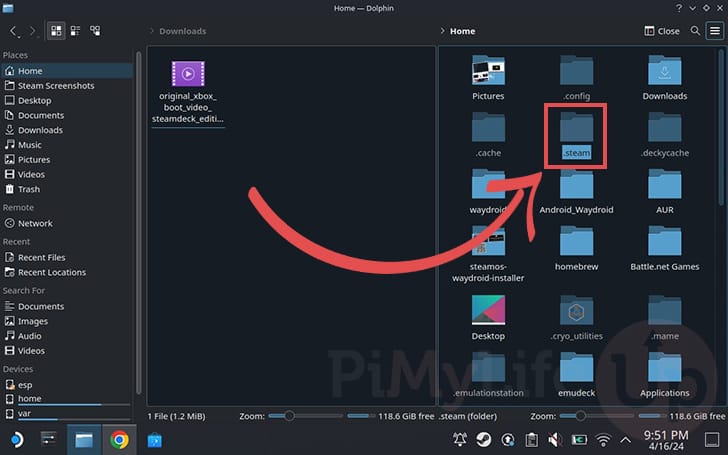
9. You should now see a folder called “.steam“. Double-click this folder to open it.
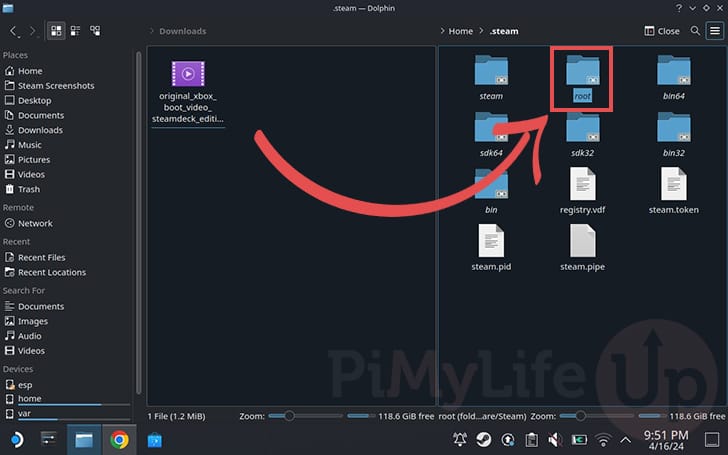
10. Next, navigate to the “root” folder.
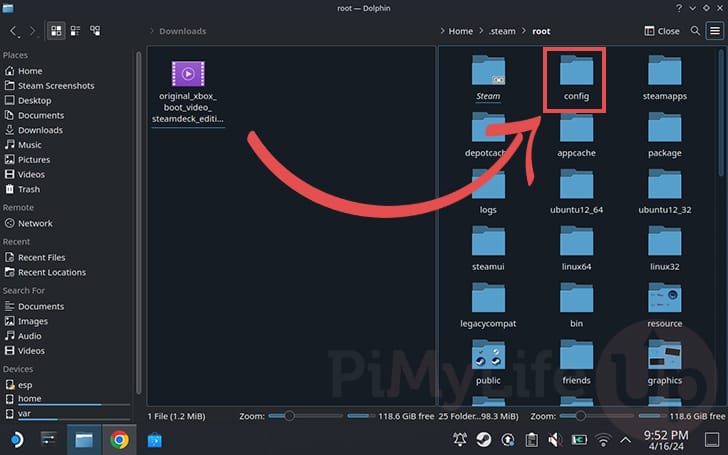
11. After that, look for the directory labeled “config” and change into it.
Creating the Missing UI Overrides Folders
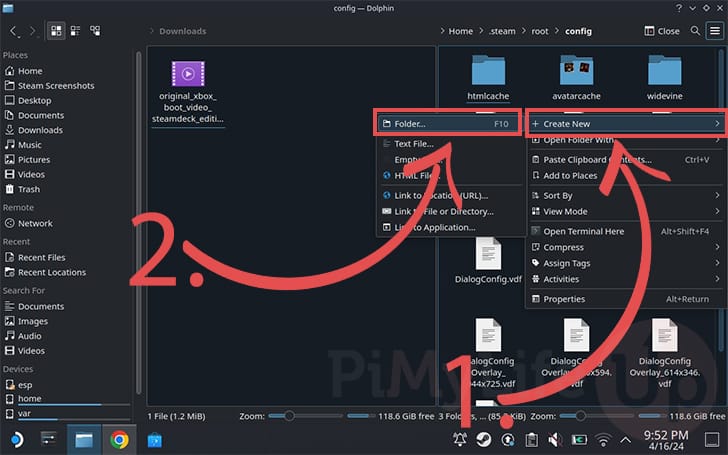
12. Once you are in the config folder, we must create a directory that your Steam Deck will check for a custom boot animation.
To do this, right-click (Press the L2 trigger) in the right-hand panel to bring up the context menu. First, hover over the “Create New” option (1.), and then click the “Folder...” option (2.).
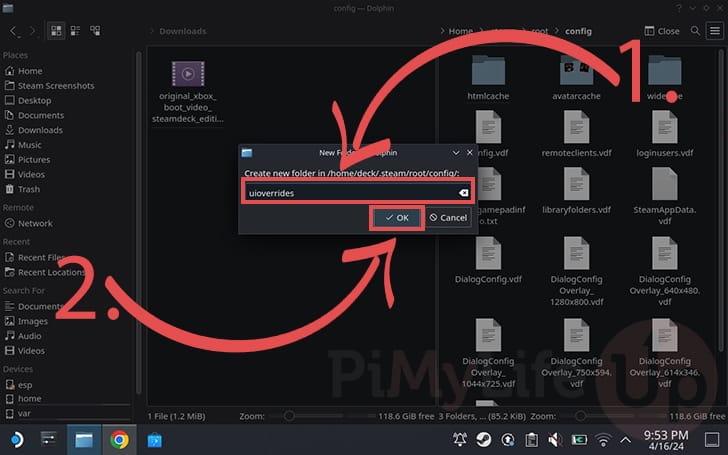
13. You should use this textbox to name this new folder “uioverrides” (1.). You can bring up the virtual keyboard by pressing the “X” button on your Steam Deck.
To create the folder, click the “OK” button (2.).
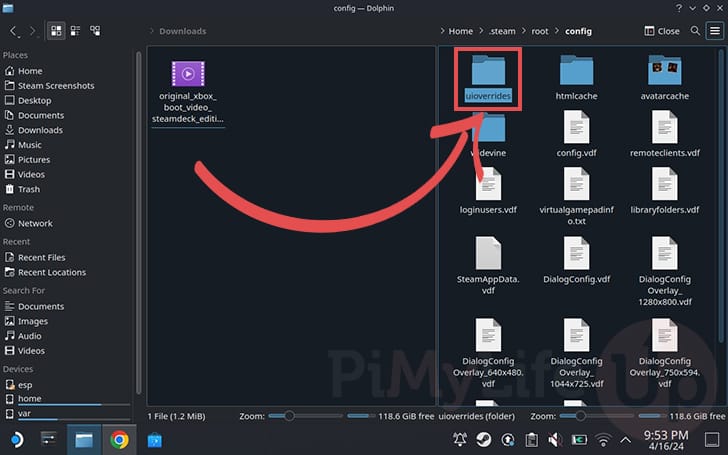
14. With the new directory created, change into it.
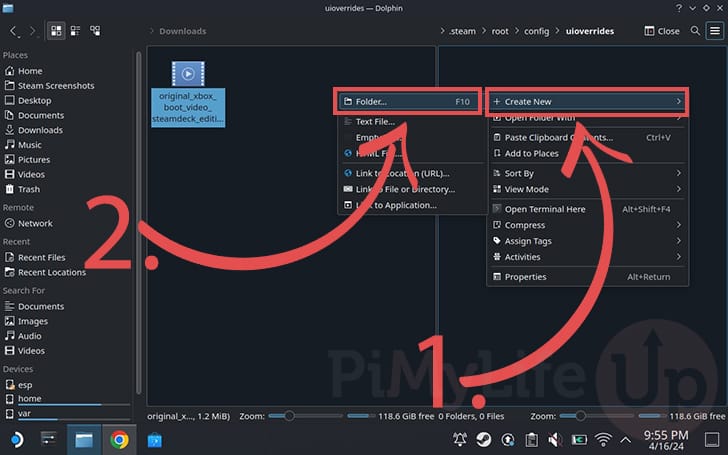
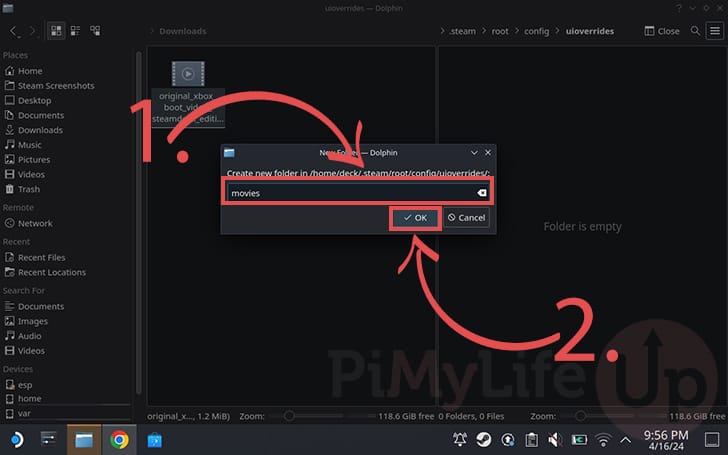
15. We can now create the final directory that we will need. The Steam client checks this next folder for any UI video replacements.
Again, right-click using the L2 trigger and hover over the “Create New” option (1.). You will then want to click the “Folder...” option (2.).
16. You will want to use this dialog to create a new folder called “movies” (1.). After typing out this folder name, click the “OK” button (2.).
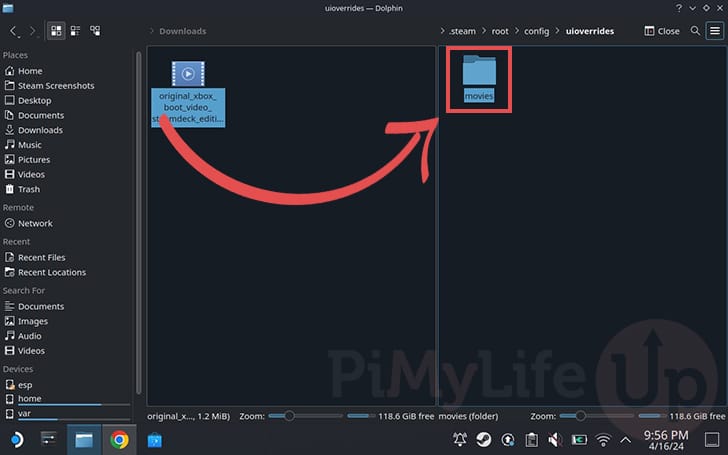
17. Finally, change to the “movies” folder.
Setting up your Custom Boot Animation for the Steam Deck
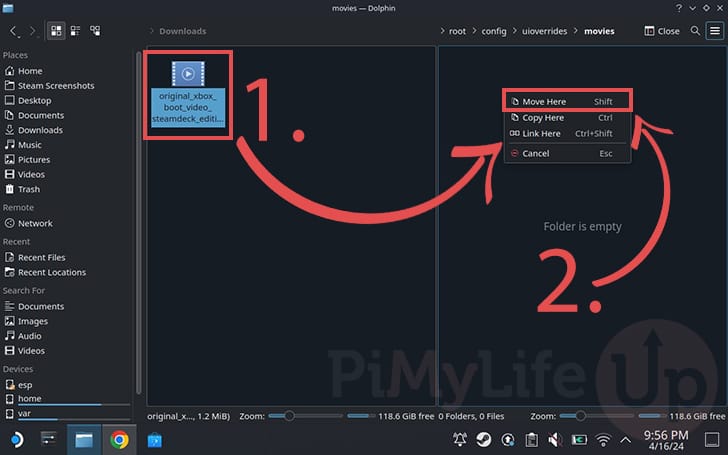
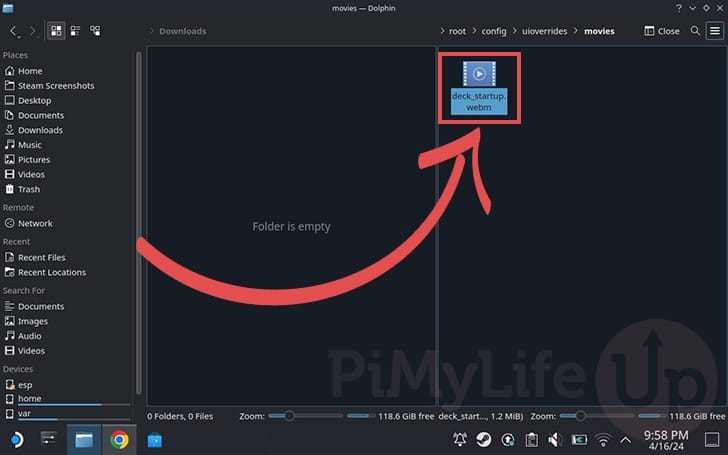
18. Now that you are in the correct directory, you will want to drag the custom boot animation you downloaded to your Steam Deck from the left panel to the right panel (1.).
A context menu will pop up, select the option labeled “Move Here” (2.).
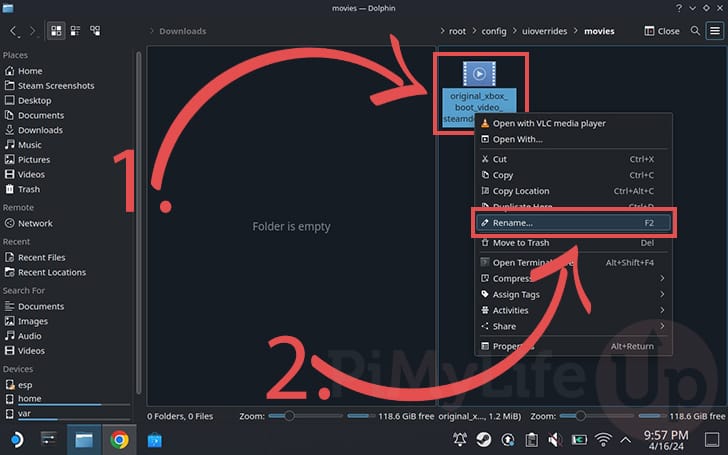
19. Your custom boot animation is now in the correct directory, but you will need to rename the file so that your Steam Deck can detect it.
To rename a file, right-click it (1.) and then select the “Rename...“(2.) option.
You will want to name this video “deck_startup“.
20. With the movie now renamed to “deck_startup” your Steam Deck will now load this boot animation instead of its own.
You can check that your new animation works by restarting your Deck.
Using Decky Loader to set a Custom Boot Animation
One of the best ways to control and set a new custom boot animation on your Steam Deck is to utilize a Decky Loader plugin.
The plugin we are talking about in particular is Animation Changer. This changer is an app you can load from the quick menu, quickly install, and select new boot animations.
1. Before proceeding, you must ensure that Decky Loader is installed on your Steam Deck.
This tool is super easy to install and allows you to expand the functionality of your Deck.
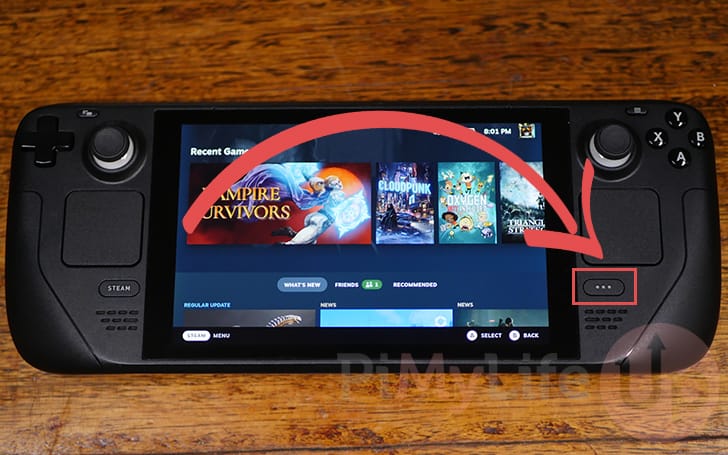
2. With Decky Loader installed you will wantto open up the quick access menu by pressing the button with the three dots.
3. Once you have the quick access panel open, change to the Decky tab (1.). This is typically represented by the plug icon.
After changing to this tab, click the marketplace icon in the top-right corner (2.).

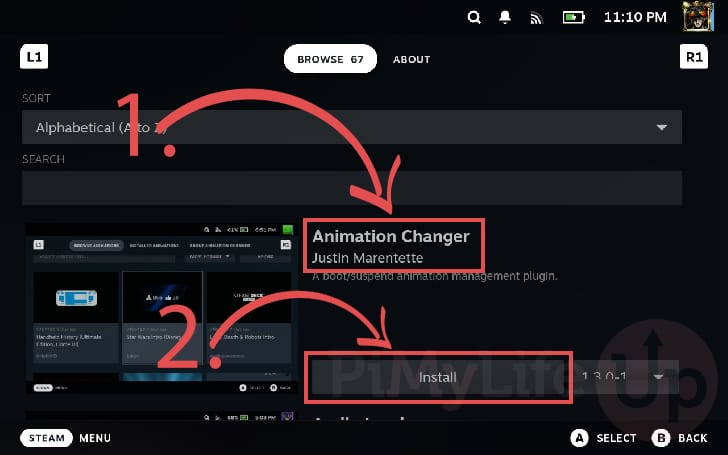
4. Using this marketplace, look for the plugin called “Animation Changer” by Justin Marentette. This plugin will allow you to easily update the Steam Deck’s boot animation with a custom one.
To install this plugin, click the big “Install” button.
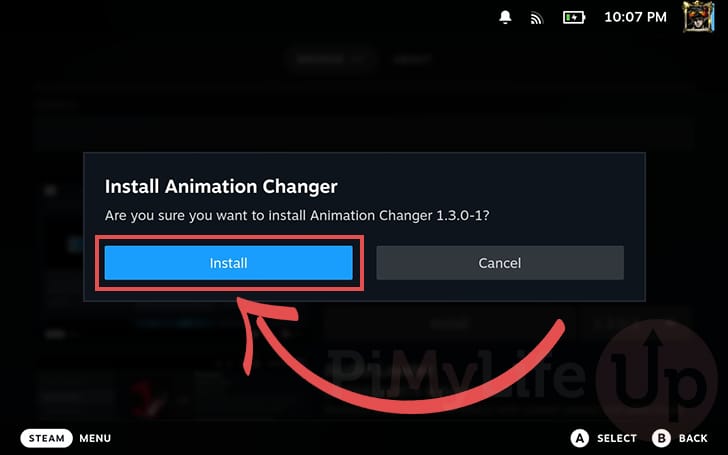
5. To proceed with the installation, click the “Install” button.
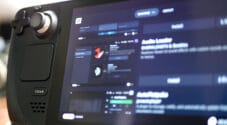
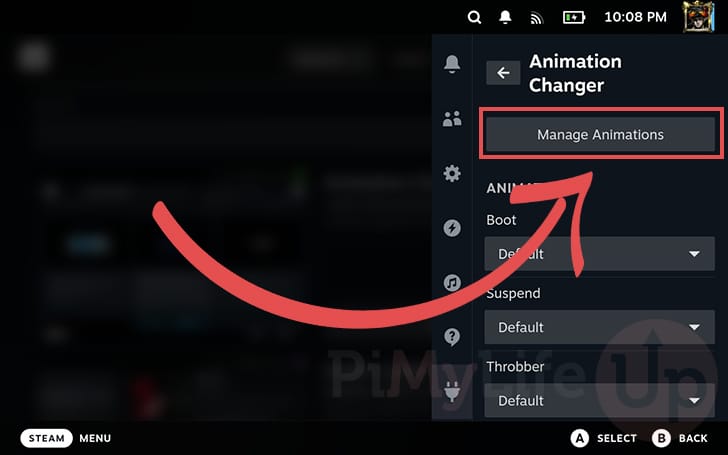
6. You should now have access to the animation changer plugin. Using this plugin is pretty easy.
You will first want to use it to download new custom boot animations to your Steam Deck. To do so, click the “Manage Animations” button.
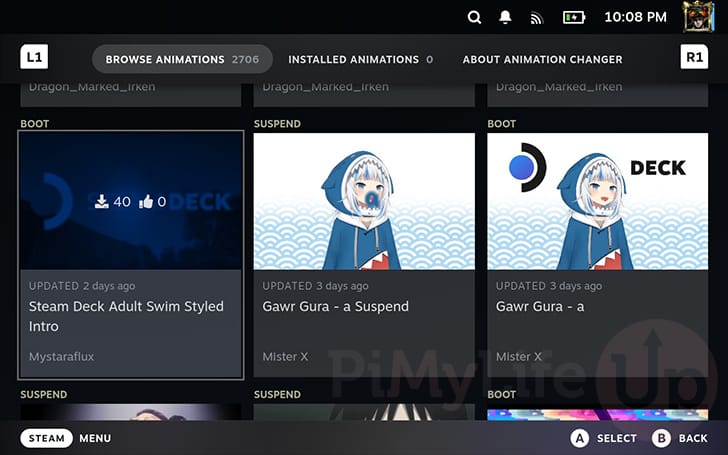
7. You will now see a huge list of different animations. Use this menu to find and install whichever ones you might like.
All of these animations are gathered from the Steam Deck Repo website.
Conclusion
Throughout this guide, we have shown several different ways to install a custom boot animation on your Steam Deck.
A custom animation is a really neat way of customizing how your Deck looks. Every time you start it up from boot, you will be greeted with your own animation.
Setting a custom animation is a straightforward process, no matter which route you choose.
Please feel free to comment below if you have encountered any issues with setting a custom boot animation on your Deck.
If you found this tutorial helpful, we recommend checking out our other Steam Deck tutorials.