This tutorial will show you how to install and use PiFi on your Raspberry Pi to turn it into a Wi-Fi router.

PiFi is a distribution that makes setting up your Raspberry Pi as a speedy OpenWrt-based Wi-Fi router significantly easier. It is definitely a project you will want to consider using if you want a super portable travel router.
OpenWrt, for those who do not know, is an open-source operating system with a focus on network routing. It has become a popular choice for anyone wanting to set up their very own router. PiFi utilizes its own customized version with improvements to work better on the Raspberry Pi and be controllable through their app.
On top of being built off OpenWrt, PiFi is packed with additional features that make it really useful for traveling. One of those features is its built-in functionality to route traffic through a VPN of your choosing. Supporting both the WireGuard and OpenVPN protocols means this travel router will work with the vast majority of VPN providers.
Another useful feature is its built-in support for AdGuard Home. This software can help reduce data usage and help improve privacy by blocking ads straight out of the box.
This functionality is controlled through PiFi’s iOS and Android app. With this app, you can easily configure and control your OpenWrt router.
You can get PiFi running on your Raspberry Pi in two ways. The first is to purchase the PiFi kit with an SD card and a supported Wi-Fi adapter. The second is installing the image yourself, which is what we are doing in this guide.
The PiFi software only officially supports two Wi-Fi adapters. The first is the built-in one on the Pi itself, and the other is the faster USB Wi-Fi dongle they provide in their kit. The kit is also the key way of supporting the development of this project
Please note that as PiFi is a headless software, there will be no output on your Raspberry Pi’s HDMI ports.


Equipment
Below is a list of equipment we used when setting up the PiFi Wi-Fi router on our Raspberry Pi.
Recommended
- Raspberry Pi Amazon
- Monitor Amazon
- Micro SD Card Amazon
- Power Supply Amazon
- Ethernet Cable Amazon or Wi-Fi Amazon
Optional
This tutorial was last tested on a Raspberry Pi 5. But it should also work on the Raspberry Pi 4 without issue.
Installing the PiFi Wi-Fi Router onto your Raspberry Pi
Over the following few sections, we will be walking you through the initial steps of setting up the PiFi Wi-Fi router on your Raspberry Pi.
This whole process is made relatively easy as PiFi is distributed as an image you can flash to an SD card of your choosing.
Downloading the Pi-Fi OpenWrt Image for your Pi
1. The first thing you will need to do is download the PiFi OpenWrt image for your version of the Raspberry Pi.
You will write this image to an SD card or another storage device and plug it into your Pi.
https://www.pifi.org/downloadsWriting the Image to your SD Card
2. Once you have the PiFi image saved to your computer, we can now write it to an SD Card or USB drive.
For this guide, we will be using the Raspberry Pi Imager. If you want to follow our exact steps, download and install this tool before proceeding with the guide.
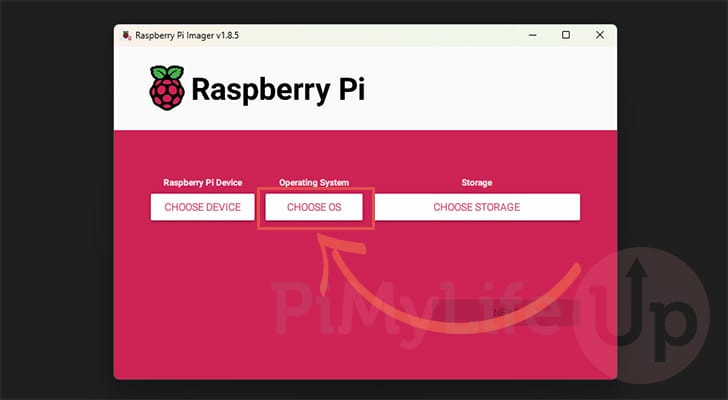
4. With the Raspberry Pi imager now open, click the “CHOOSE OS” button.
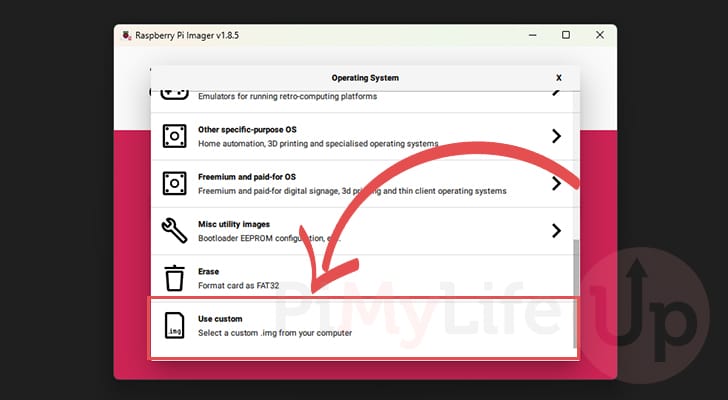
5. In the dialog box that pops up, you must scroll to the bottom and click the “Use custom” option.
Clicking this option will bring up a dialog box where you can select the PiFi image you want to write to your Raspberry Pi’s SD Card.
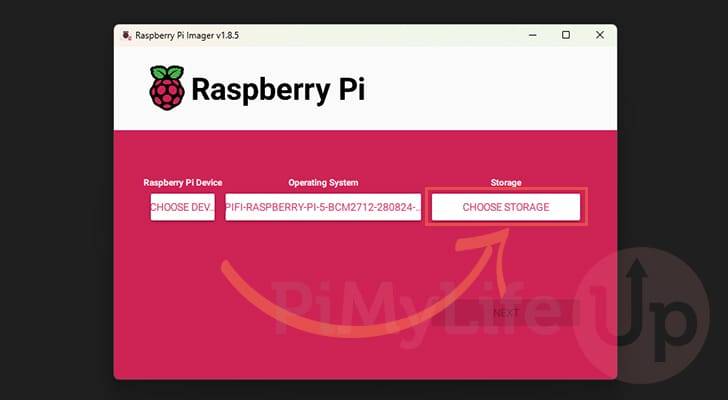
6. Next, click the “CHOOSE STORAGE” button and select the drive you want to write the PiFi image to.
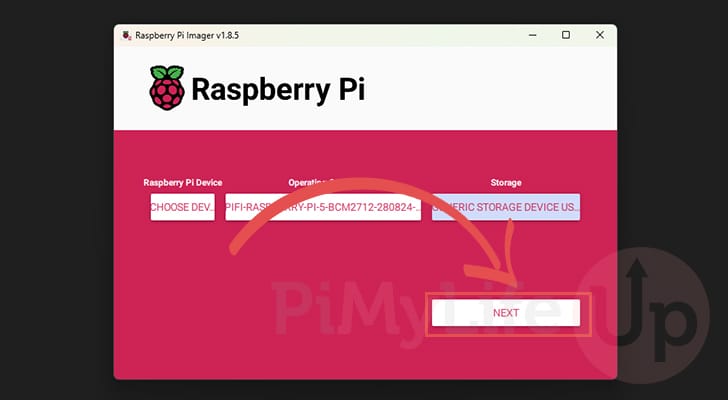
7. With the PiFi image selected, click the “Next” button to begin writing the image.
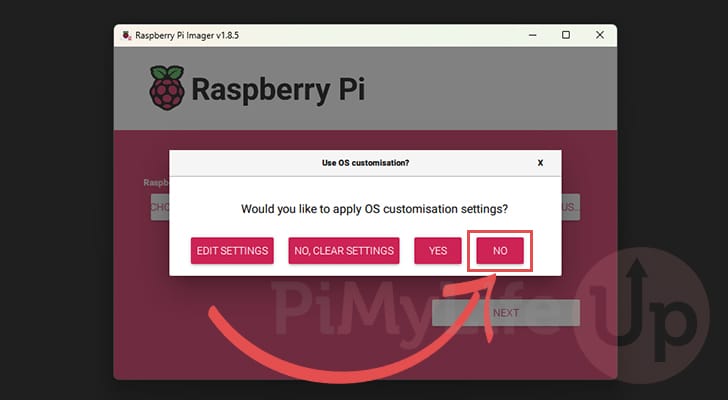
8. You may be prompted if you want to apply OS customization to this image.
Since this image is a fork of OpenWrt for your Raspberry Pi, you can just click the “No” button as these customizations won’t do anything.
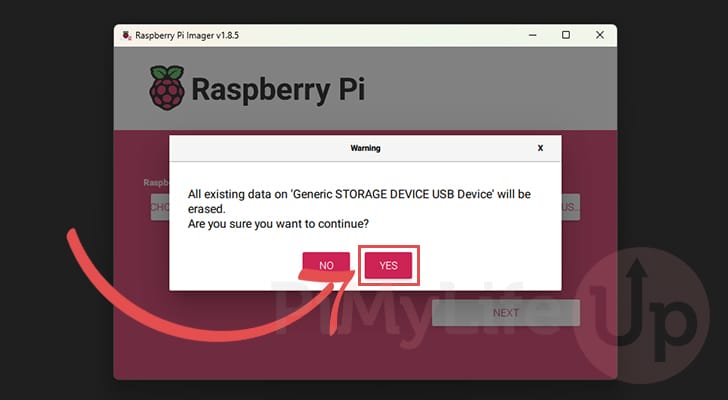
9. You will now see a warning that all existing data on the SD card will be wiped by writing the PiFi image to the device.
To proceed, click the “YES” button.
Connecting to your New Raspberry Pi PiFi Wi-Fi Router
10. To control your new PiFi powered Raspberry Pi Wi-Fi router, you will need to download the official PiFi app to your mobile device.
The team provides builds of the app for both Android and iOS devices.
11. Once you have downloaded and launched the App, you will be greeted by the following welcome screen.
To begin setting up Pi-Fi, tap the “Get Started” button.

12. The next step is to select the Wi-Fi region for your PiFi powered Raspberry Pi router.
For example, in our case, we selected the “Australia” option.

13. This next screen will prompt you to change to the “PiFi” Wi-Fi network of your phone to continue the setup process.
This screen will also show you the default password for this Wi-Fi network.
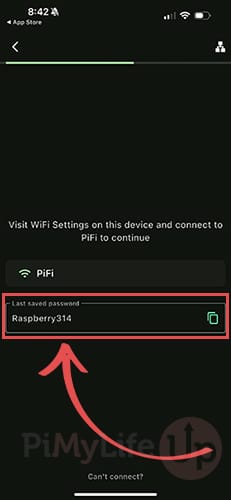
14. Switching to your phone’s Wi-Fi settings, you should see a new network appear within the list.
For our example, you can see that the setup network was called “PiFi 5 Setup“. Tap the network and then type in the default password. Since this is your first time setting up PiFi, this should be set to “Raspberry314“.

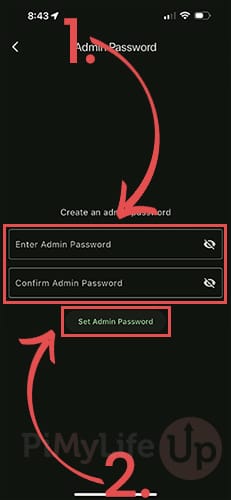
15. On this next screen, you will be prompted to enter a password to use for the admin account (1.). This admin account is what you will use to manage PiFi from within the app.
After setting a password, click the “Set Admin Password” button (2.).
16. This next screen will prompt you if you want to enable the AdGuard Home network-wide ad blocker.
Select the “Enable Protection” button to enable this protection. Alternatively, you can tap the “Skip for now” button and set it up later.

17. The final setup screen will warn you that if you are using the PiFi Wi-Fi adapter on your Raspberry Pi, removing it will cause a factory reset.
Once you understand this, click the “Got it!” button.

18. You have now successfully set up your Raspberry Pi OpenWrt-based Wi-Fi router.
To gain access to the main app, tap the “Continue” button.

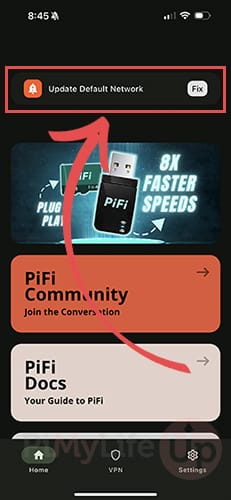
19. The first thing you will want to do after setting up PiFi on your Raspberry Pi, is to update the default network.
You should see a notification at the top of your screen prompting you to do so. Tap this notification to continue.
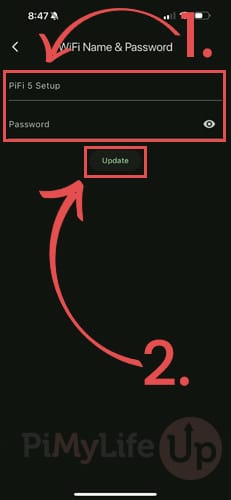
20. On this screen, you can now set a new Wi-Fi network name, and password (1.).
Once you are happy to have set these details, click the “Update” button (2.).
Conclusion
Hopefully, at this point, you will now have an OpenWrt-based travel router running on your Raspberry Pi, thanks to the PiFi distribution.
This distribution is a great way of setting up your Raspberry Pi as a highly portable router with minimal effort. The app-based approach also makes it easy to manage while you are on the go.
Please feel free to drop a comment below if you have had any issues installing this software on your Pi.
If you liked this quick tutorial, we recommend exploring some of our other Raspberry Pi projects.


Will this work on Pi Zero 2W?
Hi Mithun,
Unfortunately PiFi only has support for the Raspberry Pi 4 and the Raspberry Pi 5.
Kind regards,
Emmet
This is a really good tutorial however please also extend it on how to use a custom VPN like tailscale with this.