In this project, we will show you how to stream games directly to your Raspberry Pi using Moonlight.
Moonlight is one of the best self-hosted game streaming platforms that you can use. It allows you to easily create a low latency, high-definition link between a more powerful gaming device running Sunshine and a weaker device such as the Raspberry Pi.
This sort of software allows you to play your games from a screen that might be too far away from your more powerful device. For example, you could have a gaming PC on the second floor of a house but your living room TV on the first. Instead of having to try and run an HDMI cable between them, you can use Moonlight to stream it over your network.
One way of getting Moonlight hooked up to a TV at an affordable rate is to set it up on a Raspberry Pi. The Pi is a low-powered device, so it is cheap to keep running constantly and has enough power to handle the stream without introducing additional latency.
Of course, like all game streaming software, you will always get the best experience with a wired ethernet connection. Even the best Wi-Fi networks can introduce extra latency.
While this guide for installing and setting up Moonlight will work on any Raspberry Pi, you will get the best experience with the Raspberry Pi 5 or newer. The more power you have, the better streaming experience you will get.


Equipment
Below is a list of equipment we used when setting up Moonlight on our Raspberry Pi.
Recommended
- Raspberry Pi Amazon
- Monitor Amazon
- Micro SD Card Amazon
- Power Supply Amazon
- Ethernet Cable Amazon or Wi-Fi Amazon
- USB Mouse Amazon
- USB Keyboard Amazon
Optional
This tutorial was last tested on a Raspberry Pi 5 running the latest version of Raspberry Pi OS Bookworm Lite.
Installing and Running Moonlight on your Raspberry Pi
Over the following sections, we will walk you through turning your Raspberry Pi into a Moonlight streaming box.
While this tutorial will focus on starting from Raspberry Pi OS Lite, you should still be able to follow this guide on the full desktop version. However, be warned there are known performance issues.
Preparing your Raspberry Pi
1. Your first step is to ensure that all of the packages on your system are up-to-date.
Updating packages on your Raspberry Pi is as simple as running the following two commands within the terminal.
sudo apt update
sudo apt upgrade -yCopy
2. Next we must install the two packages we require to set up Moonlight on our Raspberry Pi using the command below.
The first package, “curl“, is what we will use to grab and run the script that sets up the Moonlight package repository.
The second package, “pulseaudio“, will allow audio to work properly between Moonlight and the Raspberry Pi.
sudo apt install curl pulseaudioCopy3. Once Pulse Audio has been installed, you will need to enable its service so that it will be automatically started when your Raspberry Pi powers on.
sudo systemctl --global enable pulseaudioCopy4. Since we are running the “lite” release of Raspberry Pi OS, the next step will be to get your system to automatically login to your user.
If you are using the desktop variant of Raspberry Pi OS, skip this step.
You can do this easily by using the following command within the terminal. Basically, this immediately gets your system to start the terminal session as your current user.
sudo tee /etc/systemd/system/getty@tty1.service.d/autologin.conf << EOF
[Service]
ExecStart=
ExecStart=-/sbin/agetty --autologin $USER --noclear %I \$TERM
EOFCopy
Adding and Installing Moonlight on the Raspberry Pi
5. Now that we have prepared our Raspberry Pi, our next step is to add the Moonlight package repository to our operating system.
The easiest way to do this is to run the official script from the Moonlight team by running the following command in the terminal.
curl -1sLf 'https://dl.cloudsmith.io/public/moonlight-game-streaming/moonlight-qt/setup.deb.sh' | distro=raspbian codename=$(lsb_release -cs) sudo -E bashCopy6. Once the repository has been added, all we need to do to install Moonlight onto our Raspberry Pi is to use the following command.
We don’t have to worry about running an “apt update” beforehand, as the script we ran in the previous step has already done it for us.
The installation process for Moonlight shouldn’t take very long to complete unless you are on a slow internet connection.
sudo apt install moonlight-qtCopyGetting Moonlight to Start at Boot on Your Pi
7. With Moonlight installed, let us move on to our next step, which is getting the game streaming software to start when our Raspberry Pi does.
We are going to be taking an easier approach by editing the crontab file with the following command. If prompted with the text editor you would like to use to edit the crontab, we highly recommend Nano for beginners.
crontab -eCopy8. Now, you will want to add the following line to the bottom of this file. This line simply tells the Cron manager that at reboot, the “moonlight-qt” command should be run.
@reboot moonlight-qtCopy9. After you have finished writing into this file, save and quit by pressing CTRL + X, Y, and then ENTER.
10. With everything in place, restart your Raspberry Pi by running the following command in the terminal.
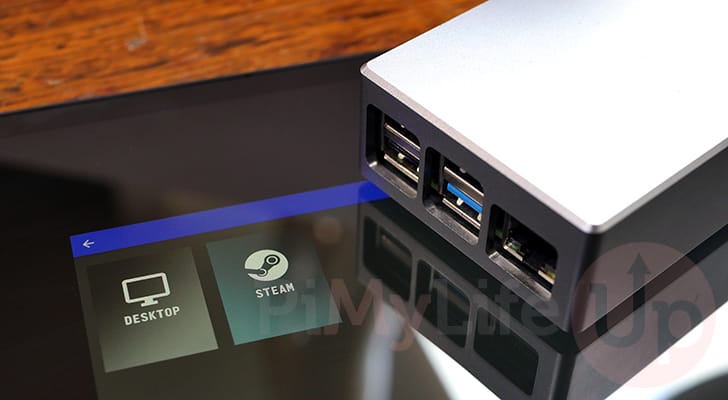
sudo rebootCopy11. If everything has worked properly, Moonlight should be running on your Raspberry Pi when it boots up.
You may also want to consider connecting an Xbox, or PlayStation controller for a better experience. If you are ready, continue to the next section to see how to use Moonlight to pair it with a game streaming service such as Sunshine.
Pairing Moonlight on your Raspberry Pi to your Streaming Server
11. Now that you have Moonlight installed and running on your Raspberry Pi, you will want to use it to connect to your machine.
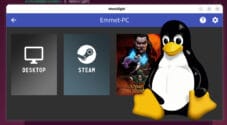
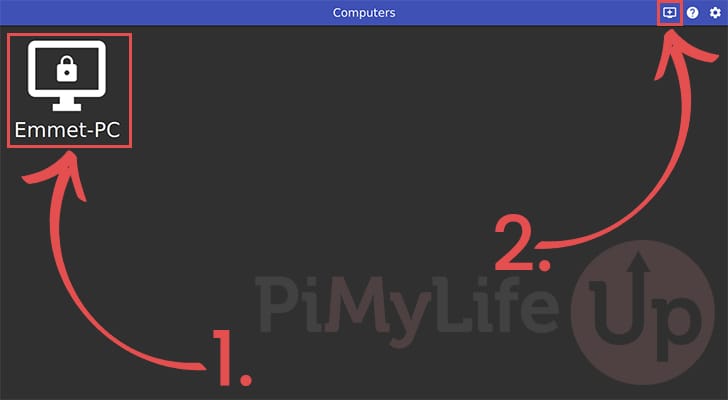
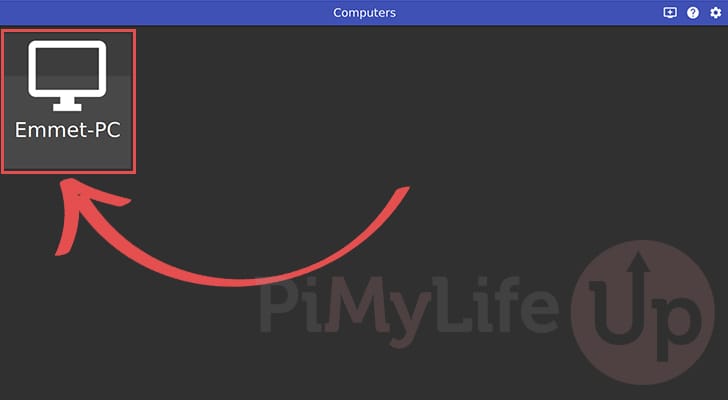
If Moonlight automatically detects your streaming PC with Sunshine installed, it should appear on the main screen. You can begin pairing by simply clicking the identifier (1.).
If your PC hasn’t appeared, you can click the little screen and plus (+) symbol in the top-right corner (2.). This will pop up a dialog box that will allow you to manually specify the IP address of your server.
12. Upon selecting the server you want to pair your Moonlight client with, you will see a PIN code appear. You will need this code to pair your Raspberry Pi with the Sunshine streaming server
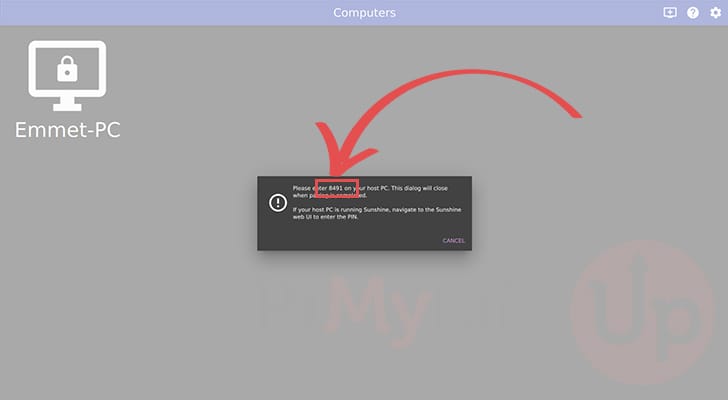
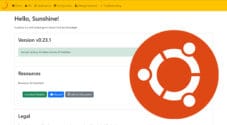
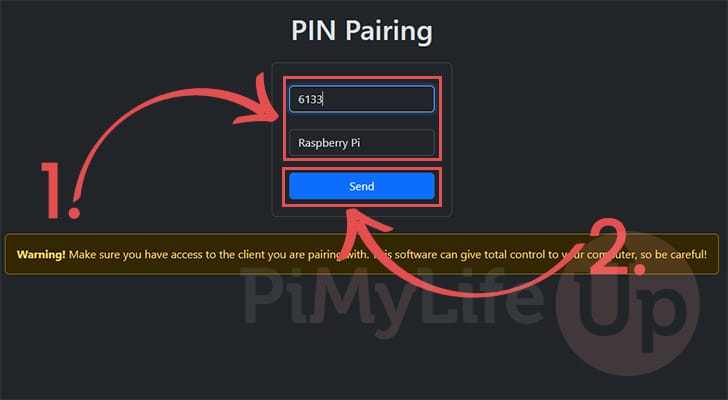
13. Now on the device you are attempting to pair Moonlight with, open up the Sunshine web interface and go to the “PIN” screen.
On this screen, you can to enter the PIN (1.) displayed on your Raspberry Pi’s moonlight client, followed by a name for your device.
After typing in the PIN, click the “Send” button (2.) to complete the pairing.
14. Back on Moonlight, the lock symbol on your PC should now have disappeared. Clicking the device now will begin the connection between your device and your Sunshine streaming server.
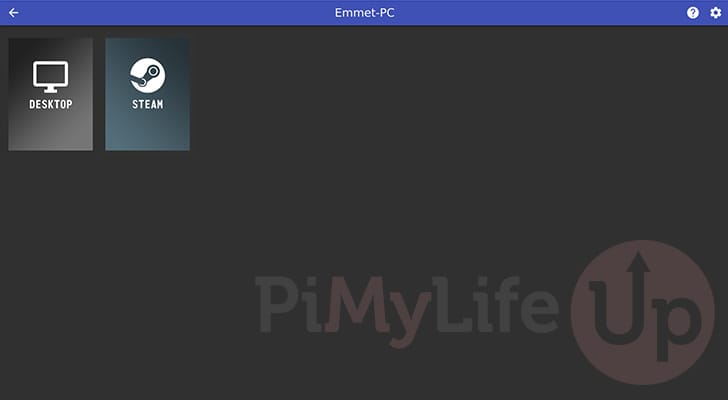
15. You will now see a list of applications that you can stream to your Raspberry Pi’s Moonlight instance. You can even stream your entire desktop if you want.
For quick access to any of your games, you can add them through the Sunshine web interface.
Conclusion
Hopefully, at this point in the tutorial, you will have successfully managed to get Moonlight up and running on your Raspberry Pi.
Moonlight is one of the best solutions for streaming your desktop or video games to your Pi. It boasts support for maintaining a high-quality stream while maintaining minimal latency. Best of all, as you should have learned, setting this software up is relatively simple.
Please feel free to comment below if you have had any issues with getting this game-streaming software to work.
If you liked this tutorial, we highly recommend that you explore some of our many other Raspberry Pi projects.