In this tutorial, we will be showing you how to set up DNS over HTTPS (DoH) for Pi-Hole on your Raspberry Pi.

DNS over HTTPS (DoH) is an attempt to improve the security and privacy of your DNS requests by utilizing the HTTPS protocol.
By default, a DNS request sent by Pi-Hole, or your Raspberry Pi is sent over plain text. Unfortunately, this means anyone can intercept this request and use it to track you or even manipulate the data sending you to the wrong website.
Setting up DNS over HTTPS (DoH) for Pi-Hole will make these requests secure between your Raspberry Pi and the upstream DNS provider.
There is still one potential issue with this. Your DNS provider can still monitor your requests, so ensure you use a trustworthy DNS provider. If you want an alternative, you can set up Unbound on your Raspberry Pi for Pi-Hole, but this method has its potential drawbacks and doesn’t solve your ISP being able to snoop on the DNS request.
To get DNS-over-HTTPS working with Pi-Hole, we will utilize the Cloudflared daemon on our Raspberry Pi.
Please note before proceeding, you should set up Pi-Hole on your Raspberry Pi.
Equipment
Below is the list of equipment we used when setting up DNS-Over-HTTPS for our Raspberry Pi Pi-Hole setup.
Recommended
Optional
This tutorial was last tested on a Raspberry Pi 400 running the latest version of Raspberry Pi OS Bullseye.
Preparing your Raspberry Pi for DNS-Over-HTTPS
To set up DNS-Over-HTTPS for Pi-Hole on our Raspberry Pi, we will need to use the Cloudflared daemon. Cloudflared is the same tool we use to set up a Cloudflare Tunnel on the Raspberry Pi.
Cloudflared allows your Raspberry Pi to make DNS-over-HTTPS requests. The DNS request is sent to Cloudflared, which securely proxies it to your provider.
Please note that despite being developed by Cloudflare, you can use Cloudflared to connect to DNS-Over-HTTPS providers such as Google.
Installing Required Software
1. Now, before you proceed any further, you will need to install the Cloudflared daemon onto your Raspberry Pi. This daemon is what will be handling the DNS-Over-HTTPS requests.
To install this software, please follow the section titled “Preparing your Raspberry Pi for the Cloudflare Tunnel” within our Setting up a Cloudflare tunnel guide.
This guide walks you through adding the Cloudflare package repository and installing the required software.
https://pimylifeup.com/raspberry-pi-cloudflare-tunnel/Setting up a User to Run Cloudflared for DNS-Over-HTTPS
2. After installing the Cloudflared daemon, we can move on to configuring the software to actually function how we need it to.
For us to use Cloudflared to proxy DNS-Over-HTTPS requests from Pi-Hole on our Raspberry Pi, we will need to create a user for the daemon to run under.
Use the following command to create a user called “cloudflared“.
- “
-s“: We use the “-s” option to set the user’s shell to something that can’t be utilized. - “
-r“: This option is used to tell the system to create this user as a system user. - “
-M“: Finally, we also tell the useradd command that it shouldn’t generate a home directory for this user.
sudo useradd -s /usr/sbin/nologin -r -M cloudflaredCopyConfigure Cloudflared to Proxy DNS-Over-HTTPS Requests on the Raspberry Pi
3. To set up DNS-Over-HTTPS for Pi-Hole on your Raspberry Pi, we must create a service that will run Cloudflared. This service will pass options to Cloudflared so that it will operate as a DoH proxy.
Begin writing this service file by using the command below within the terminal.
sudo nano /etc/systemd/system/cloudflared.serviceCopy4. Within this file, type the following lines to set up the service.
[Unit]
Description=cloudflared DNS over HTTPS proxy
After=syslog.target network-online.target

[Service]
Type=simple
User=cloudflared
ExecStart=/usr/local/bin/cloudflared proxy-dns --port 5053 --upstream https://1.1.1.1/dns-query --upstream https://1.0.0.1/dns-query
Restart=on-failure
RestartSec=10
KillMode=process

[Install]
WantedBy=multi-user.targetCopy
5. The one line you will find interesting is the one shown below. Here is where we specify the call to the Cloudflared daemon.
- We pass in the “
proxy-dns” option to tell the daemon to operate as a proxy for DNS-Over-HTTPS (DOH) on our Raspberry Pi for Pi-Hole. - Next, we use the “
--port” option to tell Cloudflared to operate its DoH proxy on port5053. - Finally, we use the “
--upstream” option to specify where to connect for DNS requests. You can have multiple upstream sources.
In the example below, we use Cloudflare’s DNS-Over-HTTPS servers, so we use “1.1.1.1” and “1.0.0.1“. You can change these values to the ones provided by your DNS provider.
ExecStart=/usr/local/bin/cloudflared proxy-dns --port 5053 --upstream https://1.1.1.1/dns-query --upstream https://1.0.0.1/dns-queryCopy6. Once you have finished typing these lines into the file, save and quit by pressing CTRL + X, followed by Y, then the ENTER key.
Starting the DNS-Over-HTTPS Cloudflared Service
7. With the service created, our next step is to enable the service by using the following command.
Enabling the service allows it to automatically start when your Raspberry Pi powers on.
sudo systemctl enable cloudflaredCopy8. Our next step is to start the Cloudflared service by running the command below within the terminal.
sudo systemctl start cloudflaredCopyTesting that DNS-Over HTTPS (DoH) is working on your Raspberry Pi
9. Before we go and configure Pi-Hole on your Raspberry Pi to use DNS-Over-HTTPS, let us make a request to our new proxy.
dig @127.0.0.1 -p 5053 pimylifeup.comCopy10. If everything works correctly, you should see a response like the one below.
This result shows that our Raspberry Pi could successfully make a secure DNS request using our Cloudflared proxy.
; <<>> DiG 9.16.37-Debian <<>> @127.0.0.1 -p 5053 pimylifeup.com
; (1 server found)
;; global options: +cmd
;; Got answer:
;; ->>HEADER<<- opcode: QUERY, status: NOERROR, id: 31334
;; flags: qr rd ra ad; QUERY: 1, ANSWER: 3, AUTHORITY: 0, ADDITIONAL: 1

;; OPT PSEUDOSECTION:
; EDNS: version: 0, flags:; udp: 4096
; COOKIE: f28fd7303cd4a1ed (echoed)
;; QUESTION SECTION:
;pimylifeup.com.                        IN      A

;; ANSWER SECTION:
pimylifeup.com.         300     IN      A       104.26.4.41
pimylifeup.com.         300     IN      A       104.26.5.41
pimylifeup.com.         300     IN      A       172.67.73.232

;; Query time: 191 msec
;; SERVER: 127.0.0.1#5053(127.0.0.1)
;; WHEN: Mon Jun 05 05:12:41 BST 2023
;; MSG SIZE  rcvd: 145
Copy
Configuring Pi-Hole to use DNS-Over-HTTPS (DoH)
16. Now that we have set up a DNS-Over-HTTPS (DoH) proxy on the Raspberry Pi, we will want to point Pi-Hole to the proxy.
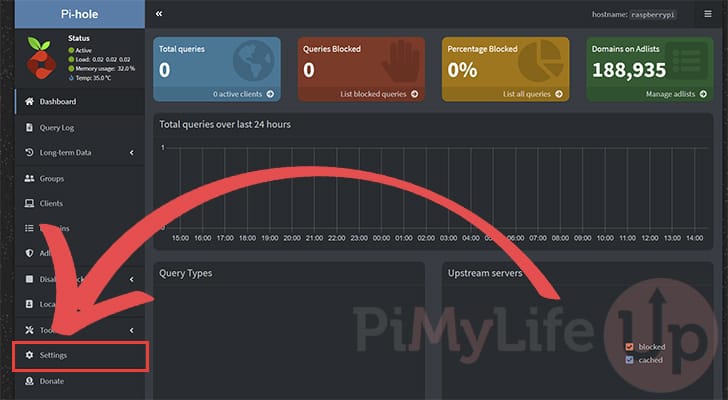
With the Pi-Hole web interface open in your web browser, navigate to the settings page. You can find this by clicking “Settings” in the sidebar.
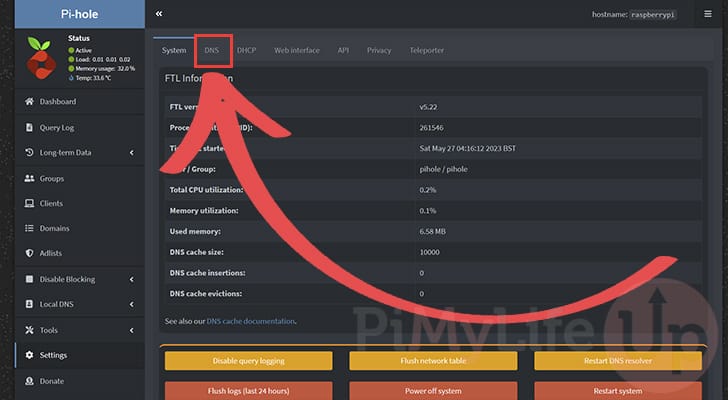
17. With the settings page open, change to the DNS settings by clicking “DNS” within the top navigation bar.
This is where you will be able to change Pi-Hole to use DNS-Over-HTTPS.
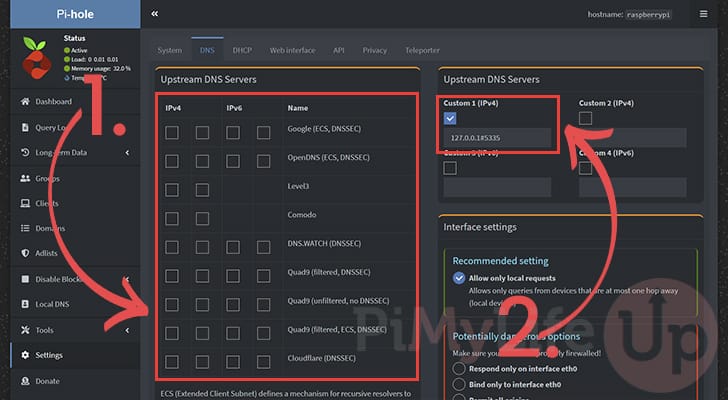
18. We are finally in the right spot to change Pi-Hole to use our Raspberry Pi’s DoH proxy.
Start by ensuring that all of the upstream DNS servers are unticked on the left-hand side (1.).
Next, we need to enable a custom DNS server by ticking a checkbox and then typing in “127.0.0.1#5053” (2.).
Finally, once you have made these changes to Pi-Hole’s configuration, scroll down and click the “Save” button or press the ENTER key.
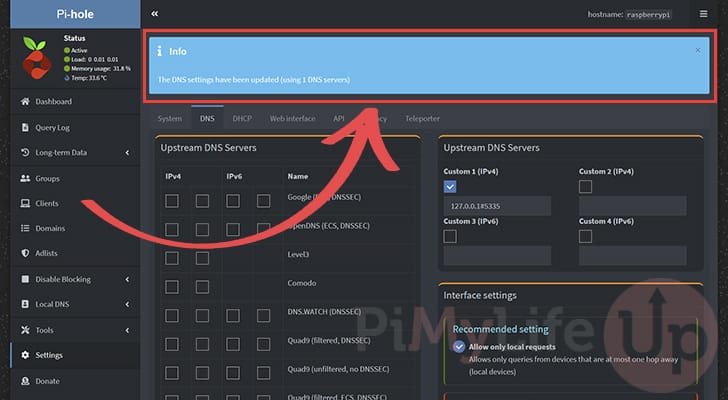
19. If your settings have been saved, you will see a message similar to the one below.
Your Raspberry Pi’s Pi-Hole server now uses DNS-Over-HTTPS (DoH) to make DNS requests. This improves your privacy and security while browsing the internet.
Conclusion
You should hopefully have Pi-Hole configured to use DNS-Over-HTTPS on your Raspberry Pi at this stage.
DNS-Over-HTTPS or DoH is a way of helping improve the privacy of your DNS requests. It does this by using the HTTPS protocol to hide the DNS lookup from prying eyes such as your ISP. It also significantly reduces the chance of someone intercepting and modifying the request.
Please comment below if you have issues getting DNS-Over-HTTPS to work with Pi-Hole.
If you found this tutorial helpful, be sure to check out our many other Raspberry Pi projects.


Thank you for the step by step guide.
At Step #5 I am getting this error “Error: The repository ‘https://pkg.cloudflare.com/cloudflared trixie Release’ does not have a Release file.”
Notice: Updating from such a repository can’t be done securely, and is therefore disabled by default.
Notice: See apt-secure(8) manpage for repository creation and user configuration details.
Raspberry Pi 5
Core v6.2.2 · FTL v6.3.2 · Web interface v6.3
TIA
Hi Saumil,
I have corrected this in the original Cloudflare tunnel tutorial, but there is a slight change to the repository where we must specify “any” instead of the OS release name.
This tutorial has been updated so it now links to the original fixed guide and ensures any fixes made there will keep this tutorial working.
Kind regards,
Emmet
Emmet, I’ve been using the Pihole for a couple years with Unbound and found that it was pretty ineffective at stopping ads and junk coming through on my Vizio smart TV. I just finished this install and am hoping that it will do a better job but I may be unreasonably hopeful. I know a little about DNS but there’s a lot for me to learn. Thanks for taking the time to do all this.
Perfect installation instructions. Worked like a charm!
Nice job with this recap. I followed it and it worked perfectly. Thank you@!
If you live in the EU it is best to use dns0.eu (GDPR save or AVG for the Dutch)
DNS53 (IPv4)
193.110.81.0
185.253.5.0
Thanks for the tutorial, worked fine on PI5
Awesome tutorial. Works like a charme. Thank you very much for your work.
Another great tutorial, thanks emmett.
Is it possible to use this cloudflared with quad 9, instead of cloudflare DNS servers?
I also wanted to ask would you consider making a tutorial for Firefly 3 for the RPI, i cant find a decent tutorial online that is as easy as your tutorials 🙂
Love your site BTW
Hi Alan,
Of course! To use Quad9 instead of Cloduflare’s DNS server you will want to change this line within the service file.
Instead of this line pointing to the Cloudflare DNS-Over-HTTPS upstream you will instead want to point it to Quad9’s which would mean the line should look something like we have shown below.
On the note of Firefly 3 it does look like an interesting project that would be good to run on a Raspberry Pi. Will add it to my todo list so I can look into it further but at a glance it should be a fairly straightforward guide to write out.
Cheers,
Emmet
This is great. Thanks for the guide. Is the setup any different if I am already am using CloudFlare tunnels.?
Hi Matt,
This should work alongside your Cloudflare tunnels as we are launching a separate instance of Cloudflared.
Cheers,
Emmet