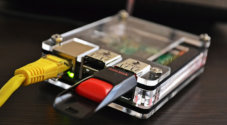
In this guide, we will be showing you how to partition and format a drive on a Linux based operating system such as Raspbian.
Within this tutorial, we will be showing you how to use three crucial pieces of software that allows you to create and modify partitions quickly. These three pieces of software are blkid, parted and mkfs.
Parted is the software that we will be using to create the partitions on a drive. While we don’t go too deep into all the capabilities of the software we do show how you can efficiently use it to create partitions on a drive.
One thing to note about parted is that it doesn’t format the partitions you create, for that, you have to use a piece of software called mkfs.
The next most important piece of software we show to you is mkfs, which is the actual piece of software that we will utilize to format our newly created partitions.
We also show you blkid, which is a handy piece of software that can be used to display all available block devices quickly.
Knowing how to properly partition your drives will be handy when doing projects such as setting up a NAS, or even something like a game emulator. Basically, any project that requires a heavy amount of storage.
You can find the full tutorial on how to partition and format drives on Linux below.
Equipment List
Below is the full list of equipment that you will need to complete this tutorial on partitioning and formatting drives.
Recommended
Optional
Partitioning a Drive on Linux via Command Line
1. For most of this tutorial, we will be making use of a piece of software called parted. Parted is the CLI (Command-Line Interface) version of its GUI brother, gparted.
Parted will allow us to do numerous things such as being able to format drives as well as creating different partitions.
Before we get too far ahead of ourselves, we must first work out what drive we want to partition and format. For that purpose, we can use a tool such as blkid to find the drive we want to format.
Enter the command below to get information on your available drives.
sudo blkidBelow we have included a sample of what the command provided for us. The drive that we are interested in is located at the bottom of the list mounted at /dev/sda.
/dev/mmcblk0p1: LABEL="boot" UUID="6228-7918" TYPE="vfat" PARTUUID="76b5801c-01"
/dev/mmcblk0p2: LABEL="rootfs" UUID="6bfc8851-cf63-4362-abf1-045dda421aad" TYPE="ext4" PARTUUID="76b5801c-02"
/dev/mmcblk0: PTUUID="76b5801c" PTTYPE="dos"
/dev/sda: PTUUID="09c74626" PTTYPE="dos"
2. Now that we have our mount location for our USB drive available to us we can go ahead and start interacting with it using the parted software.
Now before we go ahead and start formatting our drive, we must first create the partition table for the drive. If your drive already has a partition table, then you can skip to the next step.
To create a partition table we can use a straightforward command, we need to reference the mount path, in our case /dev/sda, the mklabel command and the type of partition table we want to create.
In this case we are going to be using the more modern GPT table type. However, if you want or need you can utilize the much older msdos partition table (It’s also known as MBR or Master Boot Record)
To set this, run the following command. Swap out the mount path and table type where required.
sudo parted /dev/sda mklabel gptIf a boot label already exists you will be shown a warning asking if you want to continue.
3. To create a partition on our new drive, we need to know the file format we intend on using, and the starting and ending position for that partition.
For example, if we wanted to create a 2GB partition on our empty 4GB USB, we would set the start position at 0 and the end position at 2GB.
Also if you want the partition to cover a percentage of the drive or the whole drive, you can specify sizes in %. For instance, 100% would fill the remaining space after the starting position.
Since we want to do that with our USB, we will be running the following command on it. Referencing its mount position of /dev/sda, the filesystem we want to use, fat32, and our starting and ending positions for the partition.
The parted tool also supports other filesystems such as ext2, ext3, ext4, fat16, fat32, NTFS and more.
sudo parted /dev/sda mkpart primary fat32 0G 2G4. Now that we have created our first partition on the drive, it should now be displayed using the blkid tool.
Just run the following command in your terminal on the Raspberry Pi to list all available partitions.
sudo blkidBelow you can see what the output looks like now, with our partition at /dev/sda1 now being shown.
/dev/mmcblk0p1: LABEL="boot" UUID="6228-7918" TYPE="vfat" PARTUUID="76b5801c-01"
/dev/mmcblk0p2: LABEL="rootfs" UUID="6bfc8851-cf63-4362-abf1-045dda421aad" TYPE="ext4" PARTUUID="76b5801c-02"
/dev/mmcblk0: PTUUID="76b5801c" PTTYPE="dos"
/dev/sda1: PARTLABEL="primary" PARTUUID="47470959-981d-4fe9-bb58-84bafeddbab5"
5. With our first partition now created we still have 2GB of spare space available on our 4GB drive.
We can now go ahead and format that partition using the various available mkfs tools if you don’t need to know how to handle multiple partitions you can move onto our “Formatting a partition” section.
To help give you more of an idea on how to use parted we will make another three partitions, two 512 MB partitions, and one 1 GB partition.
One thing to remember when creating additional partitions is that your new partitions must allocate space that isn’t already allocated. For example, the first partition we created filled from 0MB to 2 GB meaning that any additional partition must fill space after the first 2 GB of data.
The starting and ending positions are something that you will see more of in the three commands below.
Additionally our examples below we will be using the filesystem formats, NTFS, ext2, ext4. We are using a variety of filesystem formats to give you an idea of how each of these will be formatted.
sudo parted /dev/sda mkpart primary ntfs 2GB 3GB
sudo parted /dev/sda mkpart primary ext2 3000MB 3500MB
sudo parted /dev/sda mkpart primary ext4 3.5G 100%
6. Now that we have successfully created all our partitions lets go ahead and rerun the blkid tool to see our new partitions show up.
sudo blkidBelow is the output of the command.
/dev/mmcblk0p1: LABEL="boot" UUID="6228-7918" TYPE="vfat" PARTUUID="76b5801c-01"
/dev/mmcblk0p2: LABEL="rootfs" UUID="6bfc8851-cf63-4362-abf1-045dda421aad" TYPE="ext4" PARTUUID="76b5801c-02"
/dev/mmcblk0: PTUUID="76b5801c" PTTYPE="dos"
/dev/sda1: PARTLABEL="primary" PARTUUID="47470959-981d-4fe9-bb58-84bafeddbab5"
/dev/sda2: PARTLABEL="primary" PARTUUID="07e3d328-3fb7-4a09-8ded-cf74178bde2a"
/dev/sda3: PARTLABEL="primary" PARTUUID="82d3de54-07e2-42de-94b6-825bf8dcfe7a"
/dev/sda4: PARTLABEL="primary" PARTUUID="df1af8e1-5e8b-4909-b754-f3a54aa4c2ac"
7. Now that we are all done with creating our partitions, and can see them, we should now proceed onto actually formatting these partitions.
Formatting Partitions on Linux via Command Line
1. Now that we have created all our partitions, we need to format them. The parted tool only creates the partitions themselves and sets a few bytes so that the system can understand what format to expect on that partition
To format these partitions, we will be making use of a tool called mkfs. This tool is primarily designed to format partitions and has support for a wide range of filesystems.
Thankfully mkfs is very easy to use. Basically you need to call it with the filesystem type you want to use and the device that it should be formatting.
Let’s begin by formatting our first partition. This partition is located at /dev/sda1. For this partition, we will be formatting it in the fat32 filesystem type. For mkfs this means we need to use vfat as the filesystem type.
To do this we can use a shorthand version of the mkfs command, you can see below that we simply need to call mkfs.vfat followed by the partitions mount location.
sudo mkfs.vfat /dev/sda12. As you can see with the previous command it is very easy to format your partitions, and is a much simpler process then creating partitions.
Below we will showcase a few examples of other filesystems you can format using this method.
sudo mkfs.ntfs /dev/sda2
sudo mkfs.ext2 /dev/sda3
sudo mkfs.ext4 /dev/sda4
3. Now that we have formatted all of our partitions, we can now mount them if we choose to do so.
If you want to verify that each partition has actually been formatted we can again make use of the blkid tool to show us all the partitions and their formatted filesystem type.
sudo blkidBelow you can see what the output looks like now, with our four different partitions being formatted with four different filesystem types.
/dev/mmcblk0p1: LABEL="boot" UUID="6228-7918" TYPE="vfat" PARTUUID="76b5801c-01"
/dev/mmcblk0p2: LABEL="rootfs" UUID="6bfc8851-cf63-4362-abf1-045dda421aad" TYPE="ext4" PARTUUID="76b5801c-02"
/dev/sda1: UUID="DCF5-DDF6" TYPE="vfat" PARTLABEL="primary" PARTUUID="d7e89b84-3817-4393-b348-75f47618dd3e"
/dev/mmcblk0: PTUUID="76b5801c" PTTYPE="dos"
/dev/sda2: UUID="656268AC53B5530D" TYPE="ntfs" PTTYPE="dos" PARTLABEL="primary" PARTUUID="07e3d328-3fb7-4a09-8ded-cf74178bde2a"
/dev/sda3: UUID="9887c8c7-f5f9-4440-9ec1-b84793877366" TYPE="ext2" PARTLABEL="primary" PARTUUID="82d3de54-07e2-42de-94b6-825bf8dcfe7a"
/dev/sda4: UUID="3d8b1983-4a46-4c7d-9c97-e4adb233dcb7" TYPE="ext4" PARTLABEL="primary" PARTUUID="df1af8e1-5e8b-4909-b754-f3a54aa4c2ac"
4. You should hopefully now have an idea on how you can use tools that come with an operating system such as Raspbian to create new partitions and also format those partitions in various filesystem types.
If you are interested in what various filesystems that are supported by default you can look at our list below.
These can vary depending on what Linux distribution you are running, additionally you can add support for NTFS and exFAT by installing certain packages
Supported Filesystem types: msdos, bfs, cpm, ext2, ext3, ext4, minix, fat, vfat, hfs, vxfs, rf, rk, dec, NTFS.
I hope by the end of this tutorial you will now have an idea on how to partition and format drives using your Raspberry Pi or your Linux device.
If you have any feedback on the process that we use for partitioning or formatting drives, then please feel free to leave us a comment below.