In this tutorial, we will show you how to set up and run Dockge on Linux-based systems such as Ubuntu.
Dockge is one of the easiest and sleekest tools for managing Docker Compose files on your Linux system.
This tool features one of the easiest-to-use web interfaces. It allows you to perform almost any task that you might require when managing a Docker Compose stack.
For example, using this web interface, you can create, edit, start, stop, restart, delete, and even update your Docker Compose stacks.
Dockge doesn’t use proprietary handling methods for your Docker Compose files. They are kept on your disk and can still be interacted with directly using the Docker CLI.
Personally, we find it a significantly easier and quicker experience than more heavyweight Docker management tools such as Portainer. While not as feature-packed, it probably has most of the features the average user would need, especially if you are self-hosting within a home lab.
Dockge even boasts support for multiple Docker agents. This functionality allows you to control stacks from different hosts in the one web interface.
Best of all, installing and running Dockge on Linux is a really easy process, as Dockge itself runs within a Docker container. With Docker installed, you can have this management tool up and running in a couple of minutes.
If you are running a Raspberry Pi, we have a version of installing Dockge on the Raspberry Pi that we recommend following instead.


Installing and Running Dockge on Linux
By the end of the next few sections, you should hopefully have Dockge installed on your Linux system and it managing your Docker Compose stacks.
These steps for setting up Dockge should work on any variant of Linux you can think of, including popular distributions such as Ubuntu. The distribution needs to support Docker 20 and newer.
Preparing your System for Dockge
1. You must have Docker installed on your Linux system to install and use Dockge.
If you haven’t installed Docker already, we highly recommend our guide. It will have Docker installed in the way that we expect it to be setup for the rest of this guide.
https://pimylifeup.com/linux-docker-install/2. Once you have Docker installed, we can create a directory to store Dockge on our system. We won’t be storing Dockge in the normal “/opt/stacks” directory we normally use in our guides.
This is because Dockge automatically scans the “/opt/stacks” container for Docker Compose files, and we don’t want it to detect itself.
We can create the “/opt/dockge” directory using the mkdir command within the terminal. We use the “-p” option to ensure the whole path is created.
sudo mkdir -p /opt/dockgeCopy3. After creating the directory to store Dockge, we must also create the “/opt/stacks” directory.
If you have followed any of our Docker guides previously, this directory will already exist, but you can ensure it is created by running the command below.
sudo mkdir -p /opt/stacksCopy4. With everything now prepared, we can change into the Dockge directory we created in step 2 using the cd command.
cd /opt/dockgeCopyWriting a Docker Compose File for Dockge
5. As mentioned at the start of this guide, Dockge runs within a Docker container. To better manage it on our system, we will create a Docker Compose file.
A Compose file is like a set of instructions Docker will follow when setting up a container, or a “stack” of containers, they are also the same thing Dockge is designed to manage through its web interface.
You can begin writing a Docker Compose file for Dockge on Linux by running the following command.
sudo nano compose.yamlCopy6. Within this file, you will want to enter the following lines. You should be safe keeping everything as it is unless you happen to run a service on port 5001 already.
If you have an existing service on port 5001, replace “5001” on the leftside with a different port.
services:
  dockge:
    image: louislam/dockge:1
    restart: unless-stopped
    ports:
      - 5001:5001
    volumes:
      - /var/run/docker.sock:/var/run/docker.sock
      - ./data:/app/data
      - /opt/stacks:/opt/stacks
    environment:
      - DOCKGE_STACKS_DIR=/opt/stacksCopy
7. Once you have finished writing out your Compose file, save and quit by pressing CTRL + X, Y, and then ENTER.
Starting Dockge on your Linux System
8. With the Compose file written, we can get Docker to start Dockge on our Linux system by running the following command.
Docker will immediately download and start the latest version of the Dockge container. Additionally, Docker will automatically start the container when it crashes or your system is restarted.
docker compose up -dCopyAccessing the Web Interface
9. Now that the Dockge container is running on your Linux system, you will want to access its web interface.
To access the web interface, you will need to know your device’s public or private IP address. One of the easiest ways to get the local IP address on Linux is to use the hostname command.
hostname -ICopy10. Now in your favorite web browser, go to the following address.
Ensure you replace “<IPADDRESS>” with your own IP address.
http://<IPADDRESS>:5001Initial Setup of Dockge
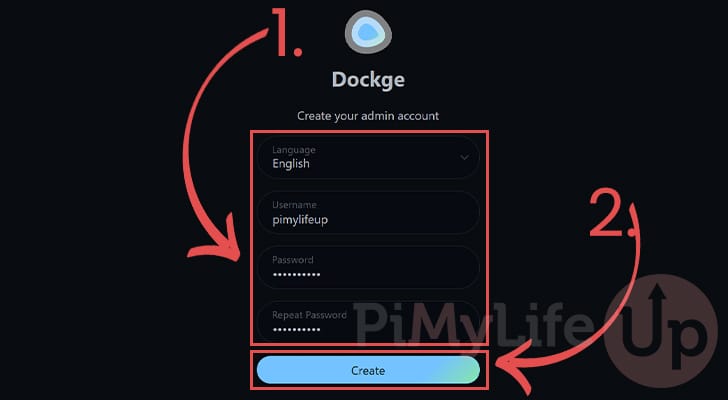
11. The first time you access Dockge, you will need to create an admin account before you can start using the software.
Use the provided boxes to fill out a username and password (1.) that you will use to access your Dockge installation.
Once you have filled out your users information, click the “Create” button (2.).
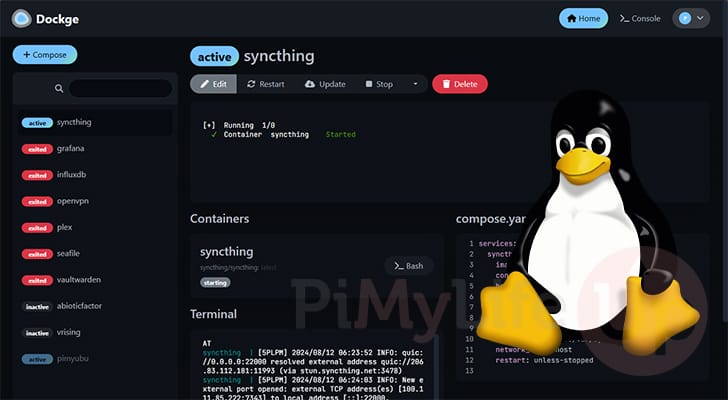
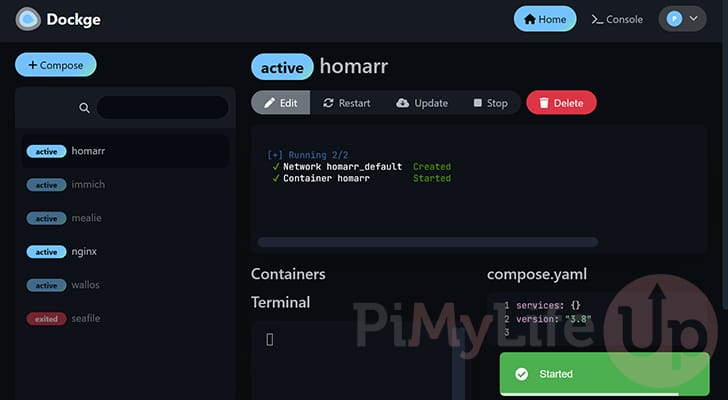
12. Below, you can see that Dockge is now running on our Linux system. It has already detected the Docker stacks we have running on our system.
This interface allows editing and managing any stack located within the “/opt/stacks” directory.
Updating to the Latest Version of Dockge on Linux
One key advantage of Dockge using Docker to run itself is that updating to the latest version is a typically straightforward process.
Over the next few steps, we will have you running the latest version of Dockge in no time.
1. Your first step is to change to the directory where we wrote the Compose file for Dockge on our Linux system,
You can swap to the correct directory by running the command below.
cd /opt/dockgeCopy2. After swapping to the correct place, you can get Docker to pull the latest version of Dockge by using the following command.
After running this command, Docker will scan the repository and see if a new version is available. If one is available, it will download the new image but won’t update any containers that are already running.
docker compose pullCopy3. Getting your running Dockge container over to the new version on Linux is as simple as running the command below.
Docker will check all containers within the Compose file to see if a new image is downloaded. If a new image is downloaded, it will restart the container and move it over to it.
docker compose up -dCopyConclusion
Hopefully, at this point in the guide, you will now have Dockge up and running on your Linux system.
Dockge is an incredibly easy tool for managing your Docker containers. It features a snappy and sleek web interface that will help you manage any Compose files on your system.
Please feel free to comment below if you have had any issues with getting this Docker manager running on Linux.
If you liked this tutorial, we recommend browsing our many other Linux guides. You can also explore our many Docker guides to see the various software you can easily self-host.