In this tutorial, we will be showing you how to set up a Seafile Server using Docker.
Seafile is a self-hosted open-source file-sharing and synchronization tool. With this, you can easily share your files with others or synchronize them between your devices.
This software even boasts a very easy-to-use web interface. This interface can be used to manage both your Seafile setup and the files themselves.
Seafile is somewhat similar to other software, such as Nextcloud and Owncloud, but is significantly more focused. It is an excellent choice for those who want a software package that focuses solely on file hosting and synchronization, without the bloat that often comes with other software packages.
There are actually two different versions of Seafile that we can set up with Docker. The first is the Community Edition, and the other is the paid Enterprise Edition. For this guide, we are purely focusing on the free community edition releases.
To make setting up this software as easy as possible, the team provides their builds using Docker containers. The advantage of Docker is that everything you need to run Seafile is stored within one package; you don’t have to worry about any missing dependencies.
For the best experience with using Seafile, you will likely want to set this up on a publicly accessible device. Additionally, you will want a domain name so that you can set up HTTPS support.
If you are running a Raspberry Pi, please follow our dedicated guide to setting up Seafile on the Raspberry Pi. There is typically a delay between ARM-compatible releases and the current version.


Setting up a Seafile Server with Docker
In the following sections, we will guide you through the entire process of setting up Seafile using Docker. This includes the steps to installing Docker on your machine, to configuring the software itself.
These steps are written with a focus on a Debian-like system such as Ubuntu. However, they should work on almost any other operating system; they might just need a slight adjustment when it comes to installing the two packages we rely on..
Preparing your System
1. Before we get started with setting up the Seafile Docker container, we must ensure that our current system is up-to-date.
You can update the package list cache and upgrade any out-of-date packages by using the following two commands on your system.
sudo apt update
sudo apt upgrade -yCopy
2. Once the upgrade process completes, you must install the wget and pwgen packages.
We will be using the wget package to download the compose and environment files required for the Seafile Docker container.
The pwgen package will be used to generate a unique password for securing Seafile’s JWT tokens.
sud apt install wget pwgenCopy3. Now that the packages are installed, you must also have Docker installed on your Linux system. If you have never installed Docker before, we highly recommend following our guide.
Our guide will ensure that you have the latest available version of Docker installed and will help minimize the number of issues you may run into. Old versions of Docker do not play nicely with Seafile.
https://pimylifeup.com/linux-docker-install/Copy4. Now that your system is ready to go, we can begin the process of setting up the Seafile Docker container.
The first part of this process is to create a directory where we will store the various Compose files that Seafile requires. We will be using the mkdir command to create a directory at “/opt/stacks/seafile/“.
sudo mkdir -p /opt/stacks/seafileCopy5. Once the directory has been created, change into it. We will need to be in this folder for the rest of this guide.
cd /opt/stacks/seafileCopyGrabbing the Docker Compose Files for Seafile
6. To make things a bit easier to handle, we will start this section off by setting a bash environment variable that contains the version of Seafile we want to set up.
You can define this variable by using the following within the terminal. In the case of this guide, we will be setting up Seafile 13.0.
SEAFILE_VERSION=13.0Copy7. With the variable now set, you can run the commands below in the terminal. These commands download the Compose files that are used for a typical Seafile Docker stack, as well as the environment file that configures these various components.
sudo wget -O .env https://manual.seafile.com/$SEAFILE_VERSION/repo/docker/ce/env
sudo wget https://manual.seafile.com/$SEAFILE_VERSION/repo/docker/ce/seafile-server.yml
sudo wget https://manual.seafile.com/$SEAFILE_VERSION/repo/docker/seadoc.yml
sudo wget https://manual.seafile.com/$SEAFILE_VERSION/repo/docker/caddy.ymlCopy
Generating a Random Password for Seafile’s Session Tokens
8. Before we can begin to configure our Seafile Docker containers, we will want to generate a unique password. We will be using this password for the JWT token.
You can generate this token using the pwgen tool that we installed earlier in this guide. Be sure to write down the value generated by this command, as you will require it later.
pwgen -s 40 1CopyConfiguring Your Environment File for Seafile
9. We are finally at the point where we can edit the environment file that is read in by the various Docker containers.
For this guide, we are using the Nano text editor as it is one of the easiest to use for beginners.
sudo nano .envCopy10. Now you will be confronted with a fair bit of different options that you can configure within this file. Each of these controls various aspects of your Seafile Docker setup.
We won’t cover everything, and instead, we will focus on the most important options.
Choosing where Seafile Stores its Files
- The first thing we need to do is configure our Seafile Docker container to mount the directory where we created our Compose file.
By default, the software is set up to use a different directory. To make this change, look for the following line.
BASIC_STORAGE_PATH=/optCopyOnce you have found this line, update it to point to the “/opt/stacks/seafile” directory.
BASIC_STORAGE_PATH=/opt/stacks/seafileCopy- Seafile allows you to set different directories for various functionalities, such as where it should store all the files you upload.
To adjust the storage location to another place on your device, look for the following line.
SEAFILE_VOLUME=$BASIC_STORAGE_PATH/seafile-dataCopyOnce you have found this line, you will want to change it to where you want the Seafile Docker container to store the data you upload.
For example, if we want the files uploaded to “/mount/nasdrive/seafile-data” we would change the line to look like what we have shown below.
SEAFILE_VOLUME=/mount/hddrive/seafile-dataCopy- If you have changed the default Seafile volume, you will also likely want to update the place Seadoc will store its data.
You can adjust where Seadoc will keep its files by modifying the following line.
SEADOC_VOLUME=$BASIC_STORAGE_PATH/seadoc-dataCopyFor example, if we were to set our mount path to “/mount/hddrive/seadoc-data” we would change the line to look like the following.
SEADOC_VOLUME=/mount/hddrive/seadoc-dataCopyConfiguring your Hostname and Protocol
- We next need to specify the domain name, hostname, or IP address that will be used to access your Seafile Docker installation.
If you are using a domain name, ensure that this is publicly routable to your machine.
SEAFILE_SERVER_HOSTNAME=seafile.example.comCopyIf we were to use the domain name “seafile.pimylifeup.com” we would change this line to look like what is shown below.
SEAFILE_SERVER_HOSTNAME=seafile.pimylifeup.comCopyLikewise, if you wanted to use your IP address instead, this line would end up looking a bit like what we have shown below. In our case, we are using the local IP of our device.
SEAFILE_SERVER_HOSTNAME=192.168.0.22Copy- If you are using a domain name and have your device publicly accessible, then you will be able to enable HTTPS functionality.
To change the protocol being used by your Seafile Docker container, you will want to find the following line.
SEAFILE_SERVER_PROTOCOL=httpCopyAfter finding this line, you must replace “http” with “https“. This will tell the Caddy server that it should enable HTTPS functionality and automatically try to fetch an SSL certificate using your chosen domain name.
SEAFILE_SERVER_PROTOCOL=httpsCopySetting your TimeZone and Private Key
- By default, your Seafile Docker container will be set to use the UTC timezone. You will want to update this to reflect your current location.
To adjust the time zone you are using, look for the following line.
TIME_ZONE=Etc/UTCCopyOnce you have found this line, you will want to replace the timezone with the TZ Identifier for where you live. You can find a list of tz database time zones by going to Wikipedia.
Since we live in Hobart, Australia, we would use the value “Australia/Hobart“.
TIME_ZONE=Australia/HobartCopy- We are now required to set the JWT private key. This key is used by Seafile to help ensure your session remains secure and stops unwanted access.
To set this key, locate the following option.
JWT_PRIVATE_KEY=CopyAfter you have found this line, add the password you generated earlier to the end of it.
JWT_PRIVATE_KEY=EXAMPLEKEYGOESHEREDONOTUSETHISONECopyConfiguring the Database Passwords
- Up next, we need to define the passwords that Seafile’s database server will use.
The first password we will set is the one that Seafile will use to communicate with the database server. To set this password, look for the following line.
SEAFILE_MYSQL_DB_PASSWORD=PASSWORDCopyOnce you have found this line, replace “PASSWORD” with a secure random password of your own. There is no need to remember the password you set here as it will be used internally by your Seafile Docker container.
SEAFILE_MYSQL_DB_PASSWORD=RANDOMPASSWORDHERECopy- Seafile also expects you to define a password that the database’s root user will use.
You can set this password by looking for the following line in the configuration file.
INIT_SEAFILE_MYSQL_ROOT_PASSWORD=ROOT_PASSWORDCopyOnce you have found this line, replace “ROOT_PASSWORD” with a new password of your own. Even though this will only be used during the initial startup process, you should still ensure it’s secure.
INIT_SEAFILE_MYSQL_ROOT_PASSWORD=DIFFERENTPASSWORDCopySetting up your Seafile User Details
- Before we finish up, we must set up the details for the user that you will use to interact with the Seafile interface. These details will only be set when your Seafile Docker container starts up for the first time.
Let us start by looking for the following option that defines the admin email.
INIT_SEAFILE_ADMIN_EMAIL=me@example.comCopyOnce you have found this option, you must replace the default email with the one that you want to use to access the Seafile web interface.
For example, if we wanted to use the email “seafile@pimylifeup.com” we would change this line to look like the one shown below.
INIT_SEAFILE_ADMIN_EMAIL=seafile@pimylifeup.comCopy- With the email now set, we must set the password that you will use to log in to your new admin account.
To set the admin password, you should see the following line immediately under the one you used to define the email earlier.
INIT_SEAFILE_ADMIN_PASSWORD=asecretCopyTo set your password, all you need to do is replace “asecret” with the password you want to use to access your new Seafile Docker installation.
INIT_SEAFILE_ADMIN_PASSWORD=randomsecurepasswordCopySaving your Changes
11. After filling out this file, you can now save and quit by pressing CTRL + X, followed by Y, and then the ENTER key.
Starting up the Seafile Docker Compose Stack
12. We are now at the point where we can start up the entire Seafile Docker stack. To start everything, run the command below.
This process can take a few minutes, especially if you haven’t got the best internet connection. There are a fair few containers that need to be downloaded and started up.
If you encounter issues with Seafile starting up on your machine, remove the “-d” option and run this command again. This will enable you to view the logs produced by the stack and identify exactly what is preventing the software from starting.
docker compose up -dCopyAccessing your Seafile Web Interface
13. With your Seafile Docker stack now up and running, you should now be able to access it in your favorite web browser.
All you need to do is go to the following address, but swap out “<IPADDRESSORDOMAIN>” with the domain name or IP address you are utilizing.
http://<IPADDRESSORDOMAIN>If you set up HTTPS within the Docker stack, you will need to make sure you specify “https” instead of “http“.
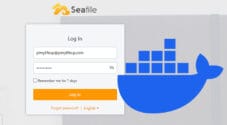
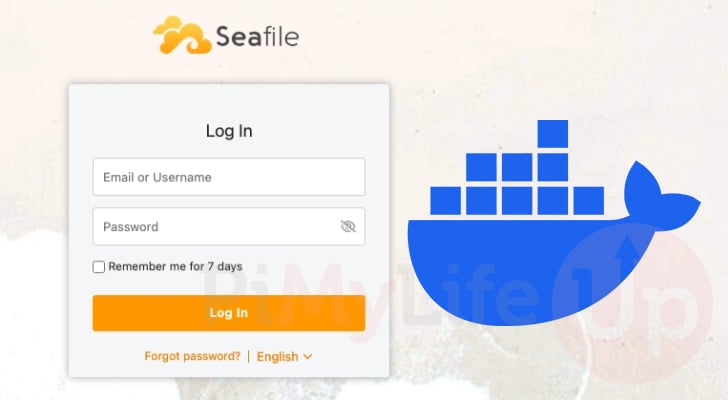
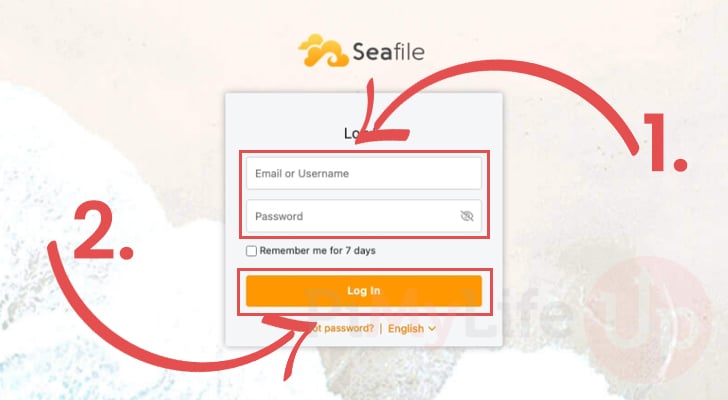
https://<DOMAINNAME>14. When you access the Seafile web interface, you will be prompted to log in. Here is where you will enter the admin email and password (1.) that you set in the environment file earlier.
After filling in your details, click the “Log in” button (2.) to continue.
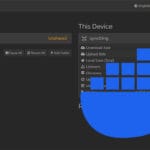
15. You have now successfully finished setting up Seafile using Docker, and everything is basically ready to go.
To access the Seafile interface, simply click the “X” button to exit the welcome window. However, there is one additional optional task that we highly recommend.

Updating your Admin Password
16. It is highly recommended that you update the admin password after your initial setup of Seafile using Docker. The reason for this is that anyone who can access your environment file will be able to see the password that you set.
Luckily, changing your password through Seafile is a relatively simple process. First, click the user icon in the top-right corner (1.) of the Seafile web interface.
Next, click the option labeled “Settings” (2.).

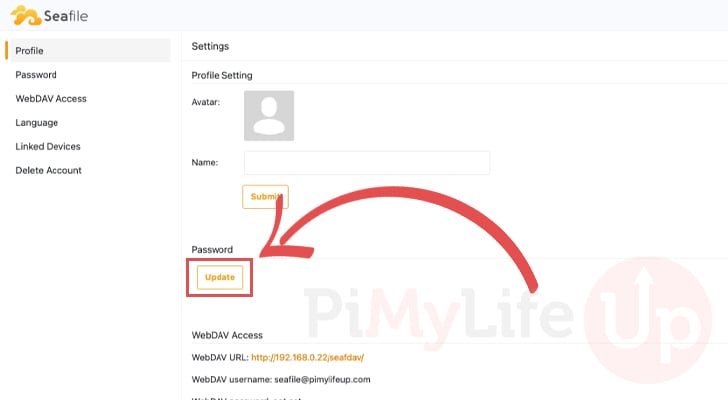
17. You should now be taken to the profile screen. On this screen, look for the heading labeled “Password” and then click the “Update” button underneath it.
18. You will now have a screen that will enable you to set a new password for your account. Before you can do this, you must first specify your current password (1.).
After typing in your current password, you will then want to fill out the password that you actually want to utilize (2.).
Finally, once you are happy with everything, click the “Submit” button to change your password (3.).

Updating your Seafile Docker Stack
One of the key advantages of using Docker to manage your software is that it often makes the update process incredibly easy. These steps we are providing for Seafile will ensure that you can update to the latest release. However, they will only help with updates within your specific branch (for example, version 13.0).
1. The first part of updating your Seafile Docker stack is to change into the directory where we saved the various Compose files.
You can swap to the correct folder by running the command below.
cd /opt/stacks/seafileCopy2. After changing to the correct location, we can now use Docker to pull the latest versions of each image. To get Docker to do this, all you must do is run the command below in the terminal.
docker compose pullCopy3. If a new version of Seafile was downloaded, you will still need to update your already running container.
To get Docker to detect the new release and restart your containers, just use the following command.
docker comopse up -dCopyConclusion
If you have reached this point in the guide, you should have successfully set up Seafile on your machine using Docker.
Seafile is a great self-hosted tool that will enable you to store and synchronize your files easily. It features an intuitive web interface and is equipped with numerous useful features.
Please drop a comment below if you have had any issues with getting Seafile to start up using Docker.
If you found this tutorial to be helpful, we recommend taking the time to explore some of our many other Docker guides.