In this tutorial, we will show you how to set up a Speedtest tracker using Docker.
An internet speedtest tracker allows you to monitor your internet performance easily. It is a great way to see if you are getting the speeds your ISP claims to offer while also being a helpful diagnostic tool.
There are various ways that you can set up an internet speedtest tracker. You can write your own custom tool like we did with our Raspberry Pi internet speed monitor guide, or you can use prebuilt software like in this tutorial.
To set up an internet speedtest tracker using Docker, we will be using a container by Alexjustesen. This container contains a piece of software that routinely performs speedtest’s using Ookla’s speedtest service. The results from these speedtests are then tracked and graphed so you can see how your internet performs.
The software we are using is one of the best solutions for tracking your internet speed. It just works straight out of the box. You don’t have to worry about setting up a separate service to track your data; everything is easily viewable and controllable through a modern web interface.
You can even follow this guide on a Raspberry Pi as long as you have a 64-bit operating system. The container we are using provides builds for both x64 and ARM64 architectures.
You can even set up this internet speedtest tracker on a Synology NAS if you wanted.


Installing the Internet Speedtest Tracker Using Docker
Over the next few sections, we will walk you through installing the internet speedtest tracker from a Docker container.
Most of these steps require you to use the terminal. If you are running a desktop variant of your operating system, you can often use the CTRL + ALT + T keyboard shortcut to open the terminal.
The video below will take you through all the steps to setting up the software required to run everything correctly. Alternatively, the complete written guide is immediately below the video.
Preparing your System for the Speedtest Tracker
1. Before you can set up this internet speedtest tracker, you must have Docker installed on your system.
If you don’t have Docker installed, we highly recommend following our installation guide.
https://pimylifeup.com/linux-docker-install/2. After installing Docker to your machine, we can now create a directory to store the Speedtest tracker and its configuration files.
You can create this directory by using the mkdir command within the terminal.
sudo mkdir -p /opt/stacks/speedtestCopy3. With the directory created, use the cd command to change to it. The rest of this guide will expect you to be in this folder.
cd /opt/stacks/speedtestCopy4. The other thing we will need before we can set up the speedtest tracker docker container is an app key.
The easiest way to generate a random app key is to head to the Speedtest tracker dev website in your favorite web browser.
https://speedtest-tracker.dev/Once you are on this page, you can find a randomly generated app key at the bottom of this page. You will need this key for the next section.
An example of what this value should look like is shown below. Do not use this value for your own setup. Its just here to show you what it should look like.
base64:13MUJ1DX+WkYCOaHEHSo8llgwucfcRydRM3J5u/rMRo=Writing a Docker Compose File for the Speedtest Tracker
5. We are at the point where we can begin to write the Docker Compose file that will set up and manage the internet speedtest tracker container.
A Compose file is a way of telling Docker how to set up and manage one, or many containers. It is significantly more straightforward to manage your container using these.
To begin to write this Compose file, use the following command in the terminal. We are using Nano as it is significantly simpler than other terminal-based text editors.
sudo nano compose.yamlCopyIf you want a better way of managing these Docker containers, we highly recommend setting up Dockge.
Filling out the Docker Compose File
6. In this file, enter the following lines to set up the speedtest tracker Docker container.
As the speed test tracker is completely configured through environment variables, there are a few things you will need to do here.
<APPKEY>: You must replace this placeholder with the app key you generated at the end of the previous section. This key is used to encrypt and decrypt the database.<TIMEZONE>: Here, you must specify the time zone of where your machine sits this ensures the speed test results will line up with your expected time. This timezone is specified using a TZ Identifier, you can find a list of these on Wikipedia.
An example of a valid entry for this is: “Australia/Hobart“.<CRON>: To run a speed test regularly, you must specify a cron schedule for the speed test Docker container to use. You can use our guide to learn how to write these cron jobs.
Alternatively, if you want a test to be run at midnight every day, you can use the following “0 0 * * *“.<SERVERS>: With this environment variable, you can specify the ID of a server, or multiple servers that you want to perform the speed tests against. This is a crucial step, as testing against one place will give you more consistent results.
You can find a list of servers near you by going to the Speedtest website. On this page, you will greeted by an XML page with a list of servers. The value you want is specified after “id=“.
For example, to connect to a Telstra server in Sydney we would specify the id “12492”. If we wanted to add another server to this list we would add a comma (,) followed by the id so it would end up like “12492,13279“
If you aren’t worried about the server used for your speed tests, delete this option.<KEEPRESULTS>: Finally, you can decide how long you want to store your speed test results for. This value is expressed in a number of days.
For example, to keep results for 7 days, you would specify7.
Alternatively, you must set this option to0to keep results forever. Be warned that your database will become quite bloated over time.
services:
    speedtest-tracker:
        container_name: speedtest-tracker
        ports:
            - 8080:80
            - 8443:443
        environment:
            - PUID=1000
            - PGID=1000
            - APP_KEY=<APPKEY>
            - DB_CONNECTION=sqlite
            - DISPLAY_TIMEZONE=<TIMEZONE>
            - SPEEDTEST_SCHEDULE=<CRON>
            - SPEEDTEST_SERVERS=<SERVERS>
            - PRUNE_RESULTS_OLDER_THAN=<KEEPRESULTS>
        volumes:
            - ./config:/config
        image: lscr.io/linuxserver/speedtest-tracker:latest
        restart: unless-stoppedCopy
Example of a Correct Docker Compose File for Speedtest Tracker
7. To give you an idea of how this file should be written. These are using our example values, but it should give you an idea if you are specifying something incorrectly.
services:
    speedtest-tracker:
        container_name: speedtest-tracker
        ports:
            - 8080:80
            - 8443:443
        environment:
            - PUID=1000
            - PGID=1000
            - APP_KEY=base64:13MUJ1DX+WkYCOaHEHSo8llgwucfcRydRM3J5u/rMRo=
            - DB_CONNECTION=sqlite
            - DISPLAY_TIMEZONE=Australia/Hobart
            - SPEEDTEST_SCHEDULE=0 0 * * *
            - SPEEDTEST_SERVERS=12492,13279
            - PRUNE_RESULTS_OLDER_THAN=7
        volumes:
            - ./config:/config
        image: lscr.io/linuxserver/speedtest-tracker:latest
        restart: unless-stoppedCopy
Saving your Changes
8. After filling out this information, you can save and quit by pressing CTRL + X, Y, and then ENTER
Starting up the Speedtest Tracker Docker Container
9. Starting up the Speedtest tracker Docker container is as simple as using the following command within the terminal.
This command will download the container and start it up immediately. Additionally, since we are using the “-d” option, Docker will detach from the current terminal session once it has started.
docker compose up -dCopyAccessing the Web Interface
10. Now that you have the Speedtest tracker up and running you will want to access its web interface.
To access this interface, you will want to know the IP address of your machine. If you are hosting this locally, you can get the local IP address assigned to your machine by using the
hostname -ICopy11. Go to the following address to access the web interface in your favorite web browser.
Ensure you replace “<IPADDRESS>” with the IP you got in the previous step.
http://<IPADDRESS>:8080Logging in and Changing the Default User
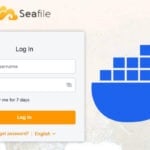
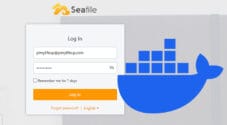
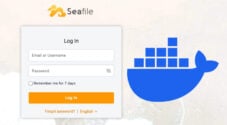
12. You must log in when you access your Docker-powered internet speedtest tracker. This software already has a default login that you can use, but it is something you will want to change immediately.
For your email address, type in “admin@example.com“, and “password” as your password (1.).
After entering the user details, click the “Sign in” button (2.).
13. Once logged in, you will want to adjust the default user to use your own username and password.
To begin this process, click on the user icon (1.) in the top right corner and select the profile (2.) option in the dropdown box.
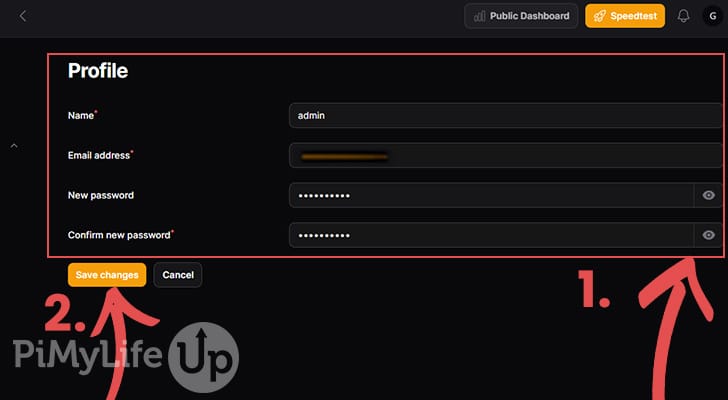
14. After swapping to the user’s profile screen, you should see a page listing your details. On this screen, you can specify a new email and password for your account (1.).
Once you are happy with your user’s new details, click the “Save changes” button (2.).
15. Since we adjusted the default user, you will be automatically logged out and be required to log back in again.
Running your First Speed Test
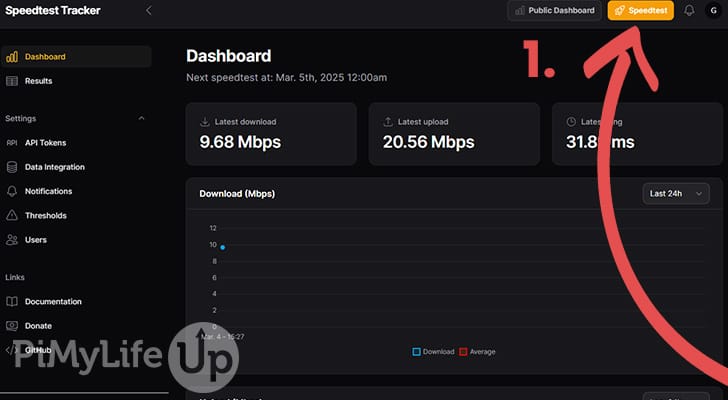
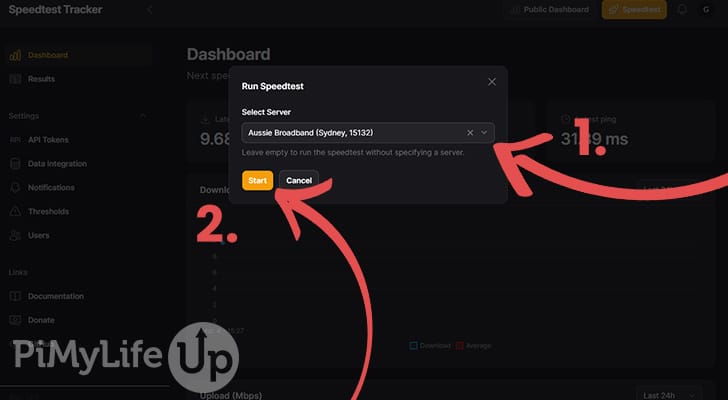
16. Running a speed test from this tracker is a really easy process. All you need to do is click the “Run Speedtest” button in the top-left corner (1.).
17. After clicking the button, a pop-up will appear. Select the server (1.) you wish to test your connection to. Once you have selected a server, click start (2.) to start the internet speed test.
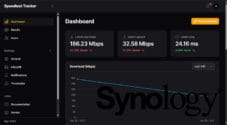
18. You can check your current status by changing to the results tab using the left-hand sidebar.
On this screen, you can see each speed test that has been run from within the Docker container. You can even see tests that are still pending.
Updating to the Latest Version of the Speedtest Tracker Container
This section will be showing you how you can easily update to the latest version of the internet speedtest tracker container.
The update process is made significantly simpler thanks to using a Docker Compose file to run this container.
1. Your first step is to change to the directory where we wrote the Compose file. You must be in the same folder to simplify interacting with your containers.
If you have followed our guide, you can swap to the right place by using the following command.
cd /opt/stacks/speedtestCopy2. After changing to the correct location, you must get Docker to pull the latest version of the speedtest tracker container. To do this, you only need to run the following command.
This command will pull the latest image but will now upgrade any existing commands.
docker compose pullCopy3. If Docker downloaded a new release of the Internet Speedtest Tracker, you will want to move your container over to this new release.
To get Docker to do this, you only need to run the following command. Docker will scan the compose file, check if any image is available, and then restart that container with the new image.
docker compose up -dCopyConclusion
If you have got to this point in the guide, you should have successfully set up the internet speed tracker software using Docker.
This software gives you a modern and simple-to-use interface to perform speed tests. It can routinely perform these tests and save these results to a database.
It is one of the coolest ways to keep an eye on your internet’s performance.
Please feel free to comment below if you have had any issues with getting this software up and running.
If you liked this tutorial, we recommend exploring our many other Docker guides to see what else you can self-host.

Thanks for this guide. Working flawlessly!
Is there a way to perform multiple (two would be sufficient) speed tests to different servers with a short delay?
Background: Those speedtests servers are not 100% stable. Sometimes not reachable or very poor performance. Currently this will end up in falsified results.
My idea was, to mitigate this behavior, that the tool will perform one test for every server that is mentioned in “SPEEDTEST_SERVERS=” in a serial sequence.
e.g. If I got three servers set up within the parameter and the job is scheduled every hour it would end up in something like
First test = 09:00 = Server 1
if test 1 is finished, Server 2 will be tested. (approx 60-90 seconds after the first test)
if test 2 is finished, Server 3 will be tested. (approx 60-90 seconds after the second test)
Due to this behaviour I would get three different results within 3 Minutes with different servers giving a better indication of the speed.
Golden solution: If one of the tests differs a lot (e.g 30% difference to the other tests) it wont be monitored. Or – if possible – set up a threshold for monitoring the speeds.
I got a 600 Mbit DL and 300 Mbit UL line. And if I now see, that I got a speed test where my upload was measured with 1,3Mbit –> that cant be a problem of my provider. Even the worst internet provider cant perform so badly.
It was definitly a problem on the speed tests server side.
Hi guys. I am getting a constant “Ops Server Error 500” when I try to login on the webpage. Running Pi OS Lite 64bit on Pi4. Tried installing multiple times. Same result. Also tried with a different .yaml config. No joy. Did you guys tried using your guide EXACTLY as written here? I don’t know jack about programming. I am just following your giude ad literam and can’t get this to work. Thank you.
P.S. Also tried your other tutorial, in Graphana. Connect to the database but I can’t get the options you are showing. Noob here.
Thanks for reaching out! The “Ops Server Error 500” usually indicates a server-side issue, which could be caused by a misconfiguration, missing dependencies, or issues with the YAML file. Running
docker logs -f speedtest-trackermight give you more details on what is causing the issue.You might also want to check that there aren’t any port conflicts. If something else is running on port 8080, you might not be able to connect.
The example completed compose.yaml is missing the APP_URL variable. Is this important?
In v1.2.3 of Speedtest Tracker, the Admin email and password editing is via the user icon > Profile option at the top right of the screen. The Users menu only allows editing and creation of new users.
Hi V,
You’re right
APP_URLisn’t required in thecompose.yaml, so it can be safely omitted.Thanks for pointing out the change in SpeedtestTracker v1.2.3 regarding the admin email and password! We’ll update the tutorial to reflect this. Appreciate the heads-up!
first of all: Thanks to all your instructions for this project…
i got it all up and running basicly….
so now i want to “fine-tune” this project, but i’m not shure where i have to Pull the screws..
i want to execute the Speedtest-Tracker every hour
wo, where i have to define this ?
is it in the Docker compose file
compose.yaml?what do i have to alter ? at this command?
- SPEEDTEST_SCHEDULE=0 * * * *does it work after
docker compose pulland
docker compose up -dThank you
Great to hear you got everything up and running! To schedule the speed test to run every hour, you’ll need to adjust the
SPEEDTEST_SCHEDULEenvironment variable in yourdocker-compose.ymlfile. So, what you have stated should work correctly.Hi
I am running on a raspberry pi4 with 4gb ram
Install for this ( internet speed test using Docker ) all fine
When running Docker I get the following error –
no matching manifest for linux/arm/v8 in the manifest list entries
When running ‘docker compose up -d’
Any ideas please ?
Thanks
Andy
Hi Andy,
From memory that error indicates that you are running a 32-bit operating system on your Raspberry Pi. You must be using a 64-bit operating system to use the Speedtest tracker docker container on your Raspberry Pi.
Kind regards,
Emmet
brilliant guide many thanks
Thank you for this, working perfectly. Now I have a leg to stand on when I complain to my ISP (Spectrum) about the speeds I pay for vs the actual speeds they serve me.
Do not see a General setting after install
Hi Gordon,
Unfortunately, the Speedtest tracker dev team removed the general settings page and moved it to being managed through environment variables.
I have updated the tutorial to use the new environment variables, but it will require you to redo your Compose file.
Please let me know if you have any additional issues.
Kind regards,
Emmet
Hello,
I tried this and the web interface is most impressive. However I got stuck with the final step: to create a schedule. The “general” tab is no longer present in the latest UI; instead the parameters are located in the environment variables.
I shall have to come back to this later.
Hi Ric,
Thank you for alerting us to this. I finally got around to it and have updated the tutorial to use the environment variables.
Kind regards,
Emmet