In this tutorial, we will show you how to set up the Gluetun Docker container on your machine.
Gluetun is a thin VPN client for your Docker containers that is packed with a ton of features. It works with a ton of VPNs right out of the box. You don’t have to rely on vendor-specific VPN software, meaning you can also change providers for your routed containers in seconds.
This specialized Docker container is designed for you to route your other containers through it. This allows you to run your software through a VPN. It is great when used in combination with other Docker containers, such as qBittorrent.
Gluetun can even be set up to act as a very easy-to-use HTTP and Shadowsocks proxy. This proxy functionality can be great for easily routing a particular application through a VPN instead of a whole machine.
A key feature of using Gluetun to route your Docker containers is that it features a built-in kill switch. This kill switch effectively terminates the network connections until the VPN connection is restored.
Best of all, Gluetun is really easy to set up. All you need is your chosen VPN provider’s login details; the rest is fairly simple.


Setting up the Gluetun Docker VPN Client on your System
The next few sections will show you how to set up and use the Gluetun Docker VPN client on your system. We will also be showing you how to route your other containers through this VPN.
Preparing your System to Run Gluetun
1. To run Gluetun, you must have Docker installed on your system. This is the run time that will handle
If you haven’t installed Docker, we have a great guide for Linux based systems such as Ubuntu.
https://pimylifeup.com/linux-docker-install/2. After installing Docker, we can move on to creating a directory where we will store the Gluetun VPN container and all of it’s data.
You can use the mkdir command within the terminal to create a directory at “/opt/stacks/gluetun“. We use the “-p” tag to create the whole directory path.
sudo mkdir -p /opt/stacks/gluetunCopy3. Once you have created the directory above, you can change to it using the cd command.
cd /opt/stacks/gluetunCopyWriting a Docker Compose file for Gluetun
4. With everything set up we can begin to write the Docker Compose file that will start up and manage Gluetun for us.
Since Gluetun requires a bit of configuration, it is significantly easier to manage using a Compose file. A Compose file is a simple way of specifying instructions on how a container or a set of containers is run.
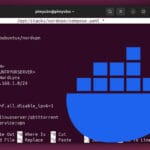
You can begin to write this Compose file using Nano using the following terminal command.
sudo nano compose.yamlCopyFilling out the Compose File
5. You will want to enter the following lines within this file. Gluetun requires a bit of configuration to connect to your VPN. Each VPN has a different way that it is configured
<TIMEZONE>: Replace this placeholder with the relevant time zone identifier for where your server is hosted. This time zone is used for the timestamps for the logs.
An example of a valid value for this is: “Australia/Hobart“.<SERVICEPROVIDER>: With this option, you will specify the name of the service provider you intend to use. This must match up with one of the VPN’s that the Gluetun Docker container supports.
For example, if you were using NordVPN you would set this value to “nordvpn“<VPNTYPE>: Next, specify the type of VPN connection the Gluetun VPN client will utilize when connecting to your provider.
OpenVPN is the most well-supported VPN technology. However, if your VPN supports WireGuard, then you should use that. WireGuard offers better performance. Refer to the provider page for your chosen VPN
Use “openvpn” for OpenVPN, and “wireguard” for WireGuard.<VPNCONENCTIONDETAILS>: This placeholder must be replaced with the connection details for your VPN. The requirements here will differ depending on the VPN you are connecting to Gluetun. Refer to the provider’s page from the Gluetun Wiki.
Typically, you will want to specify one of the following sets of environment variables. One set is if you are using an OpenVPN connection, and another is if you are using a WireGuard connection. Some VPNs may require additional information.- OpenVPN:
The username and password you use differ depending on the VPN you are using. For example, NordVPN requires you to use service credentials and not your accounts email and password.- OPENVPN_USER=<USERNAME>- OPENVPN_PASSWORD=<PASSWORD>
- WireGuard: WireGuard connects using a generated private key. Each provider differs in the way that they give you this key. NordVPN, for example, shows you this key through their web interface within the manual setup section.
- WIREGUARD_PRIVATE_KEY=<KEY>
- OpenVPN:
Please note that if you do not want the HTTP or Shadowsocks proxy functionality of Gluetun, simply remove the “HTTPROXY” and “SHADOWSOCKS” lines.
services:
  gluetun:
    image: qmcgaw/gluetun
    container_name: gluetun
    cap_add:
      - NET_ADMIN
    devices:
      - /dev/net/tun:/dev/net/tun
    ports:
      - 8888:8888/tcp # HTTP proxy Remove if not using
      - 8388:8388/tcp # Shadowsocks Remove if not using
      - 8388:8388/udp # Shadowsocks Remove if not using
    volumes:
      - ./data:/gluetun
    environment:
      - HTTPPROXY=on #Remove if not using for HTTP proxy
      - SHADOWSOCKS=on #Remove if not using Shadowsocks Proxy
      - TZ=<TIMEZONE>
      - VPN_SERVICE_PROVIDER=<SERVICEPROVIDER>
      - VPN_TYPE=<VPNTYPE>Copy
Example of a Filled Out Compose File
6. Below is a very basic example of what your configuration might look like after adding a VPN provider for Gluetun to connect to.
For this example, we used NordVPN.
services:
  gluetun:
    image: qmcgaw/gluetun
    container_name: gluetun
    cap_add:
      - NET_ADMIN
    devices:
      - /dev/net/tun:/dev/net/tun
    ports:
      - 8888:8888/tcp # HTTP proxy
      - 8388:8388/tcp # Shadowsocks
      - 8388:8388/udp # Shadowsocks
    volumes:
      - ./data:/gluetun
    environment:
      - HTTPPROXY=on
      - SHADOWSOCKS=on
      - TZ=Australia/Hobart
      - VPN_SERVICE_PROVIDER=nordvpn
      - VPN_TYPE=openvpn
      - OPENVPN_USER=XXXXXXX
      - OPENVPN_PASSWORD=XXXXXXXXCopy
Saving your Changes
7. After filling out the Compose file, you can save and quit using Nano by pressing CTRL + X, Y, and then ENTER.
Starting up the Gluetun Container
8. With the Compose file written, we can start the Gluetun VPN client using the following command in the terminal.
Using the “-d” option tells Docker that it should detach from the terminal session once it has downloaded and started Gluetun. This process should only take a few minutes as the Gluetun container is super lightweight.
docker compose up -dCopy9. Now that you have started Gluetun, you will want to verify that it works correctly. You don’t want to start running your Docker containers through it until you know it is connecting successfully to your VPN.
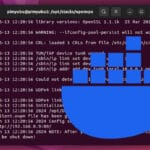
You can get the logs being output by Gluetun by using the following command in the terminal. With this command, we will follow the logs so any new output will be automatically printed to the screen.
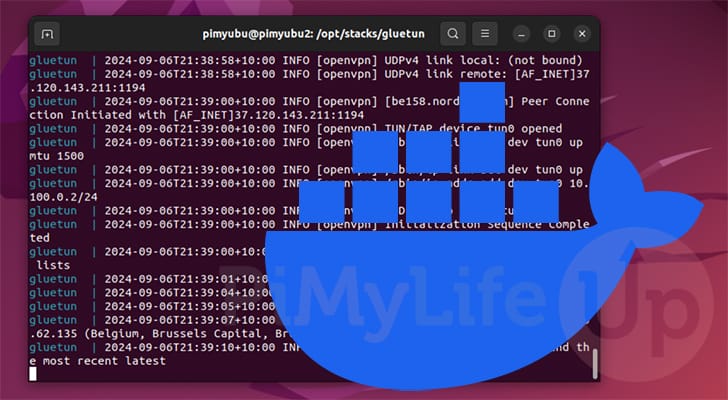
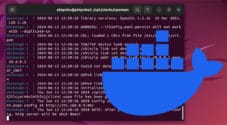
docker compose logs -fCopy10. If Gluetun is working properly, you should see logs similar to those shown below appear within the logs.
These logs indicate that the Gluetun Docker container is online, healthy, and connected to your desired VPN.
gluetun  | 2024-09-06T21:39:01+10:00 INFO [healthcheck] healthy!
gluetun  | 2024-09-06T21:39:04+10:00 INFO [dns] DNS server listening on [::]:53
gluetun  | 2024-09-06T21:39:05+10:00 INFO [dns] ready
Routing through the Gluetun VPN Client
11. Now that you have the Gluetun container running, you will want to know how to route your devices through this. We will start off this section by explaining how you can route other Docker containers through the Gluetun VPN client.
However, we will also cover the quick concept of how you can use the inbuilt HTTP Proxy.
Launching a Docker Container through the Terminal
a. If you are launching a Docker container using the terminal, routing it through your Gluetun VPN client is a relatively simple.
All you must do when launching this container is utilize the “--network” option to specify the “gluetun” container as we have below. With this, the container will route all network activity through your firewall.
--network=container:gluetunCopyRouting a Container in the Same Compose File
b. When including Gluetun in a Docker Compose stack, getting your other containers to route through it is relatively simple.
All you need to do is use the following line for each container you want to route through the VPN client.
network_mode: "service:gluetun"CopyAn example of how this would look after being defined for the Transmission Docker container is below.
services:
  gluetun:
    image: qmcgaw/gluetun
    container_name: gluetun
    cap_add:
      - NET_ADMIN
    devices:
      - /dev/net/tun:/dev/net/tun
    ports:
      - 8888:8888/tcp # HTTP proxy
      - 8388:8388/tcp # Shadowsocks
      - 8388:8388/udp # Shadowsock
    volumes:
      - ./data:/gluetun
    environment:
      - TZ=Australia/Hobart
      - VPN_SERVICE_PROVIDER=nordvpn
      - VPN_TYPE=openvpn
      - OPENVPN_USER=XXXXXXX
      - OPENVPN_PASSWORD=XXXXXXXX
  transmission:
    image: lscr.io/linuxserver/transmission:latest
    container_name: transmission
    restart: unless-stopped
    network_mode: "service:gluetun"Copy
Routing an External Docker Compose File through the Gluetun VPN
c. To connect containers in a Docker Compose file where Gluetun isn’t defined, you must change the line above slightly.
With this, you can see when we specify the network mode, we are using “container” rather than “service“. This allows us to specify a container by its name rather than as a service.
network_mode: "container:gluetun"CopyBelow is an example of how this would look when used in a separate Docker Compose file.
services:
  transmission:
    image: lscr.io/linuxserver/transmission:latest
    container_name: transmission
    restart: unless-stopped
    network_mode: "container:gluetun"Copy
Using the Gluetun HTTP Proxy
d. If you have decided to use Gluetun as a super lightweight VPN HTTP Proxy, you will want to know how to connect to it.
We won’t be covering exactly how to do this, but we will be telling you what you will need to point your machines to. The first thing you must know is the IP address of the machine on which you are running Gluetun.
If you don’t know your machine’s local IP address, you can always use the hostname command.
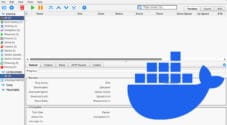
hostname -ICopye. Now once you know the local IP address of your machine. You will want to find the proxy settings for either your device, web browser, or general application settings.
Firefox is a great web browser that allows you to still manage the proxy settings through the web browser itself.
Once you find the HTTP proxy settings for your app, you will want to set it to run through the following address. Ensure you replace “<IPADDRESS>” with the IP of your machine.
After making this change, your HTTP requests should be routed through the VPN you have connected through Gluetun.
<IPADDRESS>:8888Conclusion
If you have got to this point in the tutorial, you should have hopefully set up Gluetun on your device using Docker.
Gluetun is a really neat and easy-to-use VPN client for your Docker containers. Routing your traffic through this container is incredibly easy, and it’s so lightweight you can easily run it alongside your other software.
Please feel free to post a comment below if you have had any issues getting this Docker container up and running.
If you liked this tutorial, we recommend exploring some of our many other Docker guides to see what you can easily self-host.


Thanks Emmt for a great tutorial. When I attempt to add network_mode: “container:gluetun” to my SABnzbd compose.yaml I get the following error:
✘ Container sabnzbd Error response from daemon: c… 0.0s
Error response from daemon: conflicting options: port publishing and the container type network mode
I used the docker compose version from linuxserver.
Any pointers please would be great.
Hi Paul,
You will need to make usre you remove any ports published by your sabnzbd container. This is causing a conflict with us telling it to use the gluetun container for its networking.
For example, you would remove.
If you need any further pointers, please let me know.
Kind regards,
Emmet