In this tutorial, we will be showing you how you can easily self-host Bitwarden using a Docker container.
Bitwarden is one of the best password managers available, and the best solution for those who are after something that is completely open-source.
With Bitwarden, you have a couple of solutions: you can rely on their own cloud solution, or you can self-host the vault yourself. Being able to self-host your password manager keeps you in full control over how your passwords are stored.
Now, there are actually two different solutions to self-hosting a Bitwarden vault. There is Vaultwarden, which is an alternative implementation of the Bitwarden API written in Rust, and then there is the official Bitwarden Server that we will be installing in this guide.
The biggest difference between these two is that Vaultwarden is typically much more resource-friendly, which is also what makes it perfect for small devices like the Raspberry Pi. On the flip side, the Bitwarden server is capable of handling quite a few more users, but is also significantly more resource-intensive.
Now, if you have decided to stick with the official Bitwarden server, there are a few things you will need:
- First, you must have a machine or VPS that has at the very least 2GB of RAM (4GB is the recommended amount), and also be using a 64-bit operating system.
This official implementation does not support ARM, so you cannot follow this on ARM devices, such as the Raspberry Pi. - On top of a compatible device, you must own a domain name that you can use for Bitwarden. For this server to work properly, it requires a signed SSL certificate. The best way to get a signed certificate is through Let’s Encrypt, which will require you to have a domain name.
- Third, to really make the most out of Bitwarden, you will want to be able to access your server remotely. You can achieve this through port forwarding or by setting up a service like Cloudflare Tunnel or Pangolin.
- Fourth, to use the official Bitwarden server, you will need to set up SMTP; otherwise, you will never receive the verification email. You can either use a provider like Mailgun or Sendgrid, or if you are someone who uses Gmail, you can just use their SMTP relay.
Installing the Bitwarden Server with Docker
Over the following steps, we will be walking you through the steps of setting up and running the Bitwarden Server using Docker.
These steps involve preparing your machine by installing Docker and creating a user for Bitwarden to run under, as recommended by the development team. A separate user helps keep your Bitwarden server more secure as it is separated from the other software running on your system.
If you are still undecided about what operating system you want to use, you really can’t go wrong with the many Debian variants, such as Ubuntu Server.
Preparing your System
1. The first task you will want to do is download and install the latest version of Docker. We will be using Docker to run the Bitwarden Server, as it makes the process significantly simpler.
If you already have Docker installed, you can just skip to the next step. Otherwise, follow our tutorial that will show you how to install the latest versions of Docker on Linux.
https://pimylifeup.com/raspberry-pi-docker/2. With Docker now installed, the next thing we want to do is ensure that any packages we might rely on are installed.
Now, before we do this, we will want to update the package list cache by using the command below. Please note that if you are running a system that doesn’t use “apt“, you will need to adjust these steps slightly.
sudo apt updateCopy3. Once the update has completed, ensure that the curl package has been installed on your machine. We will be using this to grab and run the official Bitwarden server script later on in the guide.
You can ensure curl has been installed by using the command below
sudo apt install curl -yCopyCreating a User to run the Bitwarden Server
4. Now that we have everything we need to get started, we can move on to creating a user under which the Bitwarden server will run.
To create a user called “bitwarden“, you will want to use the following command within the terminal.
sudo useradd bitwardenCopy5. With the user created, our next step is to give it a password. To set a password for any Linux user, you will want ot utilize the passwd command.
We can set a password for the new Bitwarden user by running the following command. You will be prompted to enter a password, and then to confirm it.
Ensure that you set this to something long and secure.
sudo passwd bitwardenCopy6. Once the user has a password assigned to it, we will want to now add the new Bitwarden server user to our “docker” group. We are doing this as it will enable the Bitwarden user and its scripts to interact with the Docker daemon
You can add (-a) the bitwarden user to the docker group (-G) by using the usermod command.
sudo usermod -aG docker bitwardenCopySetting up the Directory for the Bitwarden Server Docker Container
7. With our user now set up and configured, we will now want to create a directory that will be used to store the Bitwarden server install script, as well as all the rest of the Docker configuration required by the software.
We will be utilizing the mkdir command to create a directory at “/opt/bitwarden“.
sudo mkdir -p /opt/bitwardenCopy8. With the new folder created, we want this to only be accessible by the user who owns the folder. This helps ensure that no bad actors will be able to easily gain access to your Bitwarden setup, unless they happen to access your superuser or “bitwarden” user.
You can change the permissions of the folder we just created by using the chmod command. Since we are using “700” only the “owner” will have read, write, and execute permissions.
We have a breakdown of Linux permissions if you want to learn more about how this works.
sudo chmod -R 700 /opt/bitwardenCopy9. Since we created the “/opt/bitwarden” folder using “sudo“, it will currently be owned by the “root” user. Since we need this to be owned by the “bitwarden” user, we will need to modify this.
To change the ownership of this folder to the “bitwarden” user, all you need to do is utilize the chown command
sudo chown -R bitwarden:bitwarden /opt/bitwardenCopyRetrieving your Host ID
10. The Bitwarden team doesn’t let you self-host their server with Docker unless you have a host installation ID and key
Luckily, getting these values only requires you to provide your email address. You can retrieve both of these required values by going to the Bitwarden hosts page and following the prompts.
Before you continue, you must have the installation ID and installation key generated by this form.
https://bitwarden.com/host/Preparing the Bitwarden Docker Install Script
11. The rest of the setup steps will require you to be running under the “bitwarden” user. This will help ensure that we don’t have to fix up any permissions later on in the guide.
You can change to the “bitwarden” user by running the following command.
sudo su bitwardenCopy12. Now that we are running as our bitwarden user, you will want to change into the directory that we created earlier.
To change to this folder, you will want to use the cd command.
cd /opt/bitwardenCopy13. Once we are running under our new user, we can begin the process of setting up the Bitwarden server using Docker.
To make this entire process a bit easier, we will be relying on the installation script provided by the Bitwarden team. We can grab this script and save it to your Linux machine by using the curl command.
curl -Lso bitwarden.sh "https://func.bitwarden.com/api/dl/?app=self-host&platform=linux"Copy14. Once the script has been downloaded, we must ensure that its permission only enables our Bitwarden user to interact with it.
To achieve this, let us use the chmod command again to give this file the permissions “700“. This will ensure only our owner user can read, write, or execute this script.
chmod 700 bitwarden.shCopyInstalling the Bitwarden Server with the Official Docker Install Script
15. We are finally at the point where we can now run the new installer and have the Bitwarden server Docker container set up and ready to run.
Now, before you proceed any further, you must already have your domain name set up and pointing to your machine’s IP address. Additionally, ports 80 and 443 must be accessible, whether this is through a Cloudflare tunnel or port forwarding.
The reason for this requirement is that the Bitwarden install script will attempt to fetch you a valid SSL certificate.
To begin the installation process, run the command below in your terminal.
./bitwarden.sh installCopy16. During the installation process, you will need to complete several prompts, so let’s now walk you through them.
- Enter the domain name for your Bitwarden Instance: Type out the domain name that you intend to use to access your Docker Bitwarden Server.
For example, we would use “bitwarden.pimylifeup.com“. - Do you want to use Let’s Encrypt to generate a free SSL Certificate (y/n): Next, you will be prompted on whether you want the script to generate you are free SSL certificate. Considering Bitwarden does not function properly without one, you must now type in “
y” and press ENTER to continue.
If you select no, you will be prompted whether you have a custom SSL certificate later on. We won’t be covering this as we do not recommend this route. - Enter your email address: Let’s Encrypt requires your email when generating the SSL certificate.
The email you use here doesn’t have to be associated with the domain name you are using. - Enter the database name for your Bitwarden instance: This is the name that will be used for the Bitwarden Docker server’s container. In our tutorial, we used the name “
vault“. - Enter your installation id: Type in the ID that you would have retrieved from Bitwarden earlier in this guide.
- Enter your installation key: Type out the key that was generated earlier on the Bitwarden hosts page.
- Enter your region (US/EU): Enter whether you want to use the US or EU region. This is only applicable if you are connecting a self-hosted account or organization to a paid subscription.
Configuring your Email Settings
17. To actually create and use a user with your self-hosted Bitwarden server Docker container, you will need to set your SMTP settings. This is required as Bitwarden requires you to verify your account using your email.
This configuration is accessible through a file called “global.override.env” located within the “./bwdata/env/” directory. You can open this file for editing by using the command below.
nano ./bwdata/env/global.override.envCopy18. The Bitwarden server heavily relies on email for sending users either verification emails, or for generating a secure link for logging in.
Setting up SMTP is basically a must for proper usage of Bitwarden. Now within this file, scroll down until you find the follow section.
You must update each of these with the details provided by your SMTP provider.
globalSettings__mail__replyToEmail=no-reply@bitwarden.pimylifeup.com
globalSettings__mail__smtp__host=REPLACE
globalSettings__mail__smtp__port=587
globalSettings__mail__smtp__ssl=false
globalSettings__mail__smtp__username=REPLACE
globalSettings__mail__smtp__password=REPLACECopy
For example, we are using Mailgun’s free plan that gives us 100 emails a day, which is more than enough for our private usage.
Updating these values to those provided by Mailgun would end up changing the file to look a bit like what we have shown below. Of course we are using a random username and password but you should get the idea.
globalSettings__mail__smtp__host=smtp.mailgun.com
globalSettings__mail__smtp__port=587
globalSettings__mail__smtp__ssl=false
globalSettings__mail__smtp__username=example@pimylifeup.com
globalSettings__mail__smtp__password=examplepasswordCopy
19. Additionally, you are also able to set up access to the Bitwarden admin panel by specifying the emails you want to give access. You do not have to do this, as it is only really useful if you plan on having multiple users access your Bitwarden Docker installation.
To add an email to the access list you will want to find the following setting. By default it will have nothing set.
adminSettings__admins=CopyOnce you have found the option above, you simply need to type out the email you want to give access to the admin panel. For each additional email you add, you must separate them using a comma. We have given you an example of how this is defined below.
adminSettings__admins=admin@pimylifeup.com,emmet@pimylifeup.com,gus@pimylifeup.comCopy20. Once you have finished making your changes within this configuration file, you can save and quit by pressing CTRL + X, Y, and then ENTER.
Starting up the Bitwarden Server with Docker
21. We now have the Bitwarden server configured, and we can get it to start up its various Docker containers.
To start up the server, all we need to do is utilize the “bitwarden.sh” script we downloaded earlier and use it’s “start” command.
Please note that the initial start-up process of the Bitwarden server can take a fair bit of time. It needs to download several Docker containers that it relies on, some of which are rather large.
./bitwarden.sh startCopyAccessing your New Bitwarden Server
22. To access your new Docker-powered Bitwarden server, all you need to do is go to the domain name that you pointed to your server.
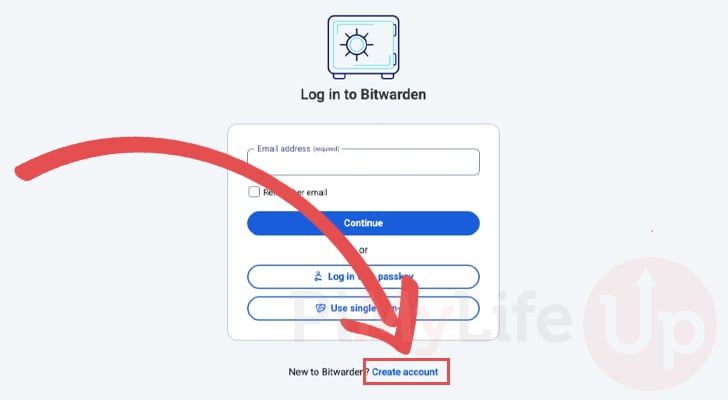
https://<DOMAINNAME>/23. The first time you access the Bitwarden dashboard, you will want to create your own account.
To begin the account creation process, click the “Create account” link at the bottom of the login screen.
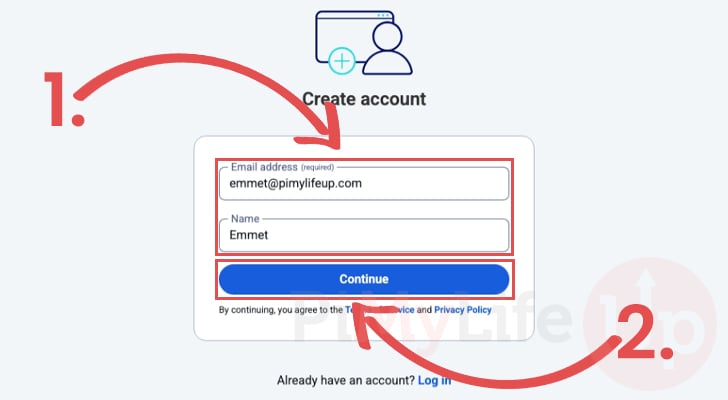
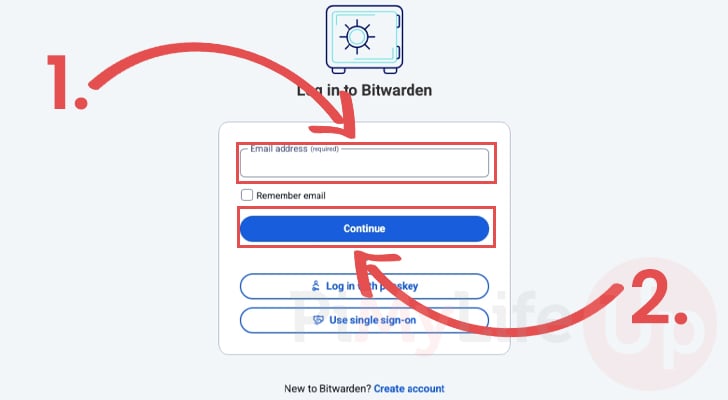
24. Next, type out the email address you want to utilize for your Bitwarden account (1.). You can also specify a name for your account, but this is optional.
After entering your details, click the “Continue” button (2.) to proceed.
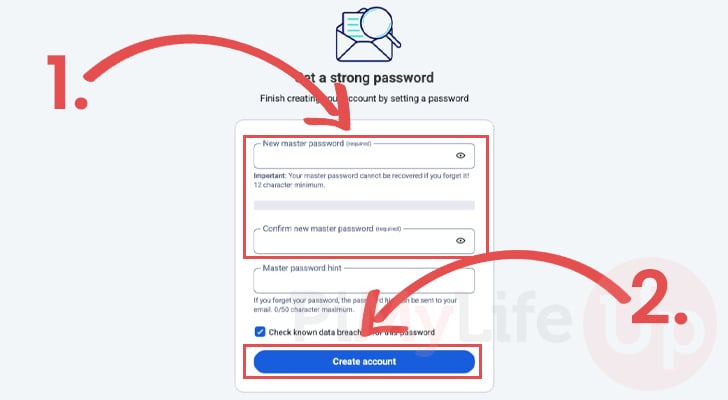
25. You will now want to type out the password you will use to access your new Bitwarden account (1.). Please note that Bitwarden requires your password to be a minimum of 12 characters long.
Ensure that this password is something that you can remember, as you will not be able to recover the account if the password is lost.
Once you are happy with the password you have set, click the “Create account” button (2.).
26. With your Bitwarden account now created on your Docker server, your next step is to log in. The first part of this process is to enter the email address you set when creating the account (1.).
After typing in your email, click the “Continue” button (2.).
27. After filling out your email, you will then be prompted to enter the password that you used when creating the account (1.).
Once the password has been typed in, you can log in to your new account by clicking the “Log in with master password” button (2.).

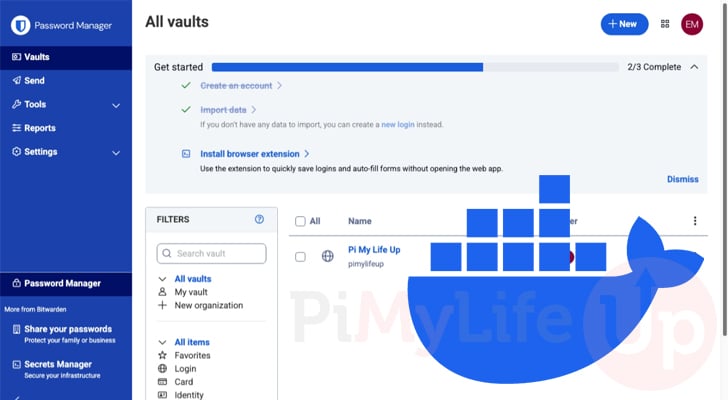
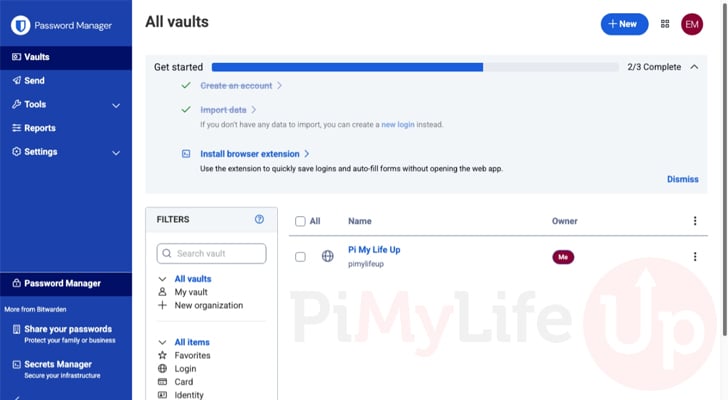
28. You have now successfully set up your very own Bitwarden server using Docker. Docker makes the process of self-hosting a Bitwarden instance a relatively straightforward process.
You can now begin to store your password within the Bitwarden interface as well as hook it into the various Bitwarden applications.
Now there is one last thing you will probably want to do before you get to carried away.
Disabling User Registration
29. By default, a fresh setup of the Bitwarden Server with Docker will be configured to accept any registrations. Basically, this means that anyone who finds your server can sign up without anything stopping them.
Luckily, we can disable user registrations by making an adjustment to the overrides file we edited earlier. So back in the terminal, open up this file for editing by running the command below.
nano ./bwdata/env/global.override.envCopy30. Within this file, scroll down until you find the following option.
globalSettings__disableUserRegistration=falseCopyTo disable user registration, all you need to do is change the “false” value to “true“.
globalSettings__disableUserRegistration=trueCopy31. Once you have made this change, save and quit by pressing CTRL + X, Y, and then ENTER.
32. Now, for this change to actually take effect, we must restart the entire Bitwarden server Docker stack by using the command below.
You will briefly lose access to Bitwarden as it restarts.
./bitwarden.sh restartCopyUpdating to the Latest Version of the Bitwarden Server Docker Container
As the Bitwarden Server does receive updates fairly often, you will probably want to know the steps required to update the various Docker containers.
Luckily, the script that we used when installing the server is the same one we will use to update everything. This script will also help with migrating to new versions if one is made available.
1. The first part of this process is to switch to the “bitwarden” user that we created. We must be this user to ensure the update runs cleanly.
sudo su bitwardenCopy2. Now that we are operating as the correct user, change to the “/opt/bitwarden” directory by running the command below.
cd /opt/bitwardenCopy3. With everything now in the right place, our next step is to get the Bitwarden.sh script to self-update by using the command below.
This will ensure that we are running the latest version of the script and get any improvements that may have been made.
./bitwarden.sh selfupdateCopy4. Once the script has finished its self-update process, we can now update the Bitwarden Server Docker stack by using the command below.
Please note that this process can take some time, especially if multiple components have updates available. You will also briefly lose access to your server during this process.
./bitwarden.sh updateCopyConclusion
Hopefully, if you have gotten to this point in the tutorial, you will have successfully managed to get your very own Bitwarden Server up and running using Docker.
Being able to self-host your very own password manager enables you to keep in control of all of your data.
Please feel free to leave a comment below if you have had any issues with getting this server up and running. It can definitely be a bit of a tricky process as it requires certain things like a domain name to be configured correctly.
If you found this project to be helpful, we highly recommend taking some time to explore some of our many other Docker projects. The amount you can self-host with this tool is crazy.