In this guide, we will show you how to boot into the recovery mode on Ubuntu.
The Ubuntu recovery mode is designed to fix common issues that could potentially be breaking your system.
It is one of those tools you hope you never have to rely on but are glad to exist when something goes wrong.
This tool works by booting your system with the minimal number of systems needed for it to operate. This helps isolate it from anything that could be breaking Ubuntu.
The recovery mode gives you several ways to repair your Ubuntu system. It has a couple of quick tools that allow you to free up space on your system, attempt to fix broken packages, and check for filesystem errors.
On top of this, Ubuntu’s recovery mode allows you to boot into the root shell. Using this shell, you can make changes to your system directly, so if you know what broke it, you can easily use this to undo the breaking change.
Booting into the Ubuntu Recovery Mode
Over the next few steps, we will walk you through the process of booting into the Ubuntu recovery mode.
We start this off by showing you how to open the Grub menu. This menu is what allows you to choose how Ubuntu boots. It is sometimes called the “boot menu”.
After that, we will show you how to navigate the grub menu so that you can enter recovery mode.
Opening the Grub Menu
1. To boot into the Ubuntu recovery mode, start with your device powered off. While rebooting also works, it typically gives you significantly less time to get into recovery mode.
Additionally, you will require a keyboard to be plugged into your device before continuing. The reason for this is that you need to press a particular key during start-up.
2. To get to the grub menu, which we will use to boot into recovery mode, you must press a particular key during start-up.
- For most people, you must continually press the ESC key on your keyboard during start-up.
- If you are running an older, non-UEFI system, you must instead press the SHIFT key continually.
Once you are certain of the key you need to press, turn your Ubuntu device back on and begin pressing the correct key. If you see the Ubuntu splash screen, you must try again.
Changing to Ubuntu Recovery Mode
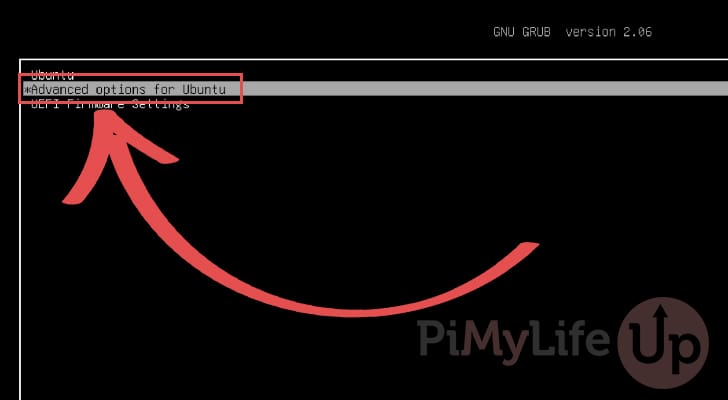
3. You should now see a screen similar to the one below. This screen is the grub menu. You can navigate this menu using the UP and DOWN arrow keys. To select an entry, press the ENTER key.
Here, you must select the “Advanced Options for Ubuntu” entry. This will take us to where we can boot into Ubuntu’s recovery mode.
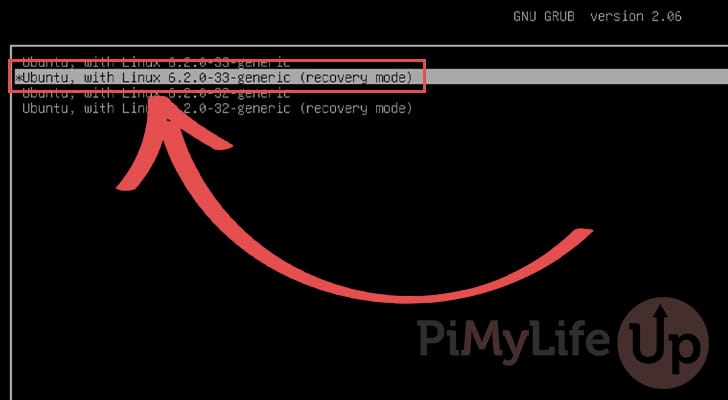
4. After going into advanced mode, you will see a list of versions of Ubuntu you can boot into. Typically, the only difference between this is the kernel version and whether they boot into recovery mode or not.
To get into recovery mode, you must select an option that ends in “(recovery mode)“. In our example, we are selecting the second entry.
Quick Overview of the Ubuntu Recovery Mode
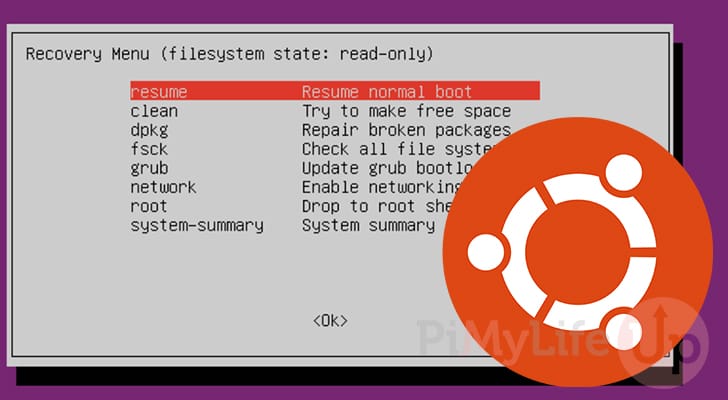
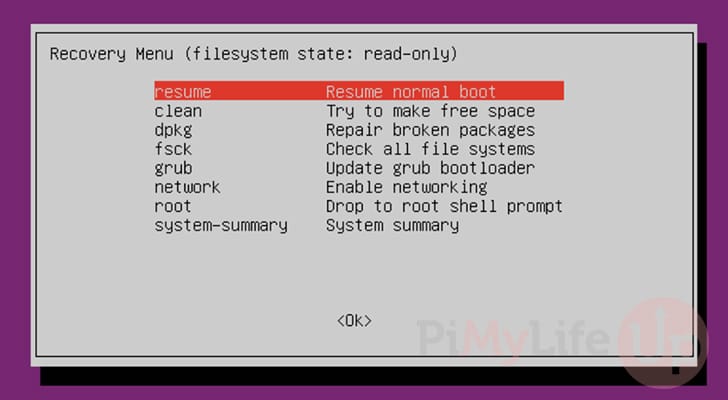
5. At this point, you have finally booted into the Ubuntu recovery mode. Here, you can see a list of different options that we will now briefly go over.
- resume: Use this option to exit recovery mode and attempt to boot into Ubuntu as normal.
- clean: By choosing clean, the recovery mode will attempt to remove files from the system to free up some space. This is useful when your system isn’t booting due to you not having enough space left on your system.
Some system components and packages can fail if they can’t create their required files during boot. - dpkg: This option will attempt to use dpkg to repair any broken package on your system.
- fsck: use this option if you suspect there to be issues with your filesystem. This will perform a full check of your filesystems and attempt to repair if possible.
Not all drive issues can be fixed, and it may indicate that you should replace your drive regardless. - grub: Updates the grub to use the newest configuration. Be careful with this. If you break grub, you will also break your access to the Ubuntu recovery mode.
- network: Recovery mode starts with almost every system module disabled. This includes networking.
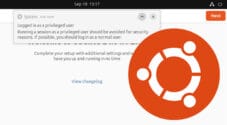
You can use this option to turn networking back on. This is useful if you need to utilize the network to fix your Ubuntu system. - root: By selecting this option, you gain access to the root shell.
You can use this shell to access your system and make any required changes. Just remember that not all parts of your system are active. You will need to switch them on if you want to use them. Additionally, all of your drives won’t be mounted, so to access files on them, you must mount them yourself. - system-summary: This final option is simple and shows you information about your system.
For example, it shows your CPU information, disk usage, and memory usage.
Conclusion
Throughout this guide, we have shown you the steps to boot your Ubuntu device into recovery mode.
This mode allows you to attempt to fix issues with your system that prevent it from booting or becoming extremely unstable.
Thanks to this tool giving you access to the root shell, you should be able to fix almost all software-related issues with your device.
If you are experiencing any issues getting into recovery mode on your system, please drop a comment below.
Be sure to check out our many other Ubuntu tutorials if you want to explore this operating system further.