In this tutorial, we will show you how to install the popular Python distribution Anaconda on an Ubuntu-based operating system.
Anaconda is a popular Python distribution that focuses on improving scientific computing. It aims to improve package management and deployment.
Installing the Anaconda distribution on Ubuntu will give you access to over 250 Python libraries. On top of these libraries it also enables the Conda package manager. This package manager is what you will use instead of pip and has several advantages that it brings with you.
A key problem with pip that Conda solves is that installing a library can break other libraries you might be using. Conda attempts to solve this issue by verifying that the Python packages it is installing on Ubuntu are compatible with the other libraries you are using.
By the end of this guide, you should have Anaconda installed on your Ubuntu system and have a basic idea of how to use the Conda Python package manager.


Quick and Easy Ways of Installing Anaconda on Ubuntu
In the following sections, we will walk you through the process of downloading and installing Anaconda on an Ubuntu system.
These steps are pretty straightforward, but you will need to use the terminal. If you are using the Ubuntu desktop, you can bring up the terminal by pressing CTRL + ALT + T.
Preparing your System
1. Before we install Anaconda on Ubuntu, we should do a couple of things first.
Our first task will be to ensure our Ubuntu system is up-to-date. We can update the package list cache and upgrade any out-of-date packages by running the following two commands.
sudo apt update
sudo apt upgrade -yCopy
2. After updating the package list cache, we must ensure that the wget, curl, and grep packages are installed on your system.
We will use these tools to make downloading and setting up Anaconda easier. You can install these packages by running the following command.
sudo apt install wget curl grepCopyDownloading the Latest Anaconda Install Script on Ubuntu
3. With Ubuntu now prepared, we can download the latest version of the Anaconda install script to your Ubuntu system.
If want to install a specific version of Anaconda, you can grab the download link directly from the Anaconda Repo and skip to step 7. Alternatively, you can follow our steps below to use bash to grab the latest download link directly from the terminal.
4. To make things easier we will set a bash variable so that it contains the architecture that you are running. Make sure you use the command relevant to your system.
For x86 64-bit Operating Systems
ARCHITECTURE="x86_64"CopyARM 64-bit Operating Systems
ARCHITECTURE="aarch64"Copy64-Bit PowerPC Systems
ARCHITECTURE="ppc64le"Copy5. Once you have the architecture variable set, you can use the command below to get the name of the latest release of Anaconda for your Ubuntu system.
This command will use curl to grab the Anaconda repo page. It will then pass this page to grep, which we use to find the release name for your desired architecture. Finally, we use the head command to get the latest release from the list.
DOWNLOAD_URL=$(curl -s -L https://repo.anaconda.com/archive/ | grep -o "Anaconda[^\"]*-Linux-${ARCHITECTURE}.sh" | head -1)Copy6. The problem with the download link we just grabbed is that it is a relative one. Getting around this is simple. We can use Bash to join the proper URL and the file name by running the following command.
DOWNLOAD_URL="https://repo.anaconda.com/archive/${DOWNLOAD_URL}"Copy7. Now all we need to do to download the Anaconda install script on Ubuntu is to run the following command within the terminal.
If you have decided to grab the download script manually, ensure that you replace “${DOWNLOAD_URL}” with the link.
wget ${DOWNLOAD_URL} -O Anaconda-Linux.shCopyRunning the Anaconda Install Script
8. After downloading the install script, we can run it to begin installing the Anaconda Python distribution on your Ubuntu system.
This script requires a bit of your input, so you can’t walk away from your machine yet.
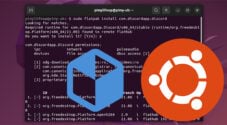
bash ./Anaconda-Linux.shCopy9. To install Anaconda to your system you will be required to accept their license agreement. This installer will display the entire agreement so it can take a fair while to get through it.
If you understand what you are accepting, you can press the page down (PGDN) key to speed up through it.
In order to continue the installation process, please review the license
agreement.
10. After reading the license agreement, the installer will ask if you accept the terms.
If you are happy to agree, type in “YES” and then press the ENTER key to continue the installation.
Do you accept the license terms? [yes|no]
>>>
11. You will now be prompted where you want Anaconda installed on Ubuntu. By default, the installer will install everything in your current user’s home directory.
If you are happy with this, press the ENTER key to continue. Alternatively, type out the path where you want this library installed.
Anaconda3 will now be installed into this location:
/home/pimyubu/anaconda3
- Press ENTER to confirm the location
- Press CTRL-C to abort the installation
- Or specify a different location below
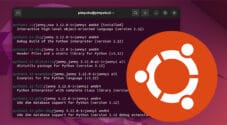
[/home/pimyubu/anaconda3] >>>12. Anaconda has now been successfully installed on your Ubuntu system. The following prompt asks if you want Conda automatically enabled for your shell session on start-up.
For most users, you will likely want this behavior, so type in “yes” and then press the ENTER key.
installation finished.
Do you wish to update your shell profile to automatically initialize conda?
This will activate conda on startup and change the command prompt when activated.
If you'd prefer that conda's base environment not be activated on startup,
run the following command when conda is activated:
conda config --set auto_activate_base false
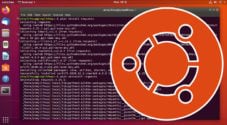
You can undo this by running `conda init --reverse $SHELL`? [yes|no]13. The final prompt tells you that you have successfully installed Anaconda3. It will also inform you to close and re-open your current shell.
==> For changes to take effect, close and re-open your current shell. <==

Thank you for installing Anaconda3!
14. You can close your current shell using the exit command within the terminal.
exitCopyVerifying your Anaconda Installation
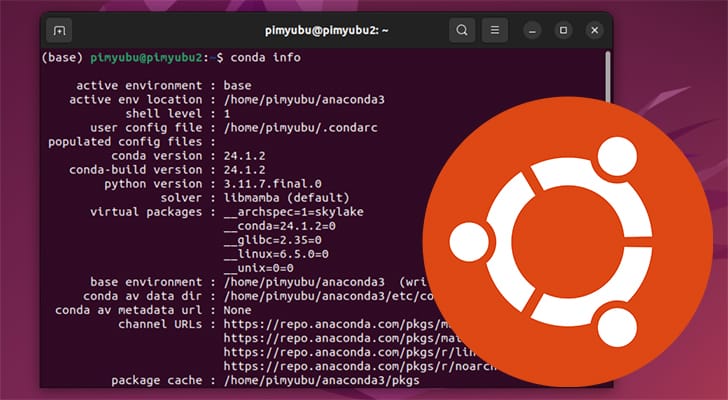
15. The easiest way to verify that you have installed Anaconda on Ubuntu is to get it to print out its information.
This is simple as using the “conda” command followed by the “info” option.
conda infoCopyBelow is an example of what this command will output after installing Anaconda to your user’s home directory.
     active environment : base
    active env location : /home/pimyubu/anaconda3
            shell level : 1
       user config file : /home/pimyubu/.condarc
 populated config files :
          conda version : 24.1.2
    conda-build version : 24.1.2
         python version : 3.11.7.final.0
                 solver : libmamba (default)
       virtual packages : __archspec=1=skylake
                          __conda=24.1.2=0
                          __glibc=2.35=0
                          __linux=6.5.0=0
                          __unix=0=0
       base environment : /home/pimyubu/anaconda3  (writable)
      conda av data dir : /home/pimyubu/anaconda3/etc/conda
  conda av metadata url : None
           channel URLs : https://repo.anaconda.com/pkgs/main/linux-64
                          https://repo.anaconda.com/pkgs/main/noarch
                          https://repo.anaconda.com/pkgs/r/linux-64
                          https://repo.anaconda.com/pkgs/r/noarch
          package cache : /home/pimyubu/anaconda3/pkgs
                          /home/pimyubu/.conda/pkgs
       envs directories : /home/pimyubu/anaconda3/envs
                          /home/pimyubu/.conda/envs
               platform : linux-64
             user-agent : conda/24.1.2 requests/2.31.0 CPython/3.11.7 Linux/6.5.0-35-generic ubuntu/22.04.4 glibc/2.35 solver/libmamba conda-libmamba-solver/24.1.0 libmambapy/1.5.6 aau/0.4.3 c/Zb9KIEv4otlXM-pp6zIIZA s/zctSiwTJ8-qcN8mYwIbm-w e/cIj-WCavK4nn5QMfalM0Yg
                UID:GID : 1000:1000
             netrc file : None
           offline mode : False
How to Update Anaconda on Ubuntu
In this section, we will show you a quick and easy method for updating your Ubuntu Anaconda installation to the latest version.
1. Your first step will be to update the Conda package manager itself by using the following command.
After running this command, you will be prompted to proceed. Type in “Y” and press the ENTER key to confirm the update.
conda update condaCopy2. Once Conda has been updated, you can use the “--all” option to get the package manager to update all of the libraries installed by the Anaconda distribution.
conda update --allCopyHow to Install Python Libraries using Conda on Ubuntu
One of Anaconda’s key features is its Conda package manager for Python. This manager is just as easy to use as pip while offering a ton of additional functionality.
However, this section will show you how to use Conda on Ubuntu to install a Python library.
1. Conda’s syntax is very similar to that of pip, you can install a Python package on Ubuntu by using “conda install” followed by the library name.
conda install <LIBRARYNAME>Copy2. For example, if we wanted to use Conda to install the Python requests library we can use the following command within the terminal.
coda install requestsCopyUninstalling Anaconda from Ubuntu
If you have decided to stop using Anaconda on your Ubuntu system, don’t worry—uninstalling it is relatively easy.
These steps assume that you followed this guide on installing Anaconda and you installed the distribution into your user’s home directory.
1. Your first step is to “activate” Conda on your system by running the following command.
conda activateCopy2. We can then get Conda to reverse all of the changes made during the installation of Anaconda by using the following command.
This will remove the auto startup of Anaconda if you enabled that during the initial setup steps.
conda init --reverse --allCopy3. Now, you must remove the “anaconda3” directory from your home directory using the rm command.
rm -rf ~/anaconda3Copy4. To finish up the removal of Anaconda from Ubuntu, you will want to exit your current shell session and re-open it.
You can easily exit out of the current shell by using the exit command
exitCopyConclusion
Hopefully, by this point in the tutorial, you should have successfully installed Anaconda on your Ubuntu system and have a solid idea of how to use Conda to install Python libraries.
Anaconda is a great Python distribution that includes many libraries and a powerful Python package manager call Conda.
Please feel free to leave a comment below if you have any questions about installing or using Anaconda.
If you liked this tutorial, we highly recommend you check out our many other Ubuntu tutorials.