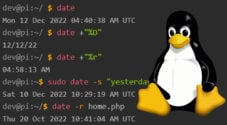
This Linux guide will show you how to use the timedatectl command to set your system’s date, time, and timezone.
The timedatectl command is a useful utility available on almost all Linux distributions that use systemd. These distributions include Debian, Ubuntu, Fedora, and CentOS.
Using this utility, you can control the current timezone, date, and time. You can even use it to enable automatic time synchronization with remote NTP servers.
Additionally, when you set the time using timedatectl, it will also reconfigure any real-time clocks (RTC) connected to your system to use the correct time.
This guide will teach you how to use timedatectl to set the time and date of your device, configure the timezone, and set up network time synchronization.
Using timedatectl to Get Your Current Time Settings
Using timedatectl is a straightforward task. This section will show you how easy it is to use it to get your current time settings.
To retrieve our current time status, we can use the following command. You can also use status after, but that is automatically implied when no argument is specified.
timedatectlCopyBy using this command, you will retrieve information about your current time settings.
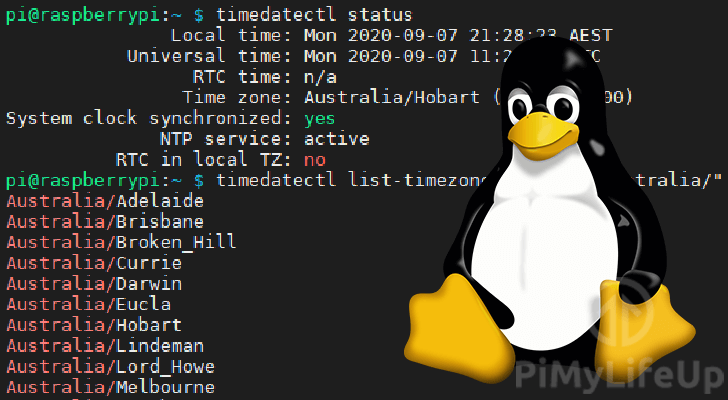
As you can see below, this command provides us our local time, universal time, our RTC time if available, and our currently defined time zone.
It also provides us with the status of some of the timedatectl command’s features, such as time synchronization status.
timedatectl
               Local time: Mon 2020-09-07 06:06:59 BST
           Universal time: Mon 2020-09-07 05:06:59 UTC
                 RTC time: n/a
                Time zone: Europe/London (BST, +0100)
System clock synchronized: yes
              NTP service: active
          RTC in local TZ: noCopy
Setting the Local Timezone on Linux Using timedatectl
In this section, we will show you how you can use the timedatectl command to change the system’s timezone.
You will learn how to use the commands list-timezones function to find your timezone and set it.
If you would rather skip the hassle of finding the correct string for your timezone, you can use the following value and skip to step 3.
[TIMEZONE]If you only see the text “[TIMEZONE]” above, your browser does not support the functionality we are using, or an ad blocker is stopping the script from working.
1. Before we get started, you will need to work out the timezone that you want to set.
You can use the timedatectl command to list all of the available timezones by running the following command.
Be warned that this command will return an extensive list. In our next step, we will show you a way of narrowing this list down.
timedatectl list-timezonesCopyFrom this, you will notice that there are potentially nine different regions that a timezone can be categorized under. These regions are the following.
Africa/
America/
Antarctica/
Asia/
Atlantic/
Australia/
Europe/
Indian/
Pacific/Copy
2. If that list makes it hard to find your specific timezone, we can use grep to slim the list down.
We will pass the result of the timedatectl command into a grep command by using a pipe (|). This will allow grep to filter our list down.
For example, we can get all timezone belonging to the Australia region by using this command.
To narrow it down to a different region, all you need to do is replace the “Australia/” text.
timedatectl list-timezones | grep "Australia/"CopyFor example, using this command, we get a more manageable list, as shown below.
Australia/Adelaide
Australia/Brisbane
Australia/Broken_Hill
Australia/Currie
Australia/Darwin
Australia/Eucla
Australia/Hobart
Australia/Lindeman
Australia/Lord_Howe
Australia/Melbourne
Australia/Perth
Australia/SydneyCopy
3. With a timezone ready, we can now set it by using the timedatectl commands set-timezone function.
All we need to do is use the following syntax, where “TIMEZONE” is replaced with your chosen timezone.
As we are changing a system setting, you will need to have superuser privileges to perform this action.
timedatectl set-timezone "<strong>TIMEZONE</strong>"CopyFor example, if we wanted to change our timezone to “Australia/Hobart” we would use the following command.
sudo timedatectl set-timezone "Australia/Hobart"Copy4. We can verify that this change took effect by making use of the timedatectl command again.
You should see that your new time zone is returned by the command.
timedatectl
               Local time: Mon 2020-09-07 15:35:47 AEST
           Universal time: Mon 2020-09-07 05:35:47 UTC
                 RTC time: n/a
                Time zone: Australia/Hobart (AEST, +1000)
System clock synchronized: yes
              NTP service: active
          RTC in local TZ: noCopy
Setting the Time and Date in Linux Using timedatectl
Our next step is to learn how to specifically set the time and date by using the timedatectl command.
Once you learn the syntax that you need to use to set the time or date, it is a relatively simple process.
Setting the Local Time in Linux
First, let us look at how we can use timedatectl to set the local time on your Linux based system.
1. To set the time, we will need to make use of the following time format, hours, minutes, followed by seconds.
Each of these numbers needs to use the 24-hour time format. So 1 PM should be written as the number 13 for hours.
You will need to separate each of the numbers by using a colon (:).
HH:MM:SSCopyFor example, if we were to use the time 3:50 PM(15:50) in this format, we would end up with the following.
15:50:00Copy2. With a time formatted correctly, we can now set the systems clock to it.
To set the time, we can make use of the “set-time” argument for the timedatectl, followed by the time.
timedatectl set-time HH:MM:SSCopyFor example, if we were to insert our example time from the previous step, the command would end up as we have below.
As we are adjusting a system setting, you will need to make sure you run this command with superuser privileges.
sudo timedatectl set-time 15:50:00Copy3. You can verify this time change by running timedatectl without specifying an option.
Setting the Date in Linux
Setting the date is also made relatively easy thanks to the timedatectl utility.
Like the time, the made thing you need to know here is the format that the tool expects for your date.
1. The format that the timedatectl command expects for the date is the year, followed by the month and then the day.
The month and date need to be specified using the two-digit system. For example, the second day of the month would be written as 02 instead of 2.
Each part of the date string will need to be separated by a hyphen (-).
Below you can see the basic syntax that timedatectl expects for the date.
YYYY-MM-DDCopyAn example of a correct value for this is the following.
2020-09-07Copy2. With a date in hand, we can use the set-time functionality of timedatectl to set the date.
You may have noticed that this is the same argument we use for setting the time, don’t worry, though, as the command is smart enough to work out our date thanks to the format difference.
timedatectl set-time YYYY-MM-DDCopyYou can see an example of what a valid use of this command would look like by checking out the following.,
sudo timedatectl set-time 2020-09-07Copy3. You can verify that the date has been successfully updated on your Linux device by running timedatectl without any arguments.
Setting the Time and Date in Linux
It is possible to combine the previous two sections into one, meaning you can simultaneously set both the time and the date.
As you should now be familiar with the time and date formats that the timedatectl command setting both the time and date should be a breeze.
Below you can see the syntax that the command expects when you are specifying both the time and date.
We need to wrap the time and date in double-quotes due to the presence of a space
timedatectl set-time "YYYY-MM-DD HH:MM:SS"CopyIf we were to combine both the example date and time that we used in our previous two sections, we would end up with a command like below.
sudo timedatectl set-time "2020-09-07 15:50:00"CopyConfiguring the RTC Hardware Clock in Linux
The timedatectl command automatically updates the RTC hardware to the correct time. By default, this means that it will be updating the time to the UTC equivalent.
Using the UTC time is the recommended behavior for a real-time clock. However, it is possible to change it so that it uses your local time instead.
To change your RTC to use the local time, you can make use of the following command.
timedatectl set-local-rtc 1CopyLikewise, you can also use this command to switch timedatectl to be setting the UTC time for the RTC.
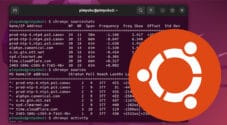
timedatectl set-local-rtc 0CopySynchronize Time with the Internet using NTP on Linux
In this section, we will show you how to synchronize the system clock with an NTP server.
NTP stands for Network Time Protocol and is a standard for synchronizing time between two devices. It has become an essential part of modern computing. It is crucial for devices that completely lack a real-time clock such as the Raspberry Pi.
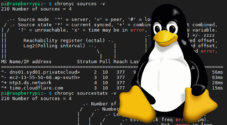
Groups like the NTP pool project provide easy ways of accessing these servers. The servers accepted into these pools must have accurate times to synchronize from.
1. Before proceeding, you need to ensure that you have a package that implements ntp installed on your operating system.
The ntp package should be available to install through almost every operating system’s repository.
If you use a distribution that uses the apt package manager, you can install the ntp package by running the following command. RHE, SUSE, and CentOS utilize Chrony, which implements the NTP protocol.
sudo apt install ntpCopy2. Luckily, enabling NTP time synchronization is a straightforward process when using the timedatectl command.
We need to use the “set-ntp” function of the timedatectl command to turn the sync on. All we need to do is pass in true to this function like below.
sudo timedatectl set-ntp trueCopyIf you decide that you don’t want your time to be synchronized with the internet, you can switch this feature off.
sudo timedatectL set-ntp falseCopy3. With NTP enabled, your device should now automatically start synchronizing its time with servers.
You can verify that it has been enabled by running the timedatectl command without any arguments.
By this stage, you should now have a good understanding of how to use the timedatectl command on your Linux device.
We walked you through how to set the time, date, and timezone of your Linux device. We also showed you how easy it is to enable time synchronization when using this command.
If you have any feedback or have run into any troubles, please leave a comment below.
To learn more about Linux be sure to check out some of our other Linux guides.