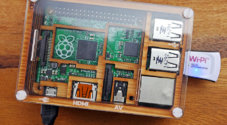
A Raspberry Pi Wi-Fi Extender is a cheap and power efficient way of increasing the total range of your Wi-Fi Network.

A Wi-Fi extender differs a fair bit from a Wi-Fi access point. The main difference being that instead of getting its network connection from Ethernet, it instead gets its network connection from a Wi-Fi adapter.
For this reason, to complete this tutorial you will require two Wi-Fi adapters, one of these must be access point capable.
You will face a fair bit of degradation in the speed of your network connection when connecting to the Wi-Fi repeater. The main reason for this is that you must wait for the traffic to go over your initial Wi-Fi connection then be repeated from your Raspberry Pi for devices to connect to.
This tutorial can be combined well with our VPN Access Point tutorial, you can find the tutorial on how to set that up located directly after this tutorial. Basically, it will show how to setup a OpenVPN client and redirect all traffic through that client.
Please note however, this tutorial will require some slight changes, we will explain those changes needed at the end of this tutorial.


Equipment List
Below are all the bits and pieces that I used for this Raspberry Pi Wi-Fi Extender tutorial.
If you’re utilizing a Raspberry Pi without built-in Wi-Fi, two Wi-Fi dongles are necessary to follow this tutorial. For newer models with integrated Wi-Fi, a single dongle that supports AP Mode is still required.
Recommended
Optional
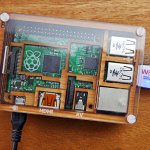
- Raspberry Pi Case Amazon
We last tested this tutorial on a Raspberry Pi 5 using the latest version of Raspberry Pi OS Bookworm.
Setting up your Raspberry Pi as a Wi-Fi Extender
In this section, we will show you how easy it is to set up your Raspberry Pi as a Wi-Fi extender. To extend your Wi-Fi range using your Pi, all you need is a Wi-Fi dongle with access point mode support.
If you are using a Pi without built-in Wi-Fi, you will need two USB Wi-Fi dongles instead of one.
Most modern USB Wi-Fi adapters will support this mode, but we can check that this functionality is available as we progress through the tutorial.
Please note that this tutorial expects you to have Network Manager installed on your Raspberry Pi. Raspberry Pi OS Bookworm and newer already use this new network manager. This tool makes extending your Wi-Fi a straightforward process.
Preparing your Raspberry Pi
1. Your first step is to ensure that your Raspberry Pi is running an updated operating system.
To update the package list cache and upgrade any out-of-date packages, use the following two commands.
sudo apt update
sudo apt upgradeCopy
2. Once you have updated your Raspberry Pi, you should now connect it to the Wi-Fi network you want to extend if you haven’t done so already.
We have a guide that covers the process of connecting to Wi-Fi if you are new to your Pi.
Getting the Wi-Fi Adapter Name
3. Because Network Manager is a core part of the Raspberry Pi operating system, setting up a Wi-Fi extender is relatively simple.
Our first step is to list the device names, so we know which device to set up to extend our Wi-Fi.
iwconfigCopyBelow, you can see that we have two wireless LAN connections. The first is “wlan0“, which is already connected to our local network.
The second is the Wi-Fi adapter we are after, which is called “wlan1“. This device is currently not doing anything and is what we will use on our Raspberry Pi to extend the Wi-Fi network.
wlan0     IEEE 802.11  ESSID:"HOME_LINK"
          Mode:Managed  Frequency:2.412 GHz  Access Point: 7A:45:58:1D:C3:39
          Bit Rate=24 Mb/s   Tx-Power=31 dBm
          Retry short limit:7   RTS thr:off   Fragment thr:off
          Power Management:on
          Link Quality=53/70  Signal level=-57 dBm
          Rx invalid nwid:0  Rx invalid crypt:0  Rx invalid frag:0
          Tx excessive retries:4  Invalid misc:0   Missed beacon:0

wlan1     IEEE 802.11  ESSID:off/any
          Mode:Managed  Access Point: Not-Associated   Tx-Power=36 dBm
          Retry short  long limit:2   RTS thr:off   Fragment thr:off
          Power Management:off
4. Before we rush too far ahead, let us ensure that the Wi-Fi adapter we are using can actually be set up as an access point.
We can check this by using the nmcli tool to check the “WIFI-PROPERTIES.AP” field.
Ensure that you replace “<DEVICE>” with the name of your Wi-Fi device. For example, we would replace it with “wlan1“.
nmcli -f WIFI-PROPERTIES.AP device show <DEVICE>CopyIf your adapter supports being put in access point mode, you should see the following message, and you can safely continue with this tutorial.
WIFI-PROPERTIES.AP: yesEnabling the Wi-Fi Extender on your Raspberry Pi
5. Thanks to Network Manager, getting our Raspberry Pi to extend a Wi-Fi network is surprisingly simple. In fact, it can be done with a single command.
The manager will handle all the more complicated parts behind the scenes and automatically share any active internet connection.
Using the command below, you can put your Wi-Fi adapter into hotspot mode. You will need to insert some of your own data for this to work:
<DEVICE>: Replace this with the name for your Wi-Fi adapter. In our case we would use “wlan1“.<SSID>: This is the SSID that your extended Wi-Fi will be broadcasted on.<PASSWORD>: The final placeholder is where you will set the password you want to use to access your extended Wi-Fi network.
sudo nmcli d wifi hotspot ifname <DEVICE> ssid <SSID> password <PASSWORD>Copy6. By running the following command, You can verify that your Wi-Fi is now being extended from your Raspberry Pi.
nmcli con showCopyIf everything is working correctly, you should see a connection labeled “Hotspot” with the device being your Wi-Fi Adapter.
Hotspot             5decc82c-ee08-4785-a078-9ff98e780f6d  wifi      wlan1
HOME_LINK           0a083523-ce08-4620-9db9-883dd5db2efe  wifi      wlan0
lo                  caf89daa-aa9a-4f9e-9a82-fbc489a296d9  loopback  lo
HOME_LINK 1         b3bf7b36-33b5-416a-9244-776ebcba1b1f  wifi      --
Troubleshooting your Raspberry Pi Wi-Fi Extender
7. Now is a good time to ensure everything works correctly. Try connecting to your newly extended Wi-Fi network using any device you have.
If everything is working correctly, then you should now be all done.
8. If you can’t connect to your Raspberry Pi’s extended Wi-Fi for some reason, you may have to try turning off the protected management frames feature.
This can cause issues when your Wi-Fi adapter doesn’t properly support the feature. Luckily, disabling it is as simple as using the following command.
sudo nmcli con modify Hotspot wifi-sec.pmf disableCopySetting up the Raspberry Pi Wi-Fi Extender with a VPN
This tutorial is fully compatible with our VPN Access Point tutorial. However there is one small change you will have to make in step 13, rather than using the commands showcased there, run the commands below.
Basically the main change you will see here is that instead of redirecting the traffic from wlan0 through the tunnel we will be redirecting the traffic from our wlan1 connection to the tunnel.
sudo iptables -t nat -A POSTROUTING -o tun0 -j MASQUERADE
sudo iptables -A FORWARD -i tun0 -o wlan1 -m state --state RELATED,ESTABLISHED -j ACCEPT
sudo iptables -A FORWARD -i wlan1 -o tun0 -j ACCEPT
The rest of the VPN Access Point tutorial can be done without any other changes.
Conclusion
Hopefully by now you should have a fully operational Raspberry Pi Wi-Fi Extender.
Thanks to newer versions of Raspberry Pi OS using network manager, setting up a Wi-Fi extender is a fairly straightforward process. This tool handles a lot of the work in the background for you.
If you come across any issues or have some feedback related to this tutorial, then please don’t hesitate to leave a comment below.
If you liked this tutorial, be sure to check out our many other Raspberry Pi guides and projects.


in case you need to back-track and delete Hotspot-1 and Hotspot-2
sudo nmcli con delete
is the command
And it seems that if you dont specify a password , nmcli qwill generate one for you.
Is there a way of setting up an open network ?
Do you have to use Google for DNS or can use use the DNS for your ISP?
Hi Dustin,
You can use whatever DNS provider that you want. We were just using it as an example within our guide.
Cheers,
Emmet
I had to add the following in step 6 to get this to continue to work on a reboot:
nohook wpa_supplicant
There is a slight issue in step #16. In the /etc/dnsmasq.conf file, adding bind-interfaces causes a conflict, since it’s already bound to the IP in the interfaces= part of the config file. This will cause the service to fail at boot with the error “failed to create listening socket for 192.168.220.1: Cannot assign requested address”. However, removing or commenting the “bind-interfaces” line works perfectly.
I got this message right at the end of the process:
Failed to start hostapd.service: Unit hostapd.service is masked.
Any ideas?
Hi Ian,
Please try running the following command. This command should remove the mask thats been applied to the hostapd service.
Cheers,
Emmet
I’m a little confused, do I need to have two wifi dongles? what if I can connect to my WiFi without it, do I still need them? (for pi3). Thanks.
Hi Mereh,
You need two available WiFi points for your Raspberry Pi.
So in the case of a Raspberry Pi 3 this will be the inbuilt one and a seperate dongle.
Cheers,
Emmet
i dont have dongles. i would like to use pi3 inbuilt wifi.
will the above guide work ?
Hey Vihari,
You require two wifi adapters for this tutorial, the Raspberry Pi 3’s inbuilt WiFi can be one of the ones used for the extender.
Cheers
if anyone has a problem with dnsmasq: failed to create listening socket for 192.168.220.1: Cannot assign requested address
check your /etc/network/interfaces (wlan0 is the adapter that connect to the internet, wlan1 is the adapter that act as the hotspot and provide internet by routing packet to/from wlan0)
allow-hotplug wlan0
iface wlan0 inet dhcp
wpa-conf /etc/wpa_supplicant/wpa_supplicant.conf
allow-hotplug wlan1
–sometimes dnsmasq failed at startup due to wlan0 is not quick when connecting to the wifi. running sudo dnsmasq fixes this problem
I had to reverse wlan0 and wlan1 in the instructions because the wifi dongle I had that was capable of AP mode made itself wlan0.
I followed all the instructions and I didn’t get any warnings or error messages, but it still wasn’t working. I found hostapd was silently failing to start and not giving any troubleshooting info so I ran it manually from the command line and it told me that my AP dongle wasn’t capable of [DSSS_CCK-40], so I removed that from the hostapd.conf file. It ran perfectly after that.
FYI I used an Alfa AWUS036NEH as the access point interface when I was setting it up.
Thank you. I followed your tutorial on a RPi running Jessie and it worked!! Couldn’t get it to work on the latest Stretch though, even though I changed the name of wlan1 to something else. It seems that dhcpcd changed the way it works in Stretch and I can no longer set up static IPs in
/etc/network/interfaces. Any idea how to get it to work?Thanks!
I have mostly followed this tutorial but am struggling to get the routing to work.
If anyone can help that would be marvelous 🙂
I’m having a problem after step 9. I’m getting “ifdown: interface wlan1 not configured Cannot find device “wlan1″ Failed to bring up wlan1”. Any suggestions wlan1 does not show up after entering ifconfig. I am new to this so it may be something very obvious. Any suggestions?
I have the same issue Mike. Did you find a solution?
No. I haven’t
OK. I’ve figured it out. (At least for my case.)
Check the “ingredients”: “Wifi dongle * 2 (The Pi 3 has WiFi inbuilt)”
I’m using a RPi Zero W. No wifi dongle attached (yet).
My assumption that as soon as the wifi dongle is attached it will work like charm…
Great tutorial. I’ve been using a similar device with Raspbian 8. Does this one work with Raspbian 9?
I have been waiting for this one! I travel often and use hotel wifi’ that require log in – i usually use my laptop as well as another external USB dongle to retrans the hotel wifi and not need to log in each time. Can this be done with the Pi – love your thoughts