In this guide, we will show you how to enable and increase the swap file on your Raspberry Pi.
The swap file is used to increase the system’s total accessible memory beyond its hardware capabilities.
This means that when all of the Raspberry Pi’s RAM is exhausted, it can start using the swap file as memory instead.
The addition of more virtual memory allows the system to deal with more memory intensive tasks without running into out of memory errors or having to shut down other additional packages.
However, the downside to this is that accessing the swap file is a significantly slower process that can create slowdowns.
The reason for this is that the swap file exists on your actual disk, which has significantly lower read and write speeds then your RAM.
Another caveat of a large swap file is that you need that space to be free on your SD Card. You can’t set a swap file on your Raspberry Pi larger than your available free space.
With the introduction of the Raspberry Pi 4, there has been less of a need to use a swap file due to the large amounts of RAM available.
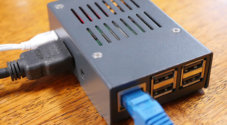
Equipment
Below is the equipment that we used for this guide on increasing the size of the swap on the Raspberry Pi.
Recommended
Optional
We last tested this tutorial on a Raspberry Pi 5 running the latest version of Raspberry Pi OS Trixie.
Increasing the Swap File on a Raspberry Pi
In this section, we will walk you through two methods to increase the size of the swap file on the Raspberry Pi.
Please note that the steps you take will differ depending on the Raspberry Pi OS release you are running. For those running Raspberry Pi OS Trixie or newer you will want to follow the “rpi-swap” instructions.
If you are running an older release you will need to follow our “dphys-swapfile” instructions instead.
Managing your Swap with rpi-swap
For those running Raspberry Pi OS Trixie or newer, the Pi uses a different service, rpi-swap, to manage the swap file on your system. This is meant to be a more modern, performance-friendly, and easier-to-use way to manage your swap.
For most users, rpi-swap will automatically create a decent-sized swap based on available space and your Raspberry Pi’s RAM. Of course, automatic is never perfect so them team still enables you to configure it yourself.
By default, the new rpi-swap service creates a swap file that follows these rules:
- The swap file has a maximum size of 2048MB
- It must not grow to more than 50 percent of the available disk space.
- The swap will be sized to be the same as the amount of RAM your Raspberry Pi has available as long as it doesnt exceed the previous two rules.
This means if you had an 8GB Raspberry Pi with a 32GB SD Card, the largest swap that will be created by default is 2GB.
Likewise, if you had a Raspberry Pi with only 1GB of RAM, the largest swap that the tool will generate with these rules is 1GB.
Controlling these rules to suite your own needs is relatively simple, and a process that we will cover over the next few steps.
1. The rpi-swap service has a lot of functionality baked into it, but we will be focusing on specifically controlling its swap file and setting the size it generates.
To override the default settings, we will want to create a new file within the “/etc/rpi/swap.conf.d” folder. Files created within this folder are read in by the service and used to overrwrite any of the default settings.
To ensure that this folder exists, we will first run the following command to create it.
sudo mkdir /etc/rpi/swap.conf.d/Copy2. With the folder created, our next step is to create a new file in it. For this example, we will be naming ours “fixedswapsize.conf“. This makes it clear that we are using this override to set a fixed size for the swap file.
You can create this file and begin editing it by using the command below.
sudo nano /etc/rpi/swap.conf.d/fixedswapsize.confCopy3. Now you can set the swap file size for your Raspberry Pi by entering the following four lines. When filling out these fields, you will need to replace a couple of placeholders, which we will cover now.
<MECHANISM>: Replace this placeholder with one of the following two options. By default, this is set to “auto” by the Raspberry Pi, but this does not guarantee a swap file will be used.swapfile: Creates a traditional swap file on your system. Your Raspberry Pi will use this swap when its RAM is exhausted. Most people wanting to increase their swap will likely want this option.zram+file: This will set up a different type of SWAP. With this option, the Raspberry Pi will compress some data in your RAM. This gives you a bit of room in your RAM but increases CPU usage, since any access to this special swap area must be decompressed.
This option also creates a swap file used as a writeback store. This isn’t a traditional swap file like the first option, but it allows idle pages to be temporarily stored to free up RAM.
<SWAPSIZE>: Replace this placeholder with the size of the swap that you want generated on your Raspberry Pi. Please note that this value must be specified in mebibytes (MiB).
Below is an example of values you may want to use to set a fixed swap size.512= 0.5 GB of Swap1024= 1GB of Swap2046= 2 GB of Swap3072= 3GB of Swap4096= 4GB of Swap
[Main]
Mechanism=<MECHANISM>

[File]
FixedSizeMiB=<SWAPSIZE>Copy
For example, if you wanted to create a traditional swap file with a size of 3 GB, you would use the following.
[Main]
Mechanism=swapfile

[File]
FixedSizeMiB=3072Copy
4. After making these changes, you can save and quit out of the text edtior by pressing CTRL + X, Y, and then ENTER.
5. For the changes to your swap file size to properly take effect, you must restart your Rasbperry Pi.
You can easily restart your device by simply using the following command within the terminal.
sudo rebootCopy6. Once your Raspberry Pi finishes booting, it should hopefully have created a brand new swap file that matches the size you specificed.
You can verify the swap has been properly created by using the following line.
ls -lh /var/swapCopyIf everything has worked correctly you should see something similar to what we have shown below. Of course your file size will differ depending on what you have set.
-rw------- 1 root root 3.1G Jan 7 20:51 /var/swapUsing dphys-swapfile to Manage your Swap
On older releases of Raspberry Pi OS, a different service was used to manage the swap file on your system.
If you are running an older release of Raspberry Pi OS such as Bookworm or older, then you will still be relying on the old “dphys-swapfile” service. This works completely different to the newer “rpi-swap” service, but is still fairly simple to use.
1. Before we can increase our Raspberry Pi’s swap file using dphys-swapfile, we must first temporarily stop it. The swap file cannot be in use while we increase it.
To stop the operating system from using the current swap file, run the following command.
sudo dphys-swapfile swapoff2. Next, we need to modify the swap file configuration file.
We can open this file using nano by using the command below.
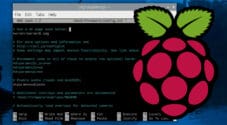
sudo nano /etc/dphys-swapfile3. Within this config file, find the following line of text.
You can use CTRL + W to search for text within the file.
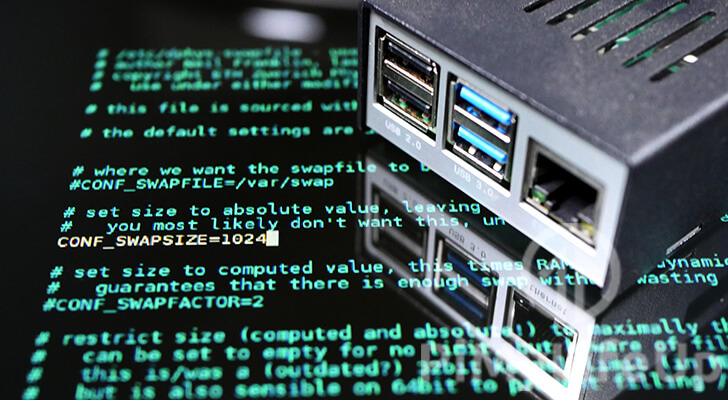
CONF_SWAPSIZE=100To increase or decrease the swap file, all you need to do is modify the numerical value you find here.
This number is the size of the swap in megabytes.
For example, if we wanted to increase our swap size to 1GB, we would change that line to the following.
CONF_SWAPSIZE=1024Whatever size you set, you must have that space available on your SD card.
4. Once you have made the change, save the file by pressing CTRL + X, followed by Y, then ENTER.
5. We can now re-initialize the Raspberry Pi’s swap file by running the command below.
Running this command will delete the original swap file and recreate it to fit the newly defined size.
sudo dphys-swapfile setup6. With the swap now recreated to the newly defined size, we can now turn the swap back on.
To start the operating systems swap system, run the following command.
sudo dphys-swapfile swaponWhile the new swapfile is now switched on, programs will not know that this new memory exists until they restart.
7. If you want all programs to be reloaded with access to the new memory pool, then the easiest way is to restart your device.
To restart your Raspberry Pi, all you need to do is run the command below.
sudo rebootConclusion
If you have got to this point in the tutorial you should now have successfully increased or decreased the size of the swap on your Raspberry Pi.
Newer versions of Pi operating system will have you using the newer and more useful “rpi-swap” service. Older versions will have you using “dphys-swapfile”. Both tools achieve the same thing, one just does a bit more helping along the swap.
Please feel free to leave a comment below if you have had any issues with this guide.
If you found this guide to be helpful, we recommend taking some time to explore some of our many Raspberry Pi projects.


This still doesn’t work on Trixie.
You need to add
[Main]
Mechanism=swapfile
before
[File]
FixedSizeMiB=3096
Also it should really be 3072 or 4096 (For either 3GB or 4Gb) swap file
Regards,
Chris
Hi Chris,
Thank you for the heads up about that, I’ve now updated the guide to have an explicit mention of setting the mechanism value rather than hoping the “auto” option makes the right choice.
Additionally, I have corrected the mistype of 3096 to 3072 as well as mentioned a few other common values users may want to use when setting up a swap file on their Raspberry Pi.
Kind regards,
Emmet
Hi there, this doesn’t work anymore on a Debian Trixie install: the ‘dphys-swapfile’ command doesn’t exist anywhere.
Hi John,
Thank you for the heads up about this. I have updated the tutorial to use the new “rpi-swap” service that is now utilized in Raspberry Pi OS Trixie.
Kind regards,
Emmet
Oups, little edit. Didn’t work at first (but maybe because i’m using proxmox-ve on it). I had to edit /usr/sbin/dphys-swapfile for change the limit of 2Go (founded where this tricky was hiden with “which dphys-swapfile”), repeat step “dphys-swapfile swapoff” “dphys-swapfile setup” & “dphys-swapfile swapon”, and this time it works
Still working perfectly 🙂
Excellent tutorial! Many thanks.
Many thanks for this very handy solution! It has worked for me a few times now, but I always need to revisit your page to “refresh my memory”!
Very nice
Running htop on a different ssh session showed that the swap was going above the 100M limit. I ended up setting this to 2048 (2G) as its just easier for it not to run out.
Thanks Emmet!
Perfect! Simple instructions, excellent results!
For my experience it was always a better solution to add a swap-partition on the SD-card. Access to flash-blocks is better seperated in case of suddenly switched power off, raspberry hunged up or deadly written flash cells. Do not forget to set a higher priority to swap partition than swap-file in root partition.
thanks this helped with small memory size on a raspberry pi 2 w with a limited amount of ram of 512mb now it doesn’t lock up
Same here; it worked flawlessly on my own Raspberry Pi Zero 2 W, running on the 64bit version of Raspberry Pi OS. I was a little weary of the last phase — ‘reboot’ — because, well, my Zero 2 W is only accessible via Wi-Fi (I have neither keyboard, nor monitor), and it’s a real pain if the reboot fails with an error message on the console…
Note you need to uncomment the maximum setting and set to higher than you want to use if want to use more than 2 gigs.
Thanks a lot! That worked for me…
it always reverts to 100mb after reboot
Hi Jeff,
I am unable to replicate this issue. Testing it on my device the swap size was maintained at the new size (in this case 1024mb) after the reboot.
Is there anything you may be potentially doing different?
Cheers,
Emmet?
Are you using an overlay filesystem to make the disk readonly? If so, you’ll need to turn that off in raspi-config before making these changes.