In this quick guide, we will show you the alternative to the Python package manager pip called UV on Linux.
uv is an alternative to the pip package manager developed by Astral that boasts several significant improvements. One of these key features is that it can be up to 100 times faster at every task than using pip on Linux.
On top of UV being a significantly faster package manager, it also comes with additional tools built-in, such as tools to set up and manage a Python virtual environment.
This Python package manager has quickly become more popular and is even used as part of the build process for the popular Home Assistant software. You can read their blog post about how on ARM systems, UV cut their build time down from hours to minutes.
The one caveat to using UV is that it is built to expect you to use a virtual environment for your Python projects. Considering this is the way Python is heading with pip; this won’t be a deal breaker for most people.
Over the following sections, we will walk you through installing and using UV on your Linux system as a speedy alternative to pip. These speed improvements are especially noticeable on weaker devices like the Raspberry Pi.
Before proceeding, you must have Python installed on your Linux system.


How to Install the UV Python Package Manager on Linux
In this section, we will cover the very basic steps to install the UV Python package manager on your Linux system. You can install this Python package manager in a couple of ways, but we will focus on using the official install script.
We are using the official install script because it is one of the cleanest ways to get UV on your system. It also doesn’t require you to install the Rust toolchain or utilize Python Pip.
Installing UV For the Current Linux User
1. Installing the UV Python package manager on Linux is as straightforward as running the following command within the terminal.
With this command, we use curl to grab the UV install script and pass it directly into the shell.
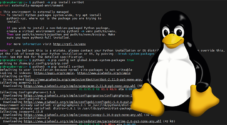
curl -LsSf https://astral.sh/uv/install.sh | shCopy2. The install script you just ran will detect the operating system you are using and its system architecture and download the correct version of UV for your system.
By default, UV will be installed in the current user’s home directory. This is UV’s intended behavior, and you should re-run this script for each user you intend to use it with.
downloading uv 0.4.21 aarch64-unknown-linux-gnu
installing to /home/pi/.cargo/bin
  uv
  uvx
everything's installed!
3. To save you from having to restart your Linux machine or terminal session, you can read in the updated Path environment variable by running the command below.
If we don’t do this, our system will be unaware that it can now access and use the UV Python package manager.
source $HOME/.cargo/envCopy5. You can verify that you have successfully installed this Python package manager by getting it to output its version.
You simply need to use “uv” followed by the “--version” option to do this.
uv --versionCopyBelow, you can see that we have installed UV version “0.4.21” to our Linux system.
uv 0.4.21Using UV as a Pip Alternative on Linux
Now that you have installed the UV Python package manager on your Linux system let us show you how to use it as a solid alternative to pip.
One of the neat things about UV is that it replicates the functionality of pip to make it very easy to get started with. This guide will only show you the very basics of what this tool is capable of, if you want to learn more, we highly recommend the official getting started guide.
Creating a Python Virtual Environment
1. Let us start this tutorial by creating a directory using the mkdir command and changing into it with the cd command.
This directory is where we will download libraries for our Python project using UV.
mkdir ~/uvpythonexample
cd ~/uvpythonexampleCopy
2. The UV Python package manager expects you to be working within a virtual environment. This is the expected behavior for most Python package managers as they move to try and stop breaking libraries that might have been installed on your system through something like APT.
UV has Python virtual environment functionality baked into it. You can create a brand-new virtual environment by running the following command.
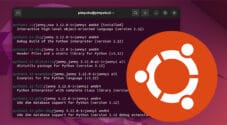
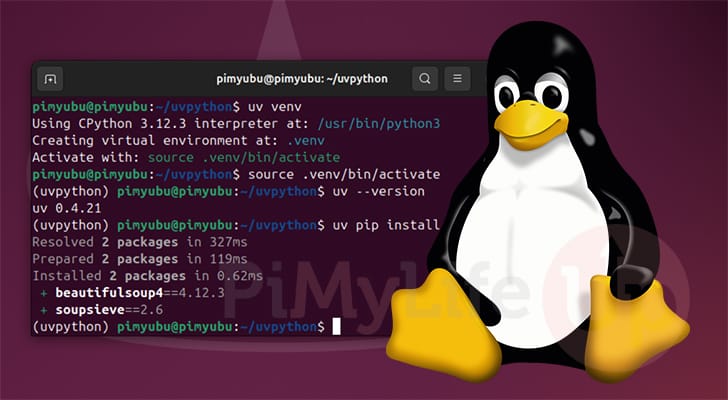
uv venvCopyAfter running the command below, you will see how UV set up the virtual environment speedily.
Using CPython 3.11.2 interpreter at: /usr/bin/python
Creating virtual environment at: .venv
Activate with: source .venv/bin/activate
3. Python virtual environments require you to “source” their activate file every time you want to use your Python project.
You can do this by simply running the following command while you are within your project directory.
source .venv/bin/activateCopyInstalling a Python Library on Linux using UV
4. Now, let us move on to the fun part, which is using the UV Python package manager to actually install a library to our Linux system.
To install Python libraries with UV you simply need to use “uv” followed by “pip” and then the “install” command. After this, you specify the package name you want to install.
uv pip install <PACKAGENAME>CopyFor example, if we wanted to install the Beautifulsoup4 Python library, we would need to run the command below.
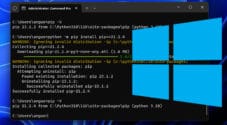
uv pip install beautifulsoup4CopyHere you should have seen the crazy speed of the UV Python package manger. It managed to retrieve this library and install it all within the space of 392ms, and this is running on a Raspberry Pi.
(uvpythonexample) pi@raspberrypi:~/uvpythonexample $ uv pip install beautifulsoup4
Resolved 2 packages in 288ms
Prepared 2 packages in 100ms
Installed 2 packages in 4ms
 + beautifulsoup4==4.12.3
 + soupsieve==2.6Copy
By comparison, if we were to use pip, you would find that this process would take significantly longer than with UV.
Conclusion
If you have reached this point in the guide, you should hopefully have the UV Python package manager installed on your Linux system.
UV boasts a significant performance improvement over the more widely used pip. Actions that could take minutes with pip are significantly faster with UV. If you are using pip to build a large project or a weaker ARM device like the Raspberry Pi, you will find these improvements significant.
Please feel free to drop a comment below if you have had any issues with getting UV running on your system.
If you liked this guide, we recommend exploring some of our many other Linux projects.