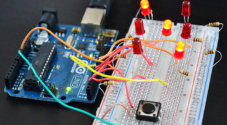
In this tutorial, we will take a look at building an Arduino traffic light circuit. This project will involve using a little a bit of code and a very simple circuit that’s great for beginners.

This is a great beginner project if you have only just bought your first Arduino or looking at buying one. Check out the equipment list a bit further down the page for everything you will need in this project.
Even though the traffic lights are extremely basic, it’s a great way to introduce yourself or others to the basics of electronics and coding.
This tutorial will provide you with a basic understanding of connecting circuitry to the Arduino and show some basics of coding.
The video further down this page will go through all the steps to completing this cool traffic light project.
If you do end up liking this project, then please make sure you follow us on social, so you stay up to date with the latest and greatest Arduino projects guides and much more.
Equipment
The equipment I have used in this Arduino traffic light project is listed right below.
Recommended
- Arduino Uno Amazon
- Red LED Amazon
- Yellow LED Amazon
- Green LED Amazon
- 3 x 100 Ohm resistor Amazon (Color = Brown Black Brown)
- Breadboard wire Amazon
- Breadboard Amazon
Video
Below is a short video that goes through all the steps to assembling and running the traffic lights using the Arduino.
A much more detailed written version of the tutorial is right underneath the video.
Arduino Traffic Light Circuit
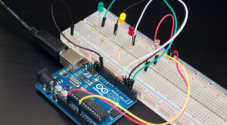
The circuit that we need to set up is really simple and shouldn’t take you too long to do. It’s a fairly simple setup with each pin controlling an LED.
- Pin 2 goes to the positive leg of the green LED.
- Pin 3 Goes to the positive leg of the yellow LED.
- Pin 4 goes to the positive leg of the red LED.
- Add a 100-ohm resistor to each of the negative LED legs and have it go to GND.
Below is a diagram of what you will need to do to get this circuit working correctly. If you’re looking a great program to prototype and draw up diagrams, then be sure to check out Fritzing.

Arduino Traffic Light Code
It’s now time to write some code to bring our lights to life. If you have programming experience, then you will find this code really basic. If you’re new to programming, then this is a great way to start learning all the basics.
First, we will need to declare our variables, these are used to store data we can reference throughout out our code.
For example, the “GREEN” variable represents the pin that the green LED is connected to.
While the “DELAY_GREEN” variable is the amount of time in milliseconds, we will delay the program from moving forward.
// variables
int GREEN = 2;
int YELLOW = 3;
int RED = 4;
int DELAY_GREEN = 5000;
int DELAY_YELLOW = 2000;
int DELAY_RED = 5000;Copy
Now we need to setup the pins so they act as an output and not as an input. The “pinMode” function accepts two parameters the pin number and the mode. (output or input)
// basic functions
void setup()
{
  pinMode(GREEN, OUTPUT);
  pinMode(YELLOW, OUTPUT);
  pinMode(RED, OUTPUT);
}Copy
The loop function creates a loop that the program will run through, so every time we call a function, it will turn a light on and then we can set a delay, so it doesn’t change until that time is up.
void loop()
{
  green_light();
  delay(DELAY_GREEN);
  yellow_light();
  delay(DELAY_YELLOW);
  red_light();
  delay(DELAY_RED);
}Copy
Now for each LED, we will need to create a function. As you can see the “green_light()” function will turn the green LED on while turning the yellow and red LEDs off.
void green_light()
{
  digitalWrite(GREEN, HIGH);
  digitalWrite(YELLOW, LOW);
  digitalWrite(RED, LOW);
}

void yellow_light()
{
  digitalWrite(GREEN, LOW);
  digitalWrite(YELLOW, HIGH);
  digitalWrite(RED, LOW);
}

void red_light()
{
  digitalWrite(GREEN, LOW);
  digitalWrite(YELLOW, LOW);
  digitalWrite(RED, HIGH);
}Copy
Once you are done writing the code, you will need to upload it to the Arduino using the USB cable that should have come with your kit. The lights should start to blink in the pattern that we have defined using the function calls and the delays.
You should always test your code before uploading it to the Arduino, you can do this by clicking the verify button (Tick). This will let you know if there are any errors in your code and allows you to make changes so that it is correct.
I hope you have enjoyed this Arduino traffic light project if you have any questions, comments, then please don’t hesitate to leave a comment below.
