In this tutorial, we will show you how to create a cron job on Ubuntu by editing the crontab.
On Ubuntu, a cron job is a task that automatically runs to a schedule you set. Cron jobs allow a lot of granularity on when it will be trigged. For example, you can run a task every minute or on a particular day of the week.
These cron jobs are written to a file on Ubuntu called a crontab. You can consider the crontab a list of tasks you want to be run to a specified schedule.
The following sections will show you how to use this crontab to automate tasks on your Ubuntu device.
You will run the following steps within the terminal on your Ubuntu device. If you are using Ubuntu’s desktop flavour, you can easily open the terminal by pressing CTRL + ALT + T.
Ensuring Cron is Installed on Ubuntu
Before proceeding further, we must ensure the Cron daemon is installed on the Ubuntu operating system. Most releases of Ubuntu should come with Cron pre-installed, but it doesn’t take long to be safe.
1. We need to update the package list cache before we can ensure that Cron is installed on our system. This cache tells the package manager where to download a package and the available version.
To update the package list cache, run the following command.
sudo apt updateCopy2. Once the package list cache update finishes, we can move on to installing Cron to Ubuntu.
To install this package, all you need to do is use the command below within the terminal.
sudo apt install cronCopy3. Now that we have ensured that Cron is available on our system, our next step is enabling the service.
If the Cron service is enabled, it will automatically start when your Ubuntu system powers on.
sudo systemctl enable cronCopyQuick Overview of Cron Jobs
While we have a full guide covering cron jobs and how to write them, let us quickly explain how they work and the format used to specify them.
A cron is a scheduled task managed and executed by the cron daemon. Each of these scheduled tasks is written within a file called a crontab.
Every user on your Ubuntu system can have their crontab file to specify cron jobs. The jobs a user writes within their crontab will be run by that user, inheriting their privileges. These crontabs are all stored within the “/var/spool/cron/crontabs/” directory.
You will write a Cron job for Ubuntu within this crontab using the following format. You must fill in a value for each field for it to be a valid job.
minute hour day_of_month month day_of_week commandLet us quickly go over these cron fields, so you understand the values you can write for each of these fields. We won’t be going too in-depth into how these values are written.
| Field | Possible Values |
|---|---|
minute | 0–59 or * |
hour | 0–23 or * |
day_of_month | 1–31 or * |
month | 1–12 or JAN–DEC or * |
day_of_week | 0–6 or SUN–SAT or * |
Within the possible values column shown above, you can see that we specify the asterisk symbol (*). This symbol tells the cron manager to fire on every possible value.
For example, when used in the minute column, it will schedule the task to fire every minute.
If we were to write a cron on Ubuntu that will grab our website on the first of every month, we would utilize the following cron job.
0 0 1 * * curl https://pimylifeup.comManaging your Crontab on Ubuntu
In the following sections we will show you how to manage the crontab on an Ubuntu system. These steps ranges from writing a cron job within the crontab file, to showing you how to remove the crontab entirely.
Writing a Cron Job
Now that we have quickly gone over what exactly a cron job is, let us explore how to write one within Ubuntu.
Over the following steps, you will see how to edit the crontab on Ubuntu and write your first Cron job.
1. To begin editing the crontab for the current user on Ubuntu, you will want to run the following command within the terminal.
If you preface this command with “sudo“, you will end up editing the crontab for the root user, so be careful.
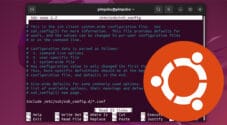
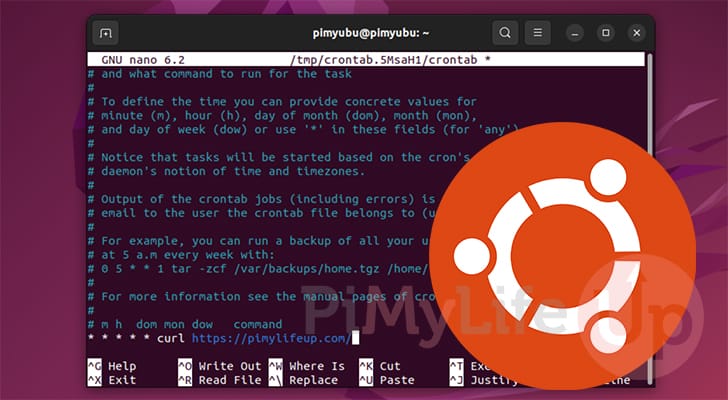
crontab -eCopyIf you haven’t modified the crontab on Ubuntu before, you will see the following message asking you to choose the text editor you want to utilise.
We recommend choosing the nano text editor as it is the easiest one to use. As it is the default option, you can press the ENTER key, alternative type in “1” then press ENTER.
Select an editor.  To change later, run 'select-editor'.
  1. /bin/nano        <---- easiest
  2. /usr/bin/vim.basic
  3. /usr/bin/vim.tiny
  4. /bin/ed

Choose 1-4 [1]:
2. With the crontab now opened on your Ubuntu device, you can add new cron jobs. Each new cron job needs to be on a separate line.
For example, if we wanted to make a curl request to our website every minute, you would add the following.
* * * * * curl https://pimylifeup.com/3. Once you have changed the crontab, you can save and quit by pressing CTRL + X, Y, and then the ENTER key.
4. If you change your user’s crontab, you will see a message saying a new crontab was installed.
crontab: installing new crontabYou will see the following message if you made no changes to the crontab on Ubuntu.
No modification made5. The cron daemon will begin executing the jobs you wrote to the crontab on Ubuntu. Restarting your Ubuntu device or any services running on it is unnecessary.
Handling the Output from Cron Jobs
One of the downsides of a cron job on Ubuntu is that it can be very difficult to tell whether they are being run successfully.
However, to work around this, you can redirect the output of a command to a log file so that you can see its output and ensure it is working as intended.
To redirect the cron jobs output, you must write your command, followed by two greater than signs (>>) and then the path to where you want the output saved.
For example, if we were to take our cron job from the previous section, we could log its output to a file called “curl.log” in our user’s home directory.
* * * * * curl https://pimylifeup.com/ >> /home/pimyubu/curl.logViewing the Contents of your Crontab on Ubuntu
You don’t have to edit the crontab to be able to see the cron jobs that are within it.
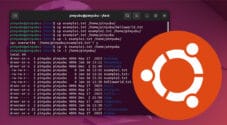
To get Ubuntu to list the contents of your crontab, you only need to utilize the “-l” option when using the “crontab” command.
crontab -lCopyBelow you can see how the command outputted the cron job we added earlier in this guide.
* * * * * curl https://pimylifeup.com/Deleting your Cron Jobs on Ubuntu
If you want to remove all of your cron jobs from the current user’s crontab, you can use the “-r” option.
With the example below, we use the “-r” option to remove the crontab and the “-i” option to prompt the user before deleting it.
crontab -r -iCopyIf you use the “-r” option without the “-i” option, the crontab will be immediately deleted without any prompts. Be careful when using the command in this way, as it is irreversible.
crontab -rCopyEditing a Different Users Crontab on Ubuntu
If you are a superuser, it is possible to edit the crontab of other users on Ubuntu. By editing a crontab of a different user, the jobs will be executed by them instead of your own.
This is useful when you need certain tasks to be performed with a user with limited permissions.
Editing the crontab of a different user is as straightforward as using the “-u” option followed by that user’s name.
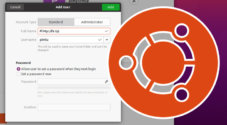
crontab -e -u USERCopyFor example, if we wanted to edit the crontab for a user with the name “pimylifeup“, we would like to use the following command within the terminal.
sudo crontab -e -u pimylifeupCopyConclusion
Throughout this guide, we aimed to show you how to automate a task on Ubuntu using cron jobs.
As mentioned throughout this tutorial, a cron job is a task written within a crontab file that the system will run according to your specified schedule.
Please comment below if you have any questions about how to write or use a cron job on Ubuntu.
If you found this helpful, check out our many other Ubuntu guides.