In this guide, we will show you how to take a screenshot on the Steam Deck while in gaming or desktop modes.
If you have ever experienced a moment in a game where you want to take a screenshot, the Steam Deck makes this process very straightforward. In gaming mode, you only need to press two buttons on your device to take a screenshot instantly.
Any screenshots you take while in gaming mode are automatically saved into your Steam screenshot library. From this library, you can easily upload them to your Steam profile.
Even in desktop mode, SteamOS comes bundled with an application that allows you to take screenshots easily.
Over the following few sections, we will show you how to take a screenshot both in and out of gaming mode.
Taking a Screenshot in Steam Deck’s Gaming Mode
While in gaming mode, the Steam Deck features its own inbuilt screenshotting tool that allows you to capture the screen at any time.
Best of all, taking and managing screenshots on your device is straightforward.
1. Luckily for us, the Steam Deck comes built-in with a simple two-button shortcut you can use to take a screenshot.
To take a screenshot at any time, press the STEAM and R1 buttons simultaneously.
If you are unsure what buttons we are talking about, please look at the photo below, where we have highlighted them.
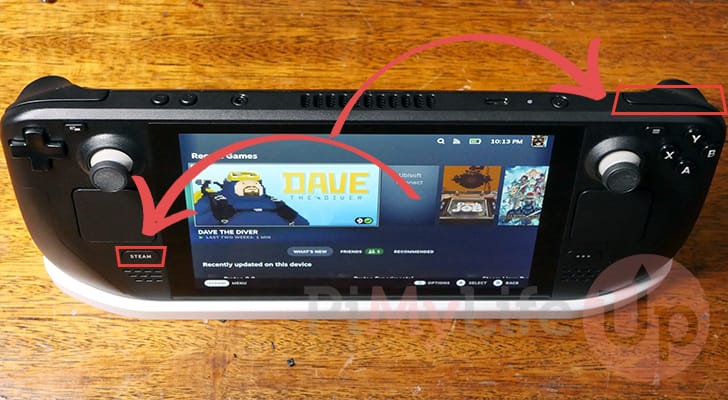
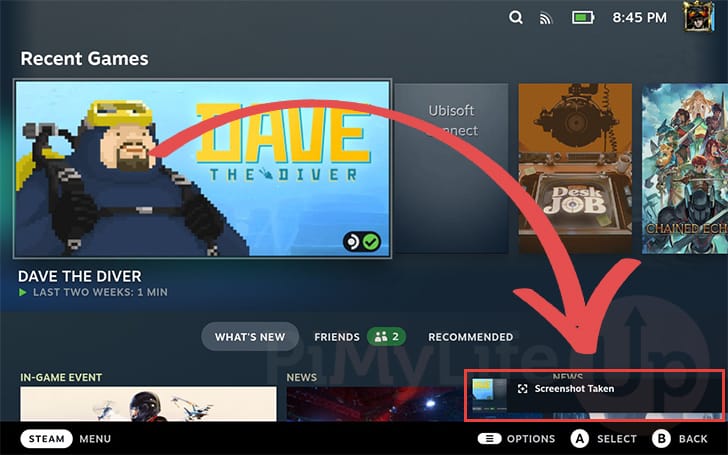
2. After pressing these two buttons, you will see a “Screenshot Taken” message appear in the bottom-right corner of your screen.
If you don’t see a message appear, you likely didn’t press the buttons simultaneously.
Finding and Managing Screenshots within Gaming Mode
Now that you have taken a screenshot while in gaming mode on your Steam Deck, you will likely want to view it again at some point.
Over the next couple of steps, we will show you how to find and manage your screenshots within the gaming mode.
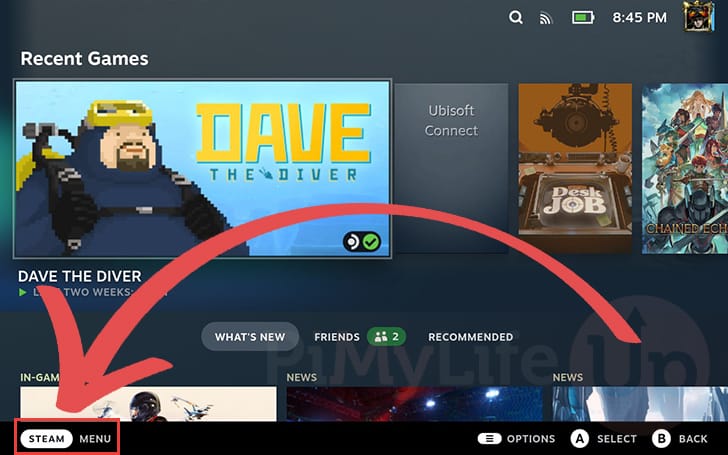
1. To browse screenshots on your Steam Deck, open the STEAM menu by pressing the STEAM button on your controller.
If you are outside a game, you can also tap the “STEAM menu” option in the bottom-right corner of the screen.
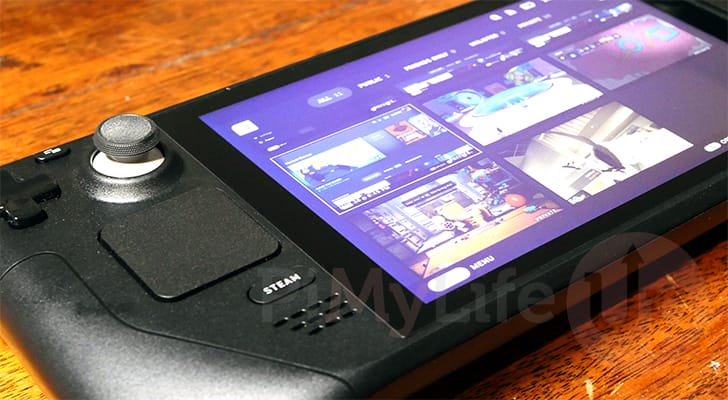
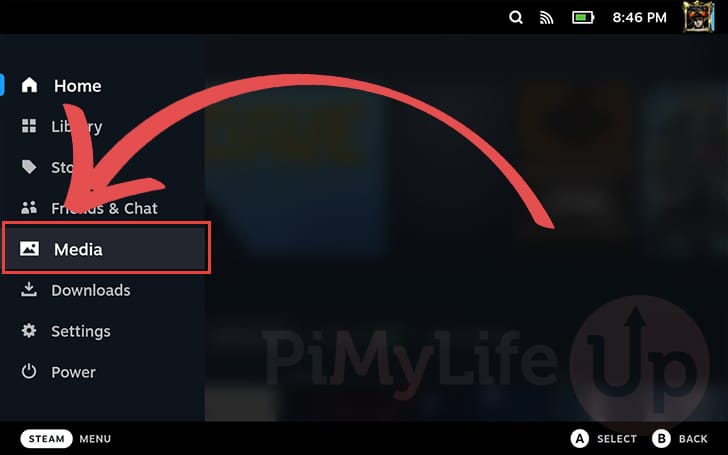
2. With the STEAM menu open, you will now want to select the “Media” option.
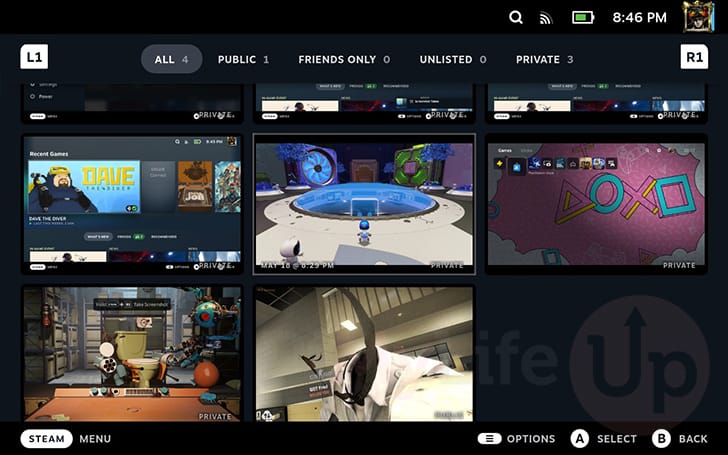
3. This page is where you will find all of the screenshots you have taken on your Steam Deck, and on your Steam account in general.
Finding your Steam Screenshots in Desktop Mode
In this section, we will show you how to find your screenshots while in desktop mode. With these steps, you can even browse to where the screenshots are stored locally on your Steam Deck.
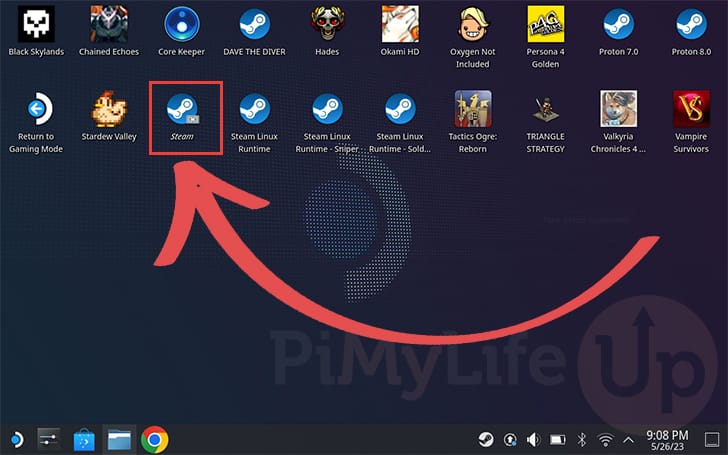
1. While you are in desktop mode, you will need to open the Steam client.
You can do this by double tapping/clicking the “Steam” icon on the desktop.
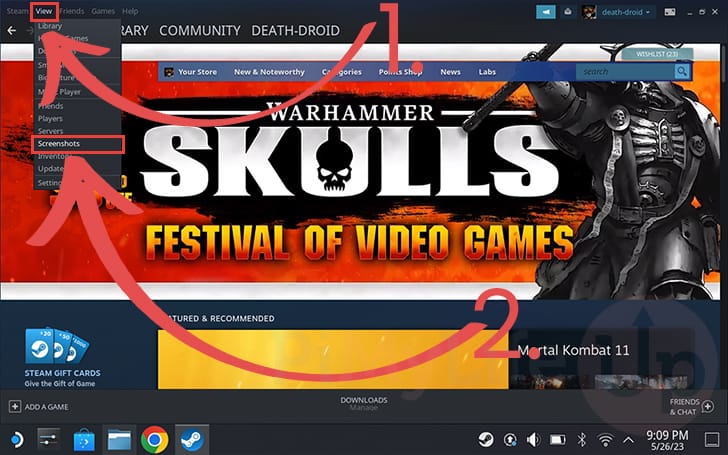
2. With the Steam client now open on your Steam Deck, we can browse to the screenshots screen.
To do this, you must first open the “View” drop-down menu (1.).
With the drop-down menu open, click the “Screenshots” option (2.).
3. You should now have the screenshot uploader open on your Steam Deck.
You can change the screenshots you are viewing by using the select box at the top of the screen (1.).
Any screenshots you have available for that game will be shown on the left side of the window (2.).
To find where these particular screenshots are stored on your Steam Deck, click the “SHOW ON DISK” button (3.).
You can also upload these screenshots to your Steam page by clicking the “UPLOAD” button (4.).

How to take a Screenshot in Steam Deck’s Desktop Mode
This section will show you how to take a screenshot while you are in Steam Deck’s desktop mode.
You will notice immediately that the same shortcut you use in gaming mode does not work. Instead, you have to rely on a third-party application called Spectacle.
Luckily for us, this Spectacle application comes pre-installed on your Steam Deck.
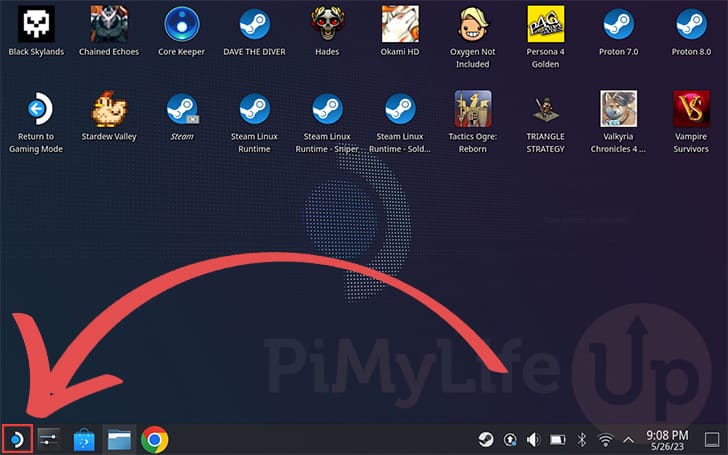
1. While in desktop mode, you will want to open the start menu by clicking the bottom-left side of the screen.
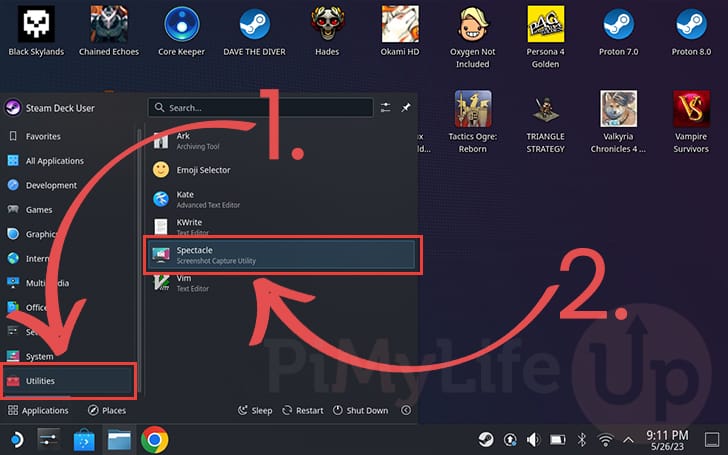
2. With the start menu open, hover over the “Utilities” option (1.).
Then finally, click the “Spectacle” option (2.). This will open the application that you can use to take screenshots while in desktop mode on your Steam Deck.
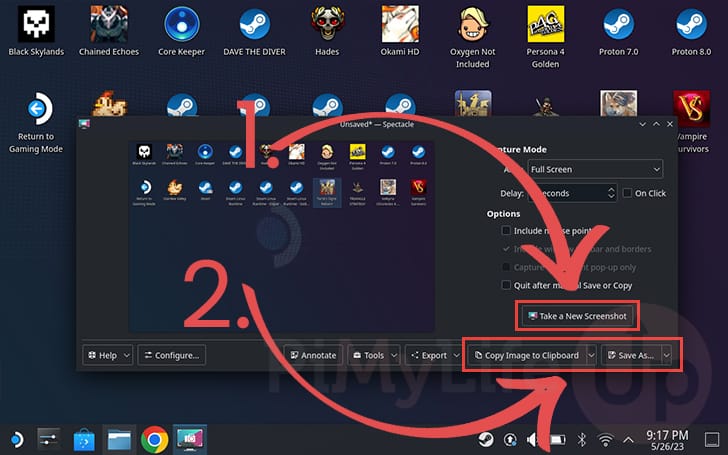
3. With Spectacle open, all you need to do to take a screenshot on your Steam Deck is to click the “Take a New Screenshot” button (1.).
By default, Spectacle will take a screenshot of the whole desktop immediately. You can configure this behaviour by changing the controls shown within the application.
Once you are happy with the screenshot you have taken, you can click the “Copy Image to Clipboard” or “Save As..” buttons (2.).
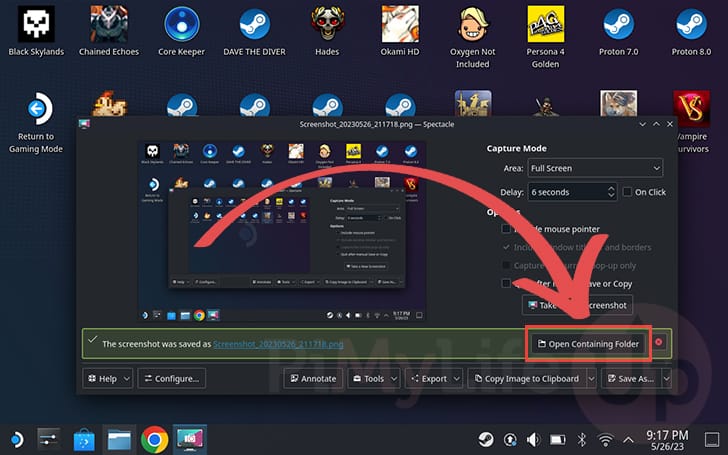
4. After saving a screenshot on your Steam Deck, you will see a message pop up within Spectacle.
You can easily browse to where these screenshots are stored by clicking the “Open Containing Folder“.
Conclusion
At this point in the tutorial, you should hopefully now have a good idea of how to take a screenshot on your Steam Deck.
We have shown how you can capture your screen in desktop and gaming modes.
Please comment below if you have questions about taking screenshots on your Steam Deck.
If you found this tutorial helpful, be sure to check out our other Steam Deck tutorials.