In this tutorial, we will be showing you how you can easily set up ownCloud on Linux using Docker.
ownCloud is a self-hosted, free, and open-source collaboration and file-sharing platform. It is designed to have many of the features you expect from cloud solutions such as Google Drive and OneDrive.
The advantage of using a platform like ownCloud is that you remain entirely in control of your data. You don’t have to worry about what a company might use your data for.
Docker is a great way to get ownCloud up and running on your machine, as it makes the setup process super simple, even for those who are just getting started with Linux.
One of the neat things about ownCloud is that it is also relatively lightweight, so you don’t necessarily need a powerful machine. However, one thing you will want is ample enough storage to keep all of your files.
Before you get started, you might also be interested in checking out Nextcloud, which is a fork of ownCloud that took its own route. Both have slightly different use cases so it’s best to explore them to see what best suits your needs.
Please note that this Docker container we are using for ownCloud requires you to be running a 64-bit operating system. However, it does have support for both ARM and traditional x64 processors.


Installing and Running ownCloud on Linux using Docker
In the following sections, we will walk you through how you can install and use ownCloud using Docker.
In particular, we are using a Docker Compose file to set up ownCloud. A Compose file helps simplify managing and modifying your setup down the road.
Installing Docker on your Machine
1. Since we are using Docker to run ownCloud you must have it installed on your system. If you already have Docker installed, please continue to the next section.
Our thorough guide shows you how to install the latest version of the Docker runtime on Linux. Installing Docker is a fairly straightforward process.
https://pimylifeup.com/linux-docker-install/Preparing your Linux Device to Run the ownCloud Container
2. Once you have Docker installed, we can move on to creating a directory to store the ownCloud configuration file. We will be creating this directory within the “/opt/stacks” folder.
To create a directory to store ownCloud’s Docker Compose file, use the mkdir command, as shown below.
sudo mkdir -p /opt/stacks/owncloudCopyOne key reason we keep our compose files organized within the “/opt/stacks/” directory is that it simplifies using software like Dockge. Dockge is a great way of managing your various services through a sleek web interface.
3. After creating the directory, you will want to change into it by using the cd command.
The reason for the tutorial will expect you to be within this directory.
cd /opt/stacks/owncloudCopyWriting the Docker Compose File for ownCloud
4. The next and probably most important task is for us to write the Docker Compose file for ownCloud.
A Compose file is like a set of instructions that Docker can use to set up multiple related services. This is extra useful in our case, as ownCloud requires a MySQL and Redis server to improve its functionality.
You can begin to write this Compose file by running the following command within the terminal.
sudo nano compose.yamlCopy5. Within this file, you will want to enter the following lines. There is nothing you need to edit here, as it will pull all configurable settings through a “.env” file that we will write shortly.
services:
  owncloud:
    image: owncloud/server:${OWNCLOUD_VERSION}
    container_name: owncloud_server
    restart: always
    ports:
      - ${HTTP_PORT}:8080
    depends_on:
      - mariadb
      - redis
    environment:
      - OWNCLOUD_DOMAIN=${OWNCLOUD_DOMAIN}
      - OWNCLOUD_TRUSTED_DOMAINS=${OWNCLOUD_TRUSTED_DOMAINS}
      - OWNCLOUD_DB_TYPE=mysql
      - OWNCLOUD_DB_NAME=owncloud
      - OWNCLOUD_DB_USERNAME=owncloud
      - OWNCLOUD_DB_PASSWORD=owncloud
      - OWNCLOUD_DB_HOST=mariadb
      - OWNCLOUD_ADMIN_USERNAME=${ADMIN_USERNAME}
      - OWNCLOUD_ADMIN_PASSWORD=${ADMIN_PASSWORD}
      - OWNCLOUD_MYSQL_UTF8MB4=true
      - OWNCLOUD_REDIS_ENABLED=true
      - OWNCLOUD_REDIS_HOST=redis
    healthcheck:
      test: ["CMD", "/usr/bin/healthcheck"]
      interval: 30s
      timeout: 10s
      retries: 5
    volumes:
      - ${OWNCLOUD_FILES_LOCATION}:/mnt/data

  mariadb:
    image: mariadb:10.11 # minimum required ownCloud version is 10.9
    container_name: owncloud_mariadb
    restart: always
    environment:
      - MYSQL_ROOT_PASSWORD=owncloud
      - MYSQL_USER=owncloud
      - MYSQL_PASSWORD=owncloud
      - MYSQL_DATABASE=owncloud
      - MARIADB_AUTO_UPGRADE=1
    command: ["--max-allowed-packet=128M", "--innodb-log-file-size=64M"]
    healthcheck:
      test: ["CMD", "mysqladmin", "ping", "-u", "root", "--password=owncloud"]
      interval: 10s
      timeout: 5s
      retries: 5
    volumes:
      - ./mysql:/var/lib/mysql

  redis:
    image: redis:6
    container_name: owncloud_redis
    restart: always
    command: ["--databases", "1"]
    healthcheck:
      test: ["CMD", "redis-cli", "ping"]
      interval: 10s
      timeout: 5s
      retries: 5
    volumes:
      - ./redis:/dataCopy
6. Once you have finished filling out the Docker Compose file, you can save and quit by pressing CTRL + X, Y, and then ENTER.
Creating an Environment File
7. Our next step is to begin writing an environment file. This file will be read alongside the Docker Compose file to configure the ownCloud container. We separate these into their own file to make configuring the container easier.
You can begin to write this “.env” file using the command below in the terminal.
sudo nano .envCopy8. Within this file, you will want to type out the following lines. Each of these lines is configurable, and we will try our best to explain what values you should use at each point.
<VERSION>: Replace this placeholder with the version of ownCloud that you want to run on your machine.
- If you are happy with using the latest release, you can simply type in “
latest“. - Alternatively, you can specify the version using its version number. It supports specifying this version using both major and minor numbers such as “
10.15.0“, “10.15“, or “10“.
- If you are happy with using the latest release, you can simply type in “
<DOMAINORIP>: The next important thing is to specify a domain name or IP you want to use when accessing your ownCloud installation.
This value must be what you will use to access ownCloud. For example, we are hosting ours for local use and will be using “192.168.0.32“.<HTTPPORT>: You must also specify the port that ownCloud will operate on.
By default, ownCloud is HTTP only, so you could run this on port “80“. However, if you have pre-existing services running or want to run it through a proxy to add SSL support you may want to use a port such as “8080” instead.<ADMINUSERNAME>: Using this placeholder, you will specify the username for the admin account. Be careful what you set here, as this is only used to create the user when the ownCloud Docker Container starts for the first time.<ADMINPASSWORD>: Here, you will want to type in the password you want to use for your admin account. You can change this later through the ownCloud web interface.<MOUNTPATH>: The final and most important place holder that you must replace is the path to where your files will be stored.
You can store this locally within the “/opt/stacks/owncloud” directory by using “./data“. Be careful where you set this location; changing it later will cause issues.
OWNCLOUD_VERSION=<VERSION>
OWNCLOUD_DOMAIN=<DOMAINORIP>:<HTTPPORT>
OWNCLOUD_TRUSTED_DOMAINS=<DOMAINORIP>
ADMIN_USERNAME=<ADMINUSERNAME>
ADMIN_PASSWORD=<ADMINPASSWORD
HTTP_PORT=<HTTPPORT>
OWNCLOUD_FILES_LOCATION=<MOUNTPATH>Copy
Below is an example of what a filled-out version of this file might look like.
OWNCLOUD_VERSION=latest
OWNCLOUD_DOMAIN=192.168.0.9:8080
OWNCLOUD_TRUSTED_DOMAINS=192.168.0.9
ADMIN_USERNAME=pimylifeup
ADMIN_PASSWORD=pimylifeup
HTTP_PORT=8080
OWNCLOUD_FILES_LOCATION=./dataCopy
9. Once you have finished filling out the environment file, save and quit by pressing CTRL + X, Y, and then ENTER.
Starting the ownCloud Docker Container
10. We are finally at the point where we can start up the ownCloud Docker container by running the following command on the terminal.
This process might take a few minutes to complete as it needs to set up three services. Additionally, since we are using the “-d” option, Docker will detach from the current terminal session and continue to run in the background.
docker compose up -dCopyAccessing the ownCloud Web Interface
11. ownCloud should now be up and running within its Docker container. If everything works correctly, you can now access ownCloud using your favorite web browser.
You may need to change port “8080” if you used a different one when writing out the “.env” file.
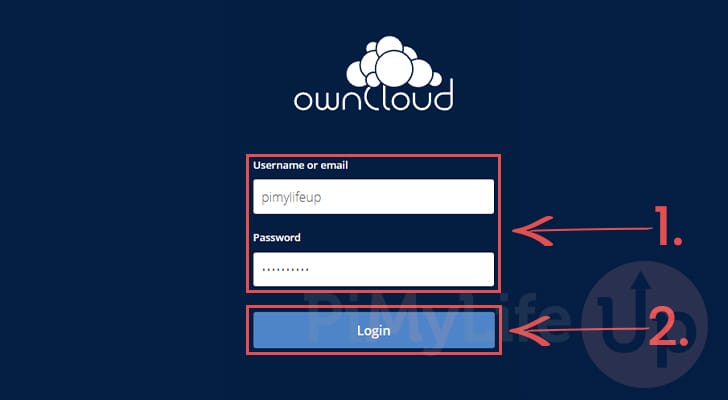
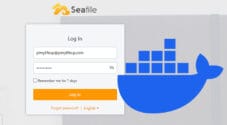
http://<DOMAINNAMEORIP>:808012. You should now be greeted by the ownCloud web interface. Use the text box to fill out the username and password that you set for your admin account (1.).
Once you have filled out your information, click the “Login” button (2.).
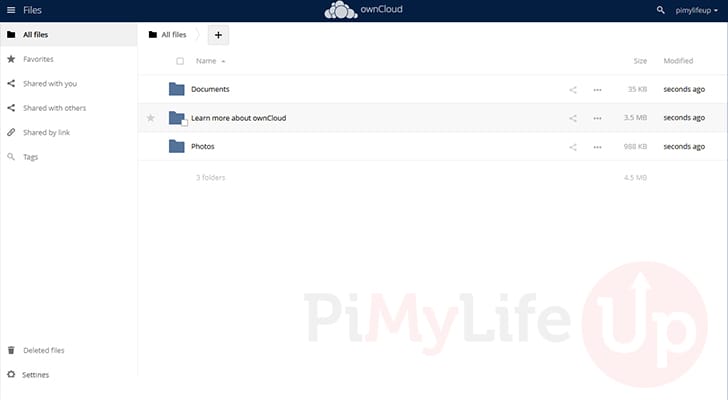
13. You should now have access to the ownCloud web interface. Since you are an admin, you can use this interface to create additional users and more.
Updating your ownCloud Docker Container
In this section, we will show you how to easily and quickly update your ownCloud Docker container.
One key advantage of using Docker is that it makes moving to the latest release such an easy process.
1. Your first step is to change to the directory where we wrote the “compose” and “.env” files in this tutorial.
You can swap to the correct directory by running the following command.
cd /opt/stacks/owncloudCopy2. Once you are in the right directory, you will want to use the following command to get Docker to pull the latest release of ownCloud to your Linux machine.
Please note that if you specified an exact version within the “.env” file, you must edit that and change the version number before proceeding.
docker compose pullCopy3. After Docker downloads a new version of your containers, you will want to move your already running versions to the new release.
You simply need to use the command below to move to the latest release.
docker compose up -dCopyConclusion
By this point in the tutorial, you will hopefully have ownCloud up and running using a Docker container.
Docker is a great tool for running your own ownCloud instance. It makes managing and setting up this collaboration and file-sharing platform significantly easier.
Please feel free to drop a comment below if you have had any issues with self-hosting ownCloud using Docker.
If you liked this tutorial, we highly recommend that you check out our many other Docker tutorials.


Thank you very much for the detailed instructions.