In this tutorial, we will show you how to run Android apps directly on Ubuntu, thanks to Waydroid.
Waydroid is a container-based solution that allows you to run a full Android operating system alongside your primary operating system.
This container-based method allows you to run Android applications as if they were a native program you installed to your Ubuntu system. Waydroid handles mapping the Linux namespace to Android; this ensures that it has access to your system’s hardware.
If you have tried to run Android software on Windows before, you will probably be familiar with a tool called Bluestacks. While Bluestacks is a great tool for running Android apps, it unfortunately has zero support for Ubuntu.
Luckily, with Linux systems like Ubuntu we have access to Waydroid. While similar in results, these two pieces of software achieve the end result different. Bluestacks runs the Android subsystem, Waydroid runs the entire operating system natively within a container.
The one downside of Waydroid is that it requires you to use an operating system that utilizes Wayland. Luckily many newer versions of Linux operating systems such as Ubuntu use Wayland out-of-the-box.
Please note that if you are using a Raspberry Pi, we highly recommend you follow our guide for specifically using Waydroid on the Raspberry Pi. There are a few key changes required for the Pi.


Installing and using Waydroid on Ubuntu
In this section, we will walk you through installing and using Waydroid on Ubuntu.
For this to work, you will need to be using a relatively new version of Ubuntu. All versions of Ubuntu since 21.04 use Wayland by default. If you are unsure of what release you are running, we have a quick guide on how to check your version of Ubuntu.
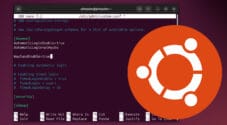
Additionally, these steps will be done using the terminal on Ubuntu. Don’t stress if you are uncomfortable with the terminal; we will run you through each step.
Preparing your Ubuntu System
1. Before we can proceed with setting up Waydroid on Ubuntu there are a few things we should do first. The first is to update your system to ensure we have a nice base to work off of.
You can update Ubuntu by using the following two commands within the terminal.
sudo apt update
sudo apt upgrade -yCopy
2. Once the package list cache has been updated, we must ensure we have all the packages we need to set up Waydroid properly on Ubuntu.
The first of the two packages are what we will be using to make adding the Waydroid repository a significantly easier process. We will be using “git“, “lzip“, “python3-venv” to run a script that makes installing libhoudini to Android a much easier process.
sudo apt install curl lsb-release git lzip python3-venvCopyAdding the Waydroid Package Repository to Ubuntu
3. The best way to install Waydroid on to Ubuntu is to add their official package repository. Doing this ensures that you can always access the latest stable releases.
The first part of this process is to add the Waydroid repositories GPG key. The apt package manager uses this key to verify that the packages your system downloads are coming from that specific repository. Basically, it helps stop someone from performing a man-in-the-middle attack and swapping out the package for something else.
sudo curl -Sf https://repo.waydro.id/waydroid.gpg --output /usr/share/keyrings/waydroid.gpgCopy4. With the GPG key added, we can now add the actual Waydroid repository to our list of package repositories on Ubuntu by running the following command.
This command will create a file at “/etc/apt/sources.list.d/waydroid.list” that points to the Waydroid repository. It will also utilize the GPG key we downloaded earlier. Here is also where we use the “lsb_release” package to insert the codename of your version of Ubuntu.
echo "deb [signed-by=/usr/share/keyrings/waydroid.gpg] https://repo.waydro.id/ $(lsb_release -cs) main" | sudo tee /etc/apt/sources.list.d/waydroid.listCopy5. As we have added a new repository, we must update the package list cache by running the command below.
If we don’t do this, Ubuntu will be unaware of the packages it can now install from the Waydroid repository.
sudo apt updateCopyInstalling and Setting up Waydroid on Ubuntu
6. With the package repository added, we can move on to installing and setting up Waydroid on Ubuntu so that we can run Android apps.
Thanks to adding the repository in the previous steps, installing Waydroid is as easy as running the following command.
sudo apt install waydroidCopy7. Even though we just installed Waydroid we now need to get it to actually initialize itself. Waydroid itself is packaged without an operating system, so we need to get it to download one now by running the following command.
By using this command, Waydroid will download a modified version of LineageOS to your device. Additionally, since we are using the “-s GAPPS” option, it will also install Google Apps.
sudo waydroid init -s GAPPSCopyLaunching Waydroid on Ubuntu
8. While we aren’t quite done setting up Waydroid on our Ubuntu device, we must start it for the next few steps.
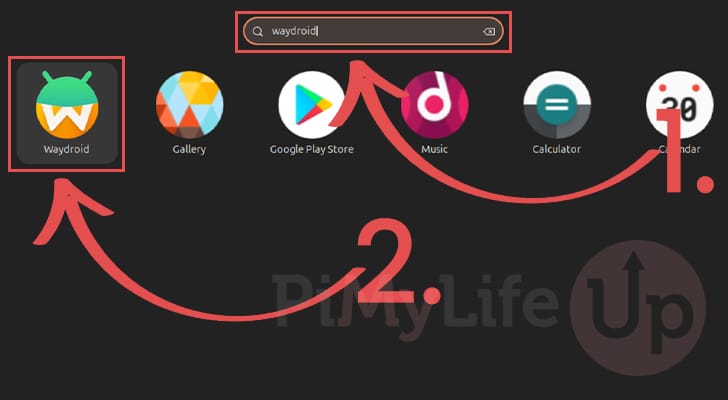
To find Waydroid, open the applications panel by clicking the bottom or top left of your screen.
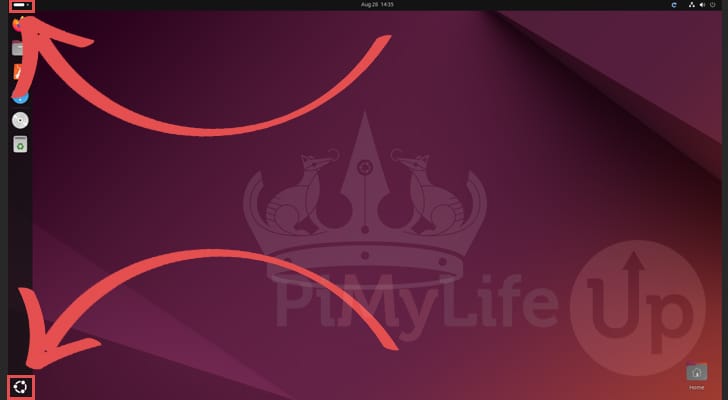
9. Now that the applications menu is open, use the search box (1.) to search for “waydroid“.
Once you see the Waydroid icon, click it (2.)
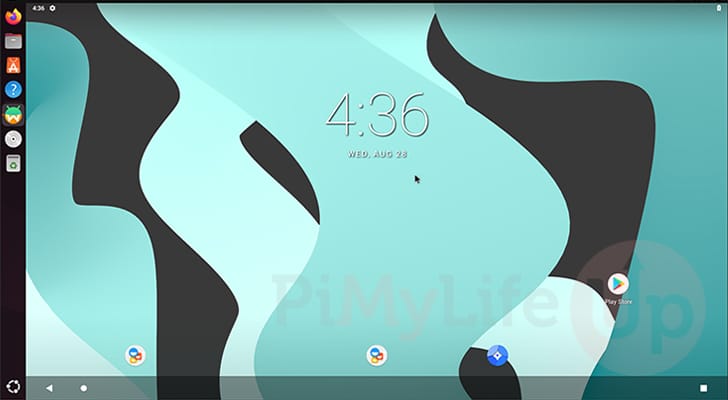
10. Now you have Waydroid up and running on your Ubuntu device.
While you can now use the Android operating system from within this container, there are a few other things to complete that will significantly improve your experience, including giving you access to the Google Play Store.
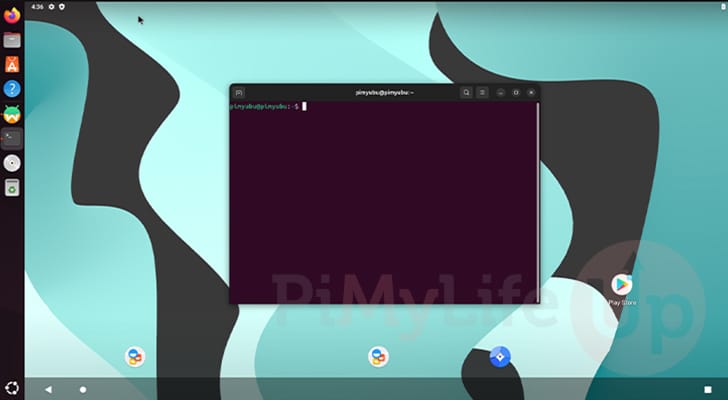
11. For the next few steps, you will want to open the terminal by pressing CTRL + ALT + T. Ensure that you keep Waydroid running in the background.
Registering your Ubuntu Android System with Google
12. With Waydroid now installed, we aren’t done yet. Google does not allow any non-certified device to connect to its services. Luckily, they do allow you to manually certify your device, but it requires us to get some additional information.
Launch the Waydroid shell on your Ubuntu device by running the following command.
sudo waydroid shellCopy13. After launching into the Waydroid shell, you will want to use the following command. This command fetches the ID associated with your Ubuntu Android installation.
ANDROID_RUNTIME_ROOT=/apex/com.android.runtime ANDROID_DATA=/data ANDROID_TZDATA_ROOT=/apex/com.android.tzdata ANDROID_I18N_ROOT=/apex/com.android.i18n sqlite3 /data/data/com.google.android.gsf/databases/gservices.db "select * from main where name = \"android_id\";"Copy14. You should now see a value similar to the one we have shown below. This value is unique for eadh device, so make sure you keep it safe.
The part you want to use for the next step is located after the string: “android_Id|“.
android_id|37128187XXXXXXXXXXXFor example, looking at the above line, the value we will use to certify our Ubuntu Android device with Google is the following.
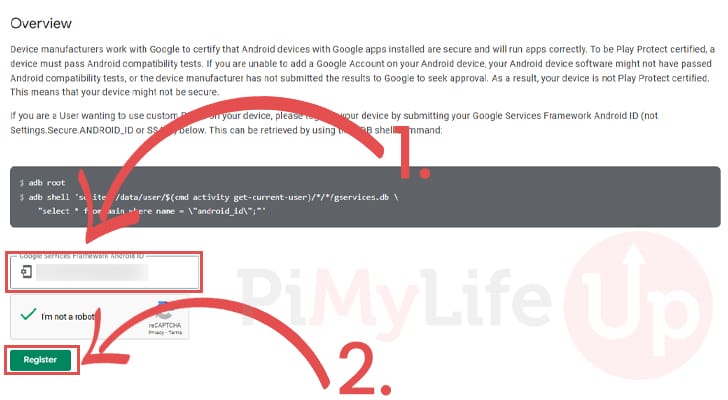
37128187XXXXXXXXXXX15. Our next step is to go to Google’s pages on certifying an uncertified Android device. This page will allow us to specify the ID we got in the previous step and associate it with your Google account.
In your favorite web browser, go to the Google Android Uncertified page.
https://www.google.com/android/uncertified16. Now that the Google Android Uncertified page is open, you should see a textbox on this page (1.). In this text box, you must type out the Android ID obtained in the previous steps.
After typing out your Android ID, you must click the “Register” button (2.).
17. You will now want to wait a few minutes before proceeding with the next step. It can take a few minutes for your Android ID changes to be propagated through Google’s servers.
Restarting Waydroid too soon may lead you to the same uncertified error.
18. After waiting a few minutes, restart the Waydroid container by using the following command.
sudo waydroid container restartCopyEnabling Multi-Window Support for Waydroid
19. One thing you may want to do is enable the multi window support of Waydroid on Ubuntu.
Enabling this functionality allows the Android applications to launch as if they were native applications installed directly on Ubuntu. This stops Waydroid from launching the full Android interface when you only want to load a single application.
To enable this functionality, you will want to run the following command.
Please note that Waydroid must be currently running on your Ubuntu device; otherwise, you will run into an issue with running this command.
waydroid prop set persist.waydroid.multi_windows trueCopy20. If you enable the multi-window support, restart the Waydroid container by running the command below in the Ubuntu terminal
sudo waydroid container restartCopyAdding Support for ARM Android Apps on Ubuntu
21. If you are running Ubuntu on an x86/x64 system, you won’t be able to run any ARM Android apps by default.
Luckily, there is a workaround that we can use to make this possible, and that is to install an ARM to x86/x64 translation later. While this translation layer isn’t perfect, it will make it possible to run many more applications since there aren’t many native x86/x64 Android apps.
To make this whole process straightforward we will use a tool called Waydroid script by casualsnek.
Setting up the Waydroid Script
22. Let us start by changing to your user’s home directory.
The easiest way to do this is to use the cd command, followed by the tilde symbol.
cd ~Copy23. After changing to your home directory, use the following command to clone the Waydroid script we will utilize.
git clone https://github.com/casualsnek/waydroid_scriptCopy24. Once the scripts repository has been cloned to your Pi, you will want to change to the new directory using the cd command.
cd waydroid_scriptCopy25. We now need to generate a virtual environment for the script that we are using. All the additional libraries this script relies on to work will be installed within this virtual environment.
To generate a new environment, use the following command in the terminal.
python3 -m venv venvCopy26. Finally, install the required libraries for this script by running the command below.
venv/bin/pip install -r requirements.txtCopyInstalling LibHoudini using the Waydroid Script
27. With this script installed, installing LibHoudini into your installation of Waydroid is as straightforward as running the following command.
This process will take a couple of minutes as it needs to fetch the libraries from online. Once this is done, you can start running Android ARM apps on your Ubuntu device.
sudo venv/bin/python3 main.py install libhoudiniCopy28. This tool also has the ability to install a few other applications that can be useful. One of those is the Widevine DRM library. This library will allow you to use streaming services that utilize DRM for their copyright management.
You can install this library easily with this tool by running the following command.
sudo venv/bin/python3 main.py install widevineCopy29. Finally, the other tool you may want to install on Waydroid is Magisk. Magisk is a root tool allowing greater access to the underlying system.
If you want this tool as well, use the following command.
sudo venv/bin/python3 main.py install magiskCopyRunning Android Apps using Waydroid on Ubuntu
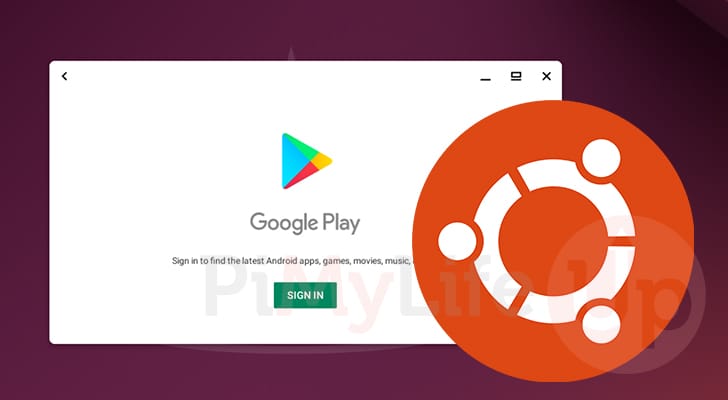
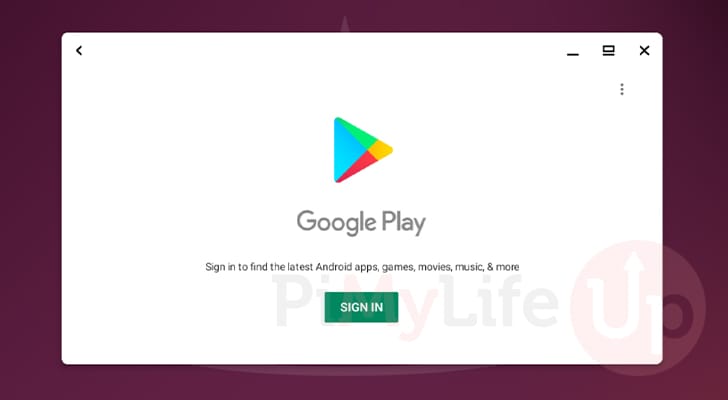
30. Below, you can see that we now have the Android Google Play Store open on our Ubuntu device, thanks to Waydroid.
Since we certified our version of Android earlier, we can now log in and have full access to the Google Apps suite.
Troubleshooting Internet Connectivity Issue with Waydroid on Ubuntu
If you have a firewall running on Ubuntu, you may run into internet connectivity issues when using Waydroid.
Luckily, we can work around this by changing a few things in the firewall without disabling it altogether.
1. The first thing we need to do is allow ports 67 and 53 through the firewall by running the following command.
Waydroid uses these, and since Waydroid is essentially operating out of a different virtual network interface, it will need these open to talk with the Ubuntu host system.
sudo ufw allow 67
sudo ufw allow 53Copy
2. Our next step is to allow IP forwarding through the firewall. We can enable this by using the following command within the terminal.
sudo ufw default allow FORWARDCopy3. For these changes to take effect, you will want to now restart the Waydroid container if it is already running.
sudo waydroid container restartCopy4. Once Waydroid finishes restarting you should now have network access.
Conclusion
If you have reached this point in the guide, you should have successfully gotten Waydroid up and running on Ubuntu.
Waydroid is a neat idea that makes running Android applications natively on Ubuntu a simple process. The applications look and feel like they were natively intended to run on Ubuntu.
While you may run into issues with some apps, a huge number should work flawlessly.
Please feel free to comment below if you have had any issues with Waydroid on Ubuntu.
If you liked this tutorial, we highly recommend exploring some of our many other Ubuntu tutorials.