In this tutorial we will be showing you how to empty the trash on the Ubuntu operating system.
If you are using the desktop flavour of Ubuntu, you will find that when you delete a file it will be moved to the trash bin.
The trash bin is an excellent piece of functionality as it makes it significantly harder to delete an important file accidentally.
Of course, this only happens if you use Ubuntu’s file browser. If you delete a file using the rm command, it will be purged instantly and not moved to the trash.
By default, the rubbish bin on Ubuntu is not automatically emptied. So, over time, the trash bin will fill up and consume a significant amount of storage space.
Luckily, emptying the rubbish bin on Ubuntu is a super simple process using either the file explorer or the terminal.
Emptying the Trash Bin on Ubuntu using the File Explorer
In this section, we will be showing you how you to use the file explorer on Ubuntu to empty the trash.
For most users, this is one of the more straightforward ways to empty the trash on Ubuntu, as it can be done in just a few simple clicks.
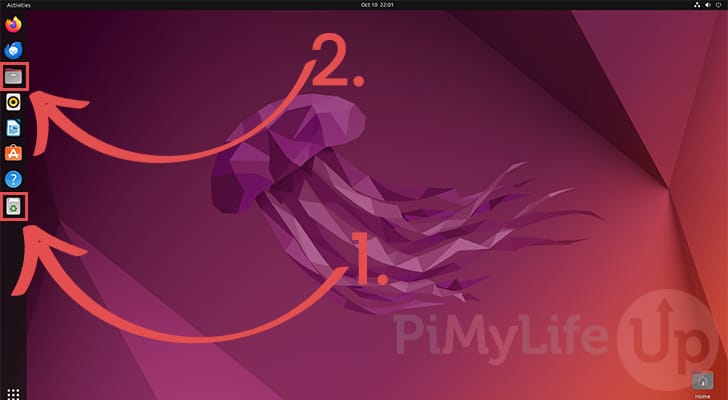
1. There are two ways that you can access the trash bin on your Ubuntu system.
The easiest way is to click the trash bin within the Ubuntu dock (1.) or by double-clicking the icon on your desktop.
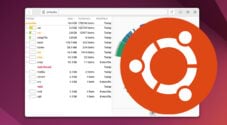
Alternatively, you can get to the trash bin by opening up the File Explorer (2.). The Files app is represented by the folder icon in the dock.
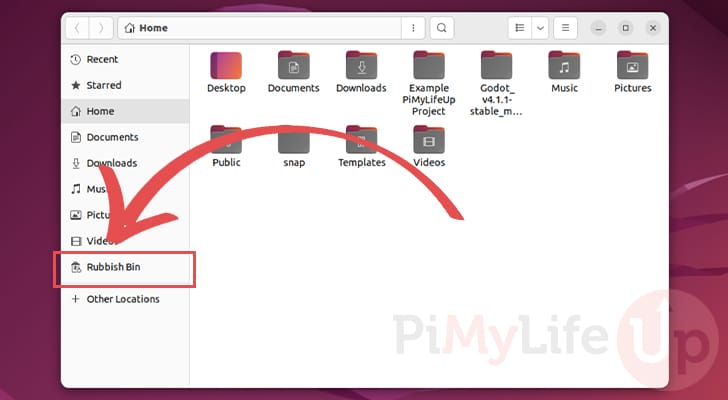
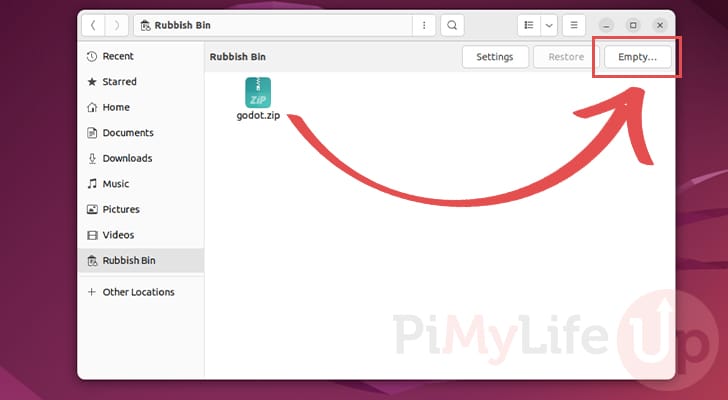
2. If you are going the file explorer route, you can access the rubbish bin on Ubuntu by clicking “Rubbish Bin” in the sidebar.
3. Once you have the trash bin open, all you need to do to empty it is to click the “Empty” button.
You can also select individual files that you want to permanently delete from your system rather than emptying the whole trash bin.
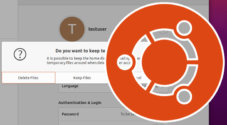
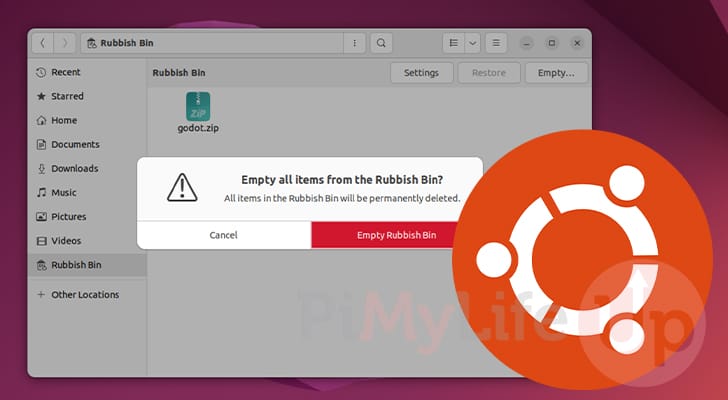
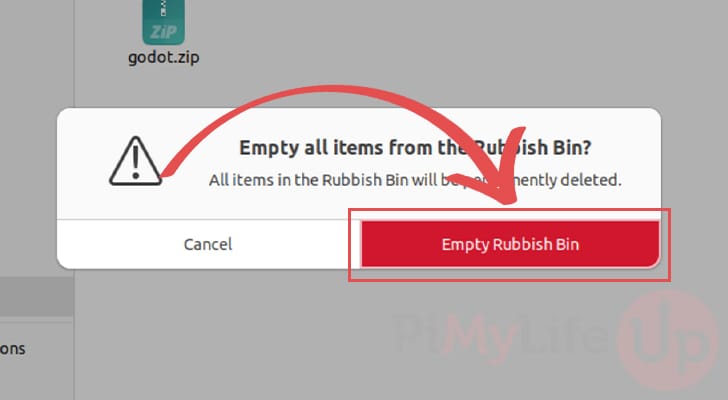
4. You will now see a warning about emptying all the items from the trash bin on your Ubuntu system.
Remember, this is a permanent action, but if you want to proceed, click the “Empty Rubbish Bin” button.
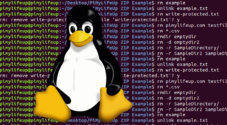
Using the Terminal to Empty the Rubbish Bin on Ubuntu
Ubuntu also offers the ability to empty the trash bin by using the terminal. This works because the trash is just another folder on your system. Ubuntu moves files into this folder, so to the end user, it appears as if it no longer exists in the spot you deleted it.
Each user on your Ubuntu system will have their own trash bin folder where things are moved. So, to empty the trash bin on Ubuntu, you will have to run this command for each user separately.
Empty the Trash Bin of the Current User
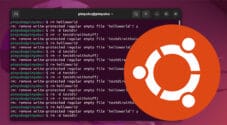
To empty the current user’s trash bin, all you need to do is use the following command. This line will use the rm command to empty the hidden “trash” directory.
rm -r -f ~/.local/share/Trash/*Copy- The “
-r” option will recursively delete any files that are found within your Ubuntu trash bin. - By using the “
-f” option, we are telling the rm command that it should forcefully delete any files or directories it encounters.
Emptying the Trash Bin of a Specific User
You can also empty the trash bin of a specific user on Ubuntu. Of course, to do this, you will need to have super-user privileges.
When running this command, ensure you replace “<USERNAME>” with the username you want to empty the trash bin of.
sudo rm -r -f /home/<USERNAME>/.local/share/Trash/*CopyAutomatically Emptying the Trash
If you would rather not manually empty the trash on Ubuntu, you can set it to automatically delete files after a certain number of days has passed.
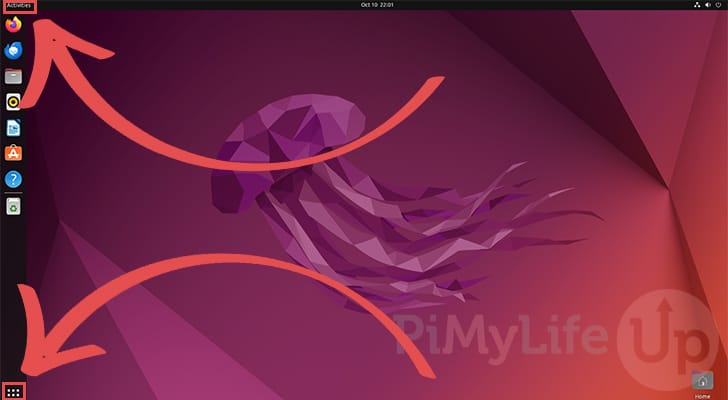
1. To enable automatic emptying of the trash bin on Ubuntu, you must first open the activities screen.
You can open this screen by clicking the top or bottom left side of the screen.
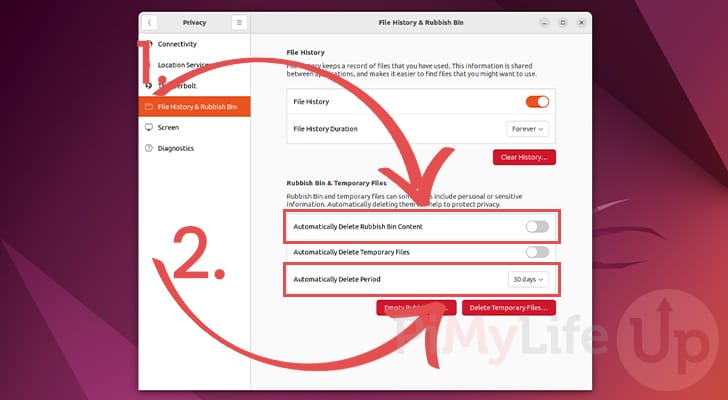
2. With the activities screen open, use the search bar to look for “file history and rubbish bin” or “file history and trash bin” (1.).
Once you see the settings option appear, click it to take you straight to the options (2.) you need to change.

3. Finally, to tell Ubuntu to automatically empty the rubbish bin, simply toggle the “Automatically Delete Rubbish Bin Content” option (1.).
You can control how often Ubuntu empties the trash bin by changing the “Automatically Delete Period” option (2.). By default, this is set to delete files after 30 days automatically.
Conclusion
Hopefully at this stage you will now have a good understanding of how to empty the trash bin on the Ubuntu system.
The trash bin is an incredibly useful tool if you accidentally delete a file using the Files application. However, over time, this will slowly bloat and consume more and more space on your system.
Luckily, cleaning out this bin is a straightforward and quick process. Please feel free to leave a comment below if you have any questions.
If you found this tutorial to be useful, check out our many other tutorials for Ubuntu.