In this tutorial, we will show you how to set up an OpenVPN VPN using a Docker container easily.

OpenVPN is one of the most used protocols for creating a secure virtual private network. It is known for its range of functionality, security, and compatibility. Due to its age, you will struggle to find a VPN client that does not support the OpenVPN protocol.
In recent years, however, the popularity of OpenVPN has died down a bit, with users switching to WireGuard due to its significantly reduced code base and performance advantage over OpenVPN. In addition, it is also significantly easier to set up. We have a guide that shows you how you can easily run your own WireGuard VPN using Docker if you prefer to go down that route.
While OpenVPN does provide its own Docker container, it forces you to use Access Server, which only gives you two connections for free. This product is more aimed at enterprises, so we will instead be using an alternative Docker container called DockOvpn.
DockOvpn only provides a sliver of the functionality provided by the OpenVPN access Server or the open-source WireGuard alternatives. However, it does make setting up a VPN with OpenVPN a really simple process. You can be up and running with just a couple of commands.
Please note that for this guide to work, you must have a static external IP address. Additionally, you will need to know what this IP address is.


Setting up an OpenVPN VPN using Docker
In the following sections, we will walk you through the entire process of setting up an OpenVPN VPN using the DockOvpn Docker container.
These steps are all written for a Linux-based operating system, such as Ubuntu, and you will be expected to use the terminal.
Installing Docker to your System
1. Since we are using Docker to set up the OpenVPN VPN we will need to install Docker itself. If you already have Docker installed, you can skip to the next section.
Alternatively, you can follow our guide on installing Docker on Linux.
https://pimylifeup.com/linux-docker-install/Preparing your System for the OpenVPN Docker Container
2. As mentioned at the start of this tutorial, your machine will need a publicly accessible, static IP address. While you could use a dynamic IP address you can run into issues when attempting to connect to your VPN.
Additionally, you will need to port forward or allow through your firewall the UDP port 1194. While OpenVPN also supports TCP, that isn’t how we will set up the VPN in this tutorial.
You may continue with this guide once you are certain everything is correct.
3. Our next step is to create a directory to store the Compose file for the OpenVPN Docker container.
You can create this directory by using the mkdir command within the terminal. We use the “-p” option to ensure the whole path will be created.
sudo mkdir -p /opt/stacks/openvpnCopy4. After creating the directory, change to it by using the cd command.
cd /opt/stacks/openvpnCopyWriting a Compose File for the OpenVPN Docker Container
5. Our next step is to write the Docker Compose file that will install and run the DockOVPN container that we are using. This container will make setting up an OpenVPN VPN using Docker a really simple process.
You can begin writing this Compose file by using the nano text editor.
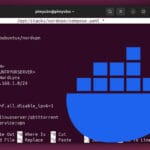
sudo nano compose.yamlCopy6. Within this Compose file, type out the following lines to set up the OpenVPN container. These lines basically tell Docker what image it should download and how it should be set up.
There is only a single placeholder that you will need to replace while filling out this file.
<IPADDRESS>: Replace this placeholder with the public IP address of your machine. If you are unsure what this is, you can fetch it by going to a website such as Ipify.
If you remove the “HOST_ADDR” environment variable completely, the DockOVPN container will attempt to work out your public IP address itself.
services:
  dockovpn:
    image: alekslitvinenk/openvpn
    cap_add:
        - NET_ADMIN
    ports:
        - 1194:1194/udp
    environment:
        HOST_ADDR: <IPADDRESS>
    volumes:
        - ./config:/opt/Dockovpn_data
    restart: alwaysCopy
7. With the file now written, save and quit by pressing CTRL + X, Y, and then ENTER.
Starting the OpenVPN Docker Container
8. With the Compose file now written, all we need to do to start up the OpenVPN Docker Container we are using is run the following command.
We use the “-d” option to ensure that the container will detach from the current terminal session and continue to run.
docker compose up -dCopySaving the Client OVPN File
9. Now that you have your OpenVPN VPN up and running, you will want to download the client OVPN file so that you can actually connect to your VPN.
When the DockOVPN container first starts, it runs its own little web server, which allows us to easily save the client config file.
You can use the command below to run the “wget” command from within the container to download the client VPN config.
docker compose exec -d dockovpn wget -O /opt/Dockovpn_data/client.ovpn http://127.0.0.1:8080Copy10. You can verify that the “client.ovpn” file is now saved to your actual filesystem by using the stat command.
stat /opt/stacks/openvpn/config/client.ovpnCopyIf everything has worked correctly, you can now take this “.ovpn” file and use it to connect to your newly set up OpenVPN Docker container.
  File: client.ovpn
  Size: 8419            Blocks: 24         IO Block: 4096   regular file
Device: fd02h/64770d    Inode: 6953397     Links: 1
Access: (0644/-rw-r--r--)  Uid: (    0/    root)   Gid: (    0/    root)
Access: 2024-06-13 21:57:51.257712388 +1000
Modify: 2024-06-13 21:57:37.225205423 +1000
Change: 2024-06-13 21:57:37.225205423 +1000
 Birth: 2024-06-13 21:57:37.225205423 +1000
Conclusion
Thanks to the DockOVPN Docker container, you should now have an OpenVPN VPN up and running on your device.
This Docker container makes setting up a VPN using OpenVPN a straightforward process. Usually, this process can be a bit difficult, especially for those who are new to Linux.
Please feel free to post a comment below if you have had any issues with getting this VPN to work on your device.
If you liked this guide, we highly recommend that you explore our many other Docker tutorials.