In this tutorial, we will show you how to use the terminal to check the available disk space on a Linux-based system.
Checking your disk space on Linux systems while using the terminal is relatively straightforward. Linux has several tools that allow you to get all the required information with just a few keystrokes.
Knowing how to check your disk space is crucial for anyone wanting to use Linux systems as their daily driver.
By checking your available space, you can decide whether to delete files from your system or invest in more disk space.
In particular, we will explore the df and du tools that come bundled with the vast majority of Linux systems. These tools have advantages and disadvantages but are very easy to use.
Even though we are using the terminal to check disk space, you don’t have to stress if you are unfamiliar with the command line. If you are using a desktop variant of Linux, you can often open the terminal by pressing CTRL + ALT + T.

Using the df command to Check Disk Space on Linux
The first tool we will be explore is the df command. This command stands for disk filesystem and is one of the easiest ways to check the disk space on your Linux system using the terminal.
This section will show you how easy this tool is to use and how you can interpret its results.
Basic Syntax of the df command
As mentioned at the start of this guide, the df command is effortless to use. You can get useable results by simply typing “df“.
However, to improve the results of this command, you can control it using options. You also have the ability to feed it the path of a file or directory if you want information about the disk that it resides on.
Below, you can see the basics of how you can check disk space using the df command in the Linux terminal.
df [OPTIONS...] [DIRECTORY/FILE...]CopyBefore proceeding any further, let us explore the two options parameters the df tool offers you.
[OPTONS...]: This tool allows you to specify options that adjust the information given to you. Below are some of the options we recommend investigating.-a: Using this option, you can tell the df tool to print information on all file systems. This includes pseudo, hidden, and duplicate file systems.-h: By default, the disk space information that df gives you about your Linux system uses kilobytes. If you use this option, the tool will convert these values to easier-to-read notation. For example, 1024 kilobytes would be displayed as “1M“.-T: You can also use this tool to print out the format of each filesystem by using this option.--help: If you want to find other ways to use this tool to check disk space, then utilize the help option.
[FILE...]: By specifying a file, the df tool will get information about the filesystem on which the file resides. You can specify multiple files or directories by just separating them by a single space.
Reading the df Output to Check Disk Space on Linux
Now that you have a rough idea of how the df command can be used to check disk space on Linux, let us put it to actual use.
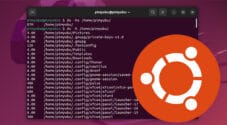
Let us start this example by using the df command in its most simple form. Here, we simply use “df” within our Linux terminal.
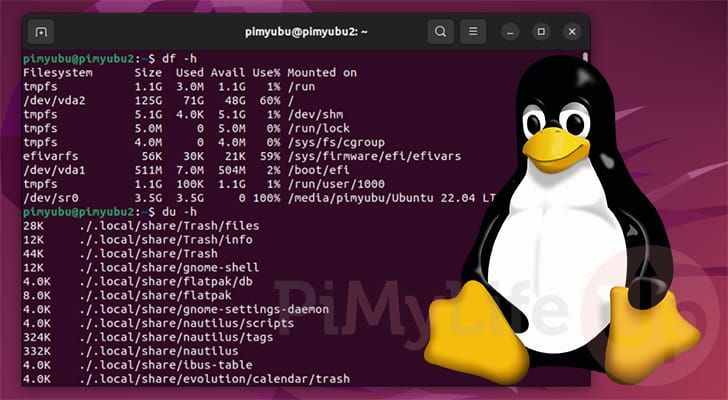
dfCopyBelow, you can see an example of the data that is output by using this command. It’s very simple data to read and interpret.
Filesystem     1K-blocks     Used Available Use% Mounted on
tmpfs          1068032     2984   1065048   1% /run
/dev/vda2      131007524 74152540  50154032  60% /
tmpfs          5340156        4   5340152   1% /dev/shm
tmpfs          5120        0      5120   0% /run/lock
tmpfs          4096        0      4096   0% /sys/fs/cgroup
efivarfs       56       30        21  59% /sys/firmware/efi/efivars
/dev/vda1      523244     7160    516084   2% /boot/efi
tmpfs          1068028      104   1067924   1% /run/user/1000
The information about your disk and available space is represented in an easy-to-read table. Below, you can see what each of the headings is used to specify.
Filesystem– The first column shows you the name this disk has been assigned by your Linux system.Type– If you use the “-T” option, this column will show you how the filesystem is formatted.1K-blocks– When not using the “-h” option, your disk size is represented in 1K blocks.Size– Using the “-h” option, the size of your disk on Linux is represented in a human-readable format rather than 1K blocks.Used– This value represents the amount of space that has been used on your disk.Avail/Available– The amount of space available on your disk. This value is the size minus the space used.Use%– The amount of disk space that has been used is represented as a percentage.Mounted on– The final column shows where this file system has been mounted on your Linux device.
Checking Disk Space in the Linux Terminal using the du Command
The other easy way to check disk space usage in the Linux terminal is to use the du command. du stands for disk usage
The advantage of using the disk usage tool is that you can check the space used by a specific directory.
Basic Syntax of the du Command
Like the df command, the du command makes checking disk usage on your Linux system very simple. To use it at its most basic level, all you need to do is type in “du.”
When you use this command without any options, it will print out the disk usage of every file and directory within the current working directory.
du [OPTIONS...] [DIRECTORY/FILE]CopyBelow, you can see what each of these parameters can be used for.
[OPTIONS...]: The options parameter allows you to control the data output using the du command. Below, we have listed some of the more useful options offered by this tool.-h: Changes the output of the du command to display the disk usage in a more human-readable format rather than bytes.-c: By default, this tool on Linux will print the size of every file within a directory. Using this option will output the total size of all files and directories.-a: Using this option, the du tool will show the size of every file and directory, including hidden ones.-s: Produces a summary of the disk space used by all files and folders within the given path.
[DIRECTORY/FILE]: Using this final parameter you can specify the directory or file you want to check the disk usage of.
Using the du Command to Check the Disk Usage of a Specific Folder on Linux
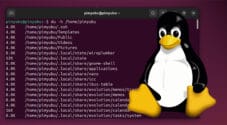
For this example, we will use the du command on Linux to check the disk usage of our “pimyubu” users’ home directory.
With the command below, we specify the “du” command, followed by the "-h” parameter to make the results more readable, and finally, the directory we want to check the disk space usage.
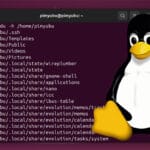
du -h /home/pimyubuCopyBelow, you can see that this command will output the size of a file or directory followed by the path of that file.
For example, with the result below, we can see that the “ ./config/index-v0.14.0.db” file is 76kb.
4.0K    ./.ssh
4.0K    ./Desktop
12K     ./.gnupg
76K     ./config/index-v0.14.0.db
If you instead want to check the total disk usage of your user’s home directory, use the following command.
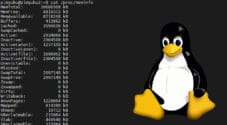
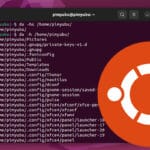
Here, we have added the “-s” option to get a summary rather than the size of each file or directory.
du -hs /home/pimyubuCopyBelow, you can see that the total size of our home user directory is 373MB.
373M /home/pimyubuConclusion
Hopefully, at this point in the tutorial, you will have a good understanding of how to check the disk space on a Linux system.
In the previous sections, we have shown you a couple of methods. The first method is to use the df command. This command gives you the overall disk space usage of your individual file systems.
The second method is to use the du command. This command has the advantage of allowing you to check how much space individual folders are consuming on your filesystem.
Both tools show that you can get all the information you need to check disk space on Linux without ever leaving the terminal.
Please feel free to below if you have any questions about either of the methods discussed in this guide.
If you liked this tutorial, we recommend exploring our many other Linux tutorials and projects.