In this Raspberry Pi Parsec tutorial we take a look at a software package called Parsec, it is a game streaming software designed to offer a simple setup and low latency connection.
Parsec allows you to be able to connect to your gaming pc or a cloud gaming pc from anywhere in the world.
This software allows you to gain access to your gaming PC from anywhere and control it using your input controls whether this is a keyboard, mouse or a joystick device.
It’s a perfect solution for the Raspberry Pi as it allows you to run any game you want and not require to utilize an NVIDIA GPU like the Moonlight gamestream client. You can also easily stream games to the Raspberry Pi using moonlight if you would prefer or even use the Steam Link software from Valve.
Even better is that Parsec also allows you to invite other friends to connect at the same time, allowing you to play local multiplayer games online.
Setting up parsec on your Raspberry Pi is a dead simple process and just takes a few minutes to get up and running correctly. It’s a fun Raspberry Pi gaming project that will help bolster a good gaming setup.
Please note that before continuing, you must be using Raspberry Pi OS Buster or older for Parsec to function. This software relies on a library that is no longer available on newer versions of the operating system.
Sadly, Parsec no longer supports the Raspberry Pi, and the following tutorial will no longer function properly. We recommend checking out our other tutorials such as using Steam Link.
Equipment List
You can find all the bits and pieces that I used for this Parsec tutorial. You can also setup Xbox controllers or PlayStation controllers for the Raspberry Pi.
Recommended
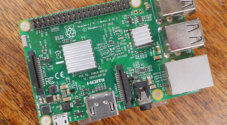
- Raspberry Pi 2 or newer
- Micro SD Card
- Power Supply
- Ethernet Cable (Recommended) or Wi-Fi
- USB Keyboard
- USB Mouse
- HDMI Cable
Optional
- Xbox Controller
- Raspberry Pi Case
- PlayStation Controller (PS3 Controller or PS4 Controller)
Step 1: Installing Parsec on your PC
Before we get started, we first must setup Parsec on your PC. Parsec will act as a server on which the Raspberry Pi will communicate with, allowing us to stream games from the server computer to our Raspberry Pi and will enable you to control them.
1. To get started go to Parsec’s website and download the software.
The Parsec team provide versions of their software for the following operating systems: Windows, macOS and Linux Ubuntu.
2. While the software downloads we recommend you use this time to sign up to Parsec, you will need an account to use the software.
3. Once you have downloaded Parsec and installed it, run it. You will initially be asked to log in to your Parsec account. Utilize the account that you set up earlier in this tutorial. Once logged in you will be greeted with a screen like below.
If you see a prompt asking if you would like to host from your current computer, make sure you click the “Enable Hosting” button, this will save you having to go into settings
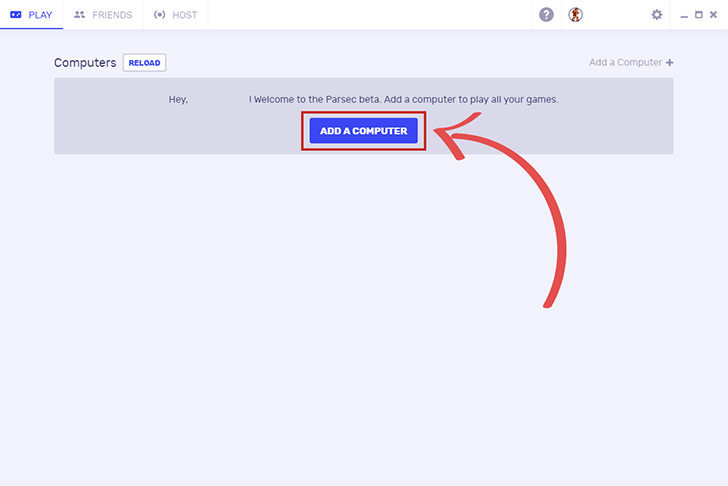
Afterward, click the “Add a computer” button like shown below.
4. You will now be introduced with two options, “Add your own gaming computer” or “Rent a cloud computer from Parsec“.
In this Raspberry Pi Parsec tutorial, you will just be adding your own, but if you lack a computer powerful enough to play games or would prefer an always-on solution you can check out Parsecs renting solutions.
To continue click, “Add your own gaming computer“.

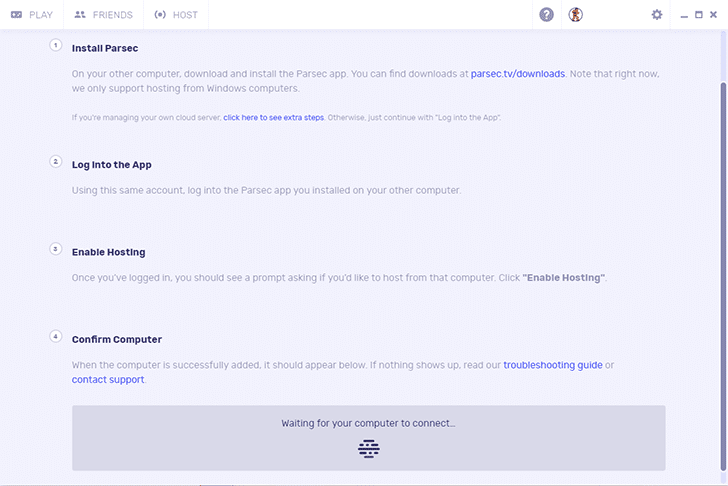
5. The next screen just runs you through all the steps required to adding your computer to Parsec as a possible host. Just follow the prompts if your computer does not show up in the “Confirm Computer” section.
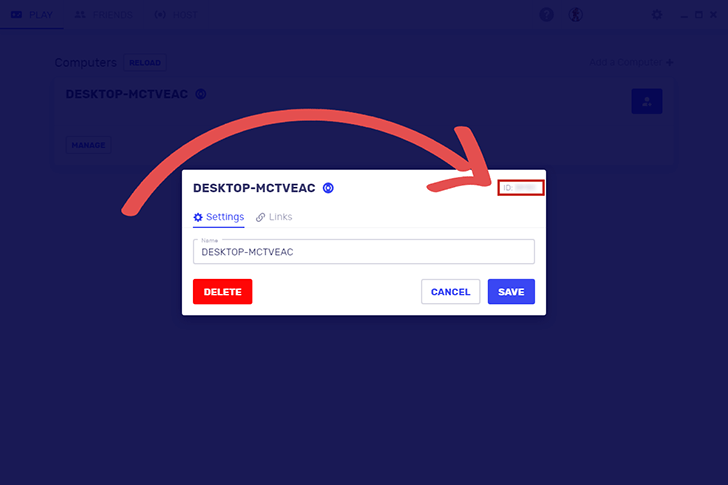
6. Now that you have finally added your computer to Parsec we can now grab the ID.
Go back to the “Play” tab and click the “Manage” button on your computer like that we have shown below.

7. On this screen, you will want to copy down the number located next to ID as we have highlighted below.
We need this ID to be able to connect your Raspberry Pi to your computer and allow it to stream between each other.
Now that we have setup Parsec on our computer and have grabbed the ID that Parsec has given our computer we can proceed onto the next steps of setting Parsec up on our Raspberry Pi.
Step 2: Preparing your Raspberry Pi for Parsec
1. Now that we have setup Parsec on our computer we need to begin setting it up on your Raspberry Pi. To start the process of this SSH into your Raspberry Pi and run the following two commands.
These two commands will ensure that our Raspbian installation is entirely up to date before we continue.
sudo apt update
sudo apt upgrade
2. With our Raspberry Pi now up to date there are a few things we have to do before we get installing, these will help ensure that the Raspberry Pi can handle the video stream from Parsec by increasing the amount of memory that is dedicated to the GPU.
Run the following command on your Raspberry Pi to open up the Raspberry Pi configuration tool.
sudo raspi-config3. Now that we have loaded up the Raspberry Pi configuration tool we will want to go down and select “7. Advanced Options“.
4. Once we are in the “Advanced Options” menu, use the ARROW KEYS to select “A3 Memory Split” and press ENTER.
5. Finally, in here we want to change the memory split from the default to 128. This setting will ensure that Parsec has access to all the GPU memory that it requires.
6. Once you have set the new memory split to 128, select “<OK>” and press ENTER.
7. You can now safely quit out of the Raspberry Configuration Tool by pressing ENTER.
8. Before our new memory split comes into effect, we are required to reboot our Raspberry Pi. We can do this by running the following command on it.
sudo reboot9. Once the reboot has finished, we can finally move onto the process of actually installing Parsec. Don’t worry it only gets easier from here on and you will soon have Parsec up and running on your Raspberry Pi.
Step 3 – Setting up Parsec on your Raspberry Pi
1. Finally, we can proceed onto the steps of installing Parsec on your Raspberry Pi. To do this, we will need to download a package from Parsecs cloud.
We can just do this by running the following commands on our Raspberry Pi.
cd ~
wget https://s3.amazonaws.com/parsec-build/package/parsec-rpi.deb
2. Now that we have downloaded the package to our Raspberry Pi we can go ahead and install it.
We can do this by using the package manager, run the following commands to tell the package manager to extract and install the “parsec-rpi.deb” file we downloaded to our Raspberry Pi.
cd ~
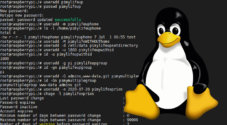
sudo dpkg -i parsec-rpi.deb3. With Parsec finally installed we can go ahead and test to make sure everything is working correctly by running the following command.
This command will allow us to set up our user for Parsec on our Raspberry Pi. However, it won’t initiate a connection with your server yet.
parsecd4. You will now be asked to enter the email address of the account you created during Step 1 and also the password you set. Your information is needed since it will need to use your account to authenticate and allow the connection.
You can use a different account, but this means it will have to be manually approved by the host computer. You can add that user as a friend and allow them to be accepted and given control of your computer automatically.
5. If you have chosen to use the same account you used for your computer, then you will now be presented with a list of available hosts.
If your computer is the only host you have set up, then you should be able just to type in 1 and press ENTER.
If no option for selecting what host to connect to appears then you can utilize the following command to connect to your server.
Make sure you replace “YOUR_SERVER_ID” with the server ID you got earlier in Step 1 of this tutorial.
parsec server_id=YOUR_SERVER_ID6. You will now be connected to your computer from your Raspberry Pi. You should now see your screen appear on whatever device your Raspberry Pi is connected to. You will notice that you have full control over everything and should also be receiving sound from the connection.
Parsec allows you to utilize the computer as if you were there yourself. Parsec also handles inputs incredibly well which means you can play all sorts of games over the connection with as little input lag as possible.
You will quickly find that Parsec is a perfect solution if you also want to play local co-op only games as it splits controllers and keyboards into separate input devices meaning each one can be a new player.
7. Once you have had a bit of a play around in Parsec, you can disconnect by clicking the little blue floating icon and clicking “Disconnect“.
8. You have now successfully setup Parsec on your Raspberry Pi. However, there are a few things that we can do to ensure that you have the best experience possible with it.
Follow our next section to learn how to setup several items such as an Xbox controller driver and fixing up mouse input.
Step 4: Improving Mouse Polling on the Raspberry Pi
One thing you may have noticed is that the tracking speed of the mouse on the Raspberry Pi can feel very slow and sluggish.
The reason for this is that the default polling speed for mice is set by default to 62.5hz or 62.5 times per second. It is set lower as it makes it easier on the CPU, but this can lead to poor performance in games.
Most people would prefer a much higher polling speed such as about 125hz, or a call every 8ms.
Luckily we can change the rate at which the Raspberry Pi polls the mouse, to do this follow the next few steps.
1. We can achieve this by first editing the cmdline.txt file located within the boot folder. Editing this file allows us to perform certain things and set specific variables before the Raspberry Pi starts up.
Run the following command to edit the file on the Raspberry Pi.
sudo nano /boot/cmdline.txt2. Within this file you should see something like below, the line is likely much longer then what we showed below.
dwc_otg.lpm_enable=0 console=serial0,115200 console=tty1 etc...3. To this line add the following to the end of it, this is the line that will set the mouse polling rate. This line will set the Raspberry Pi to poll the mouse every 8ms.
usbhid.mousepoll=8This should make the line look something like the following:
dwc_otg.lpm_enable=0 console=serial0,115200 console=tty1 usbhid.mousepoll=8 etc...4. Once you have added the additional line, you can now save the file by pressing CTRL + X then pressing Y and then ENTER to save the file.
5. For the changes to now take effect you are required to restart your Raspberry Pi. You can do this by running the following command on your Raspberry Pi.
sudo rebootConclusion
Hopefully, by the end of this tutorial, you will have your Raspberry Pi up and running with Parsec and your computer successfully connecting to it.
We have tutorials on setting up Xbox Controllers, PlayStation controllers, and Wiimote controllers if you want to use any of those.
If you have any issues with this Raspberry Pi parsec tutorial or have any feedback feel free to drop a comment below.


Hi, where did you find the linked parsec binary? I can’t seem to find a Raspberry Pi specific binary on their website.
Hi Vaughngx4,
Unfortunately, it appears that the Parsec developers have chosen to abandon the Raspberry Pi and there are no longer any binaries available.
I have added a note about this to the top of the tutorial.
If you are looking for an alternative, we do highly recommend looking into running Steam Link on the Raspberry Pi.
Cheers,
Emmet
Hello, I have a Problem on Step 3, Point 3. I installed Parsec, but if I typ parsec in the command line, i get this response:
pi@raspberrypi:~ $ parsec
-bash: parsec: command not found
I haven’t found any answer to that online. Can you help me out?
Hi Friedrich,
A couple of things here, first I just tested and found out you must be using Raspberry Pi OS Buster or older for this tutorial to work now. Parsec relies on a library that is no longer available in Raspberry Pi OS Bullseye and newer.
Secondly, it looks like the command has now changed from “
parsec” to “parsecd“. I have updated the tutorial to reflect both of these chagnes.Cheers,
Emmet